SETTING THE NETWORK PARAMETERS
Utilize the following programming steps to program the ITP-5121D keyset to
operate within the users network.
Network Parameter Setup
From the Setup, Main Menu, select
[3. NET-
WORK SETUP]
to set or modify the network
parameters.
Select the
Network Mode Setup
and press
ENTER
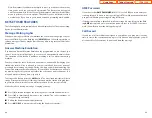
, the LCD will display this message.
•
If
[1. MANUAL IP]
is selected, the user must enter the IP address of the IP key-
set. Then enter the subnet mask, and gateway value for the customer net-
work.
•
If
[2. DHCP]
is selected, the IP address, subnet mask, and gateway value will
be obtained automatically (if a DHCP server is present).
Setting IP Manually
•
From the “Network Mode Setup” Menu,
select
[1. MANUAL IP]
and press
ENTER
.
Next, press the
END
button to get to the
NETWORK SETUP MENU
as seen here.
Enter the IP address of the IP keyset. Next, enter the netmask and gateway address
for the customer network.
•
If the
[2. IP ADDRESS SET UP]
menu is
selected, press
ENTER
, the LCD will dis-
play this message and the user can
enter its IP address.
Check if there is any currently saved IP address of the phone on the LCD. If the IP
address has not been set, the LCD displays nothing. The user can enter the IP
address using [0]-[9] dial buttons and [
] button for entering a “.” Save that IP
address by pressing the [Enter] button of navigation button assembly.
•
If the
[3. NETMASK SET UP]
menu is
selected, press
ENTER
, the LCD will dis-
play the following message and the user
can enter a new Netmask IP address.
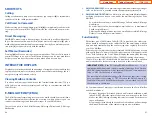
1.NETWORK MODE SET UP
2.IP ADDRESS SET UP
INPUT IP ADDRESS & PRESS OK
xxx.xxx.xxx.xxx
INPUT NETMASK & PRESS OK
xxx.xxx.xxx.xxx
NAVIGATING THE MENUS
When programming within various menu options, information can be entered via
the dial pad keys using [0]-[9] and [
] dial keys, as well as utilizing the navigation
button assembly.
The button used for editing and their features are summarized below.
BUTTON
FEATURES
Left and Right ......................To move a cursor (highlighted area) or to erase what is
entered.
Enter ........................................To save the current setting and end programming.
End............................................To cancel the current programming and return to the
Main Menu.
Cancel......................................To move back to the previous screen or delete the last
digit of the displayed option value.
[
] ............................................To enter [.] between IP address fields.
[0]-[9] ......................................To enter numerical values.
SETTING HOT DESKING (IDLE LOGIN)
Hot Desking allows you to log in and out of your ITP-5121D without rebooting.
•
From the Main Menu, select
[6. PHONE
SETUP]
to turn Hot Desking on or off.
•
Select
[1. IDLE MODE]
.
•
Enter
1
to
allow
Hot Desking,
Enter
0
to
deny
Hot Desking.
•
Press
ENTER
.
•
Press
END
.
3.NETWORK MODE SET UP
>1.MANUAL IP
2.DHCP
12
13
6.PHONE SETUP
1.IDLE MODE
IDLE MODE En(1)/Dis(0)
0_
3.NETMASK SETUP
4.GATEWAY SETUP
Home Page
ITP-5121D
Table of Contents


