8 6 -
English
R
ecording
1. Check the antenna cable is connected.
2. Check the remaining time of the disc.
3. Check the date and time are correct.
Make sure the Clock (Setup-Clock Set) must be set
before you proceed with a timer recording. (See page
27)
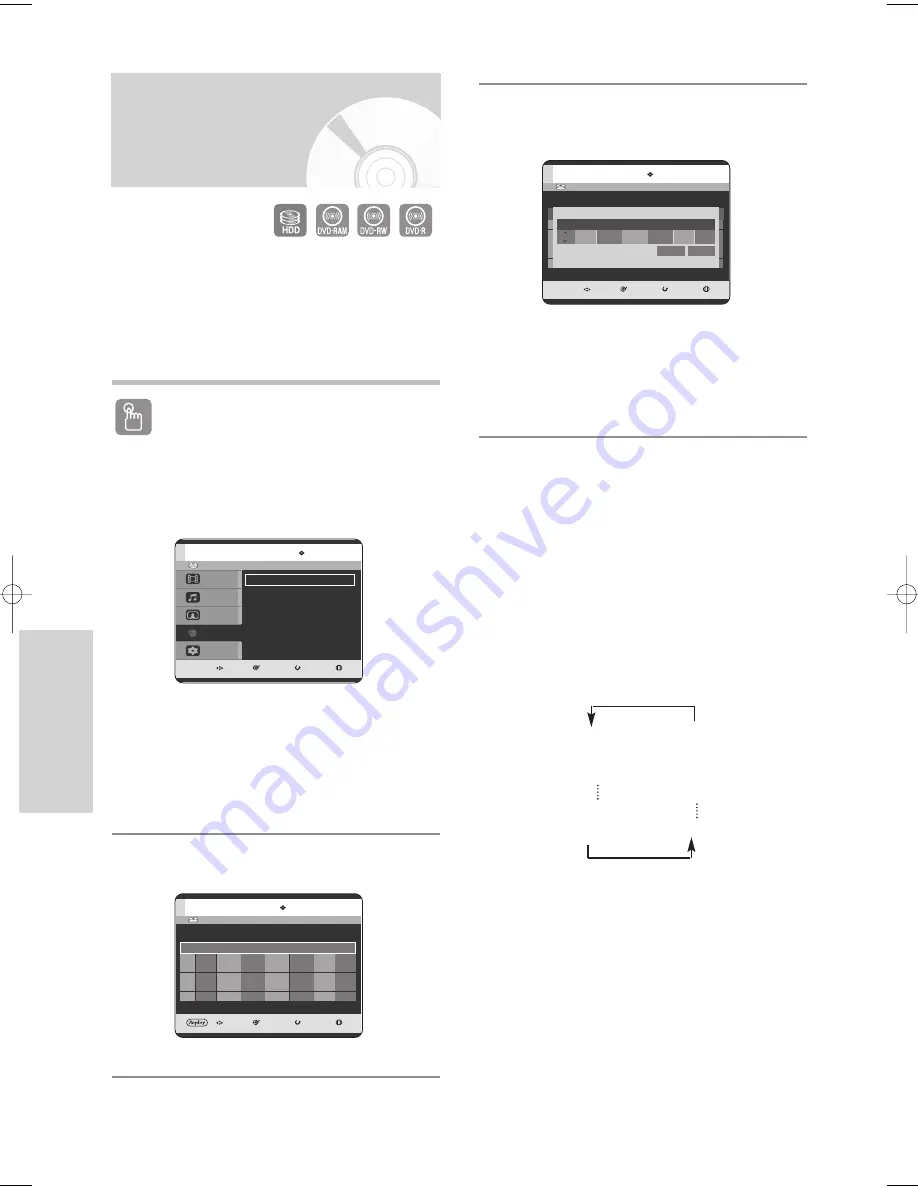
Using the TIMER button
1
With the unit in Stop mode/Playback mode,
press the
TIMER
button.
The Programme screen is displayed.
Using the MENU button.
• With the unit in Stop mode/Playback mode, press
the
MENU
button.
• Press the
…†
buttons to select
Programme
,
then press the
OK
or
√
button.
2
Press the
OK
or
√
button to select
Timer Record
.
Making a Timer
Recording
HDD
MOVE
SELECT
RETURN
EXIT
Title
Music
Photo
Programme
Setup
Programme
Timer Record
√
√
3
Press the
OK
button to select
Add a list
.
The Timer Record List screen is displayed.
Using the ANYKEY button.
• Press the
ANYKEY
button.
• Press the
…†
buttons to select
Add
, then press
the
OK
or
√
button.
4
Set timer recording option.
• Fill the input items using the
…†œ √
buttons and
number buttons.
œ √
: Moves to the previous/next item.
…†
0~9
: Sets a value.
•
To
: Select the media to record HDD or DVD.
•
Source
: The video input source (AV1, AV2 or
AV3), or the broadcasting channel you want to
make a timer recording from.
•
Date
: Timer Recording allows setting the
recording time within one month period. Set the
recording day. (day/month)
01 JAN
Every Day
02 JAN
MON-SAT
03 JAN
MON-FRI
Every SAT
30 JAN
31 JAN
Every SUN
HDD
Current Time 12:00
MOVE
SELECT
RETURN
EXIT
Timer Record List
No.
To
Source
Date
Start
End
Mode VPS/PDC
Add a list
Available Time
HDD
29:10 SP
HDD
Current Time 12:00
MOVE
SELECT
RETURN
EXIT
Timer Record List
No.
To
Source
Date
Start
End
Mode VPS/PDC
Add a list
Available Time
HDD
29:10 SP
Title No. 01
To
Source
Date
Start
End
Mode VPS/PDC
HDD
PR 02
01 JAN
12 : 00
14 : 00
SP
Off
Available Time
HDD
29:10 SP
Title
Save
6-00903E-EURO_77-92 2005.9.24 4:0 PM Page 86


