89
SAMSUNG ELECTRONICS
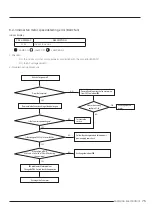
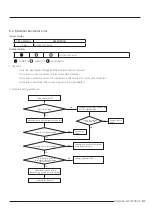
9-2-17 Smart Install error
1. Checklist :
1) Check the leakage region.(Use leakage detection liquid or soapy water)
2) When leakage region is found from service valve and piping connection flare nut part : After the related measures to
check the refrigerant supplements and operation.
3) If the leakage region is pipe welding part : Weld leakage region after refrigerant gas release.(Brass parts should only
apply)
4) If the leakage region is surface area (Heat exchanger or pipe welding region is not) : Replace parts.
5) Check the PBA Relay
- Display of indoor unit : Ensure that the operating pilot lamp has been lighted.
- Ensure that the Relay input voltage of indoor unit PBA is normally.(If the PBA is defective, replace)
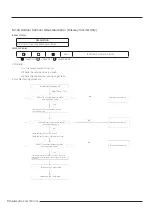
2. When the air conditioner is in standby status, use the remote controller to start the Smart Install mode.
1) Press the [SET], [Mode], [Power] button simultaneously for 4 seconds.
- Smart Install mode can be operated only with the supplied remote controller.
- During the Smart install mode procedure, remote controller cannot be operated.
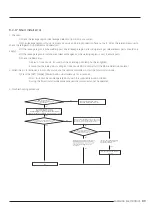
3. Troubleshooting procedure
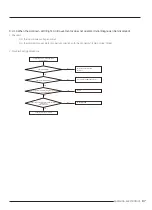
NO
YES
Did stop valve of
the low pressure valve open
perfectly?
Open perfectly stop valve.
(Use the 4mm hex wrench)
Re-connect after 3 seconds,
after separate the power cord.
And then begin cooling operation with minimum
temperature that can establish. (use the remote control)
YES
NO
Among compressor operation, does cold air
come out from the indoor unit?
YES
YES
Connect the manifold gauge to the service
port of low pressure side service valve and
then measure the refrigerant pressure.
YES
Does measurement
pressure include in ±10% extent
of reference pressure?
NO
- Discharge temperature and the indoor
.
- Fill up perfectly refrigerant after
re-vacuum.
[Execute the troubleshooting]
Check the refrigerant leaks.
Check the PCB Relay.
YES
YES
Execute the related trouble-
shooting.
End
Summary of Contents for AR07TXCAAWKNEU
Page 49: ...49 SAMSUNG ELECTRONICS 5 2 ASSY KIT CODE DB92 04839Q ...
Page 50: ...50 SAMSUNG ELECTRONICS 5 3 ASSY KIT CODE DB92 04839Q ...
Page 59: ...59 SAMSUNG ELECTRONICS 6 Wiring Diagram 6 1 Indoor Unit CODE DB68 08680A 01 ...
Page 61: ...61 SAMSUNG ELECTRONICS 7 PCB Diagram 7 1 Indoor Main PCB DB92 04839A ...
Page 62: ...62 SAMSUNG ELECTRONICS 7 2 Outdoor PCB DB92 04837A ...
Page 63: ...63 SAMSUNG ELECTRONICS ...
Page 67: ...67 SAMSUNG ELECTRONICS 8 5 DISPLAY PCB DB92 04833B ...

