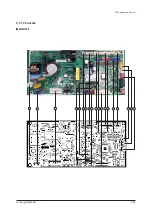
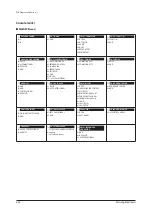
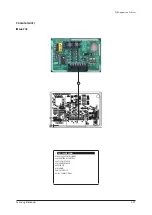
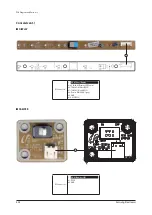
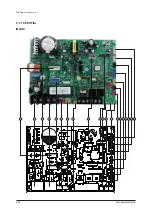
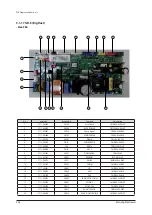
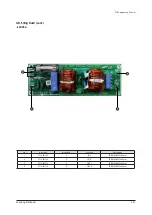
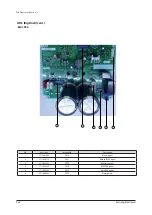
background image

S

a

m

s

u

n

g

 El

e

c

troni

c

s

6-1

6

.

 W

iri

ng D

ia

g

ra

m

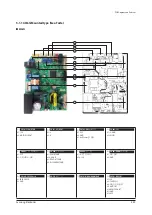
6-1 In

door

6-1-1  Gl

o

b

a

l 4w

a

y(Gl

o

b

a

l M

i

n

i

-4w

a

y) c

assteet


t

yp

e

, Sl

i

m 1w

a

y c

assette

 (l

ar

g

e

)

T

his


Do

c

u

m

ent


c

an


not


b

e

 u

sed


w

itho

u

t

 S

a

m

s

u

n

g

s


a

u

thori

z

ation

.

Motor

C

ontro

l

Disp

l

a

y

C

ontro

l

Pipe

 T

e

m

p

.

S

ensor

Fl

oat

 S/W

Drain


P

u

m

p

L

o

uv

er

C

ontro

l

EEV

C

ontro

l

R

oo

m


T

e

m

p

.


S

ensor

Summary of Contents for AM160FNBFEB/EU

Page 1: ...1FNFDEH TK AM050 100FNKDEH TK AM017 022 028 036 045 056 071 090 112 128 140FNLDEH TK AM022 028 036 045 056 071 090 112 128 140FNMDEH TK AM056 071FNCDEH TK AM028 036 056FNJDEH TK AM022 028 036 056 071FNTDEH TK AM022 028 036 045 056 071FNQDEH TK AM160KNMDEH TK AM022 045KNJDEH TK AM015 022 028 036 045 056 071 082JNVDEH TK AM180 228JNHPKH TK AM045 056 071 090 112 128 140KN4DEH TK 1 Precautions 2 Produ...

Page 2: ...Specifications 2 27 2 2 1Accessories 2 27 3 DisassemblyandReassembly 3 1 3 1IndoorUnit 3 2 ŶSlim1waycassettetype medium 3 2 ŶSlim1waycassettetype large 3 11 ŶBIGDUCT 3 18 ŶGlobal4wayCassettetype 3 21 Ŷ360Cassette 3 27 ŶDucttype Slim1 2 3 36 ŶDucttype Slim3 3 41 ŶDucttype Midpressure1 3 48 ŶDucttypeDucttype MidPressure2 HighPressure 3 53 ŶCEILING 3 58 ŶCONSOLE 3 67 ŶERVPLUS 3 72 ŶFloorStandinType 3...

Page 3: ...ndoor 6 1 6 1 1Global4way GlobalMini 4way cassteettype Slim1waycassette large 6 1 6 1 2Slim1waycassettetype medium 6 2 6 1 3360cassette 6 3 6 1 4BIGDuct 6 4 6 1 5Ceiling 6 5 6 1 6Console 6 6 6 1 7WallMountedtype NeoFortewithoutEEV 6 7 6 1 8WallMountedtype A3050 6 8 6 1 92waycassettetype 6 9 6 1 10DUCTtype SlimIII 6 10 6 1 11DUCTtype SlimI II MSP 6 11 6 1 12Ducttype HSP 6 12 6 1 13FloorStandType 6 ...

Page 4: ...atic electricity Please wear insulation gloves before performing PCB repair and measurement O Check if the place of installation is at least 2m away from electronic appliances such as TV video players and stereos This can cause irregular noise or degrade the picture quality O Please make sure the customer does not directly repair the product Arbitrary dismantling may result in electric shock or fi...

Page 5: ...osing a danger to workers O Please remove the oxide produced inside the pipe during the welding with nitrogen gas Using another gas may cause harm to the product or others 1 6 Precautions for Additional Supplement of Air Conditioner Refrigerant O Precisely calculate the refrigerant by using a scale and S net and proceed with the test operation Excessive supplement can cause harm to the product sin...

Page 6: ...ow Rate m3 min 6 5 4 7 6 5 8 7 6 Refrigerant Type R410A R410A R410A Control Method EEV EEV EEV Temperature Control Micom Thermistors Micom Thermistors Micom Thermistors Safety Devices Fuse Fuse Fuse Piping Connections Liquid Flare ø mm 6 35 6 35 6 35 Gas Flare ø mm 12 7 12 7 12 7 Drain Quick Lock ø mm VP20 OD 25 ID 20 VP20 OD 25 ID 20 VP20 OD 25 ID 20 Weight Net Weight kg 10 5 10 5 10 5 Shipping W...

Page 7: ...ooling High m3 min 16 00 14 00 12 50 17 00 15 50 14 00 Heating High m3 min R410A R410A Refrigerant Type EEV EEV Control Method Micom Thermistors Micom Thermistors Temperature Control Fuse Fuse Safety Devices 6 35 9 52 Piping Connections Liquid Flare ø mm 12 7 15 88 Gas Flare ø mm VP20 OD 26 ID 20 VP20 OD 26 ID 20 Drain Quick Lock ø mm 14 14 Weight NetWeight kg 18 18 ShippingWeight kg 1200 x 138 x ...

Page 8: ...2 14 0 x 2 Airflow Rate Cooling High m3 min 14 14 Heating High m3 min 16 16 Refrigerant Type R410A R410A Control Method EEV EEV Temperature Control Micom Thermistors Micom Thermistors Safety Devices Fuse Fuse Piping Connections Liquid Flare ø mm 6 35 9 52 Gas Flare ø mm 12 70 15 88 Drain Quick Lock ø mm VP25 OD 32 ID 25 VP25 OD 32 ID 25 Weight NetWeight kg 21 0 22 0 ShippingWeight kg 25 0 26 0 Dim...

Page 9: ...5x898 898x275x898 898x275x898 Panel Size Model PC4NUSKAN PC4NUSKAN PC4NUSKAN PC4NUSKAN NetWeight kg 6 7 6 7 6 7 6 7 ShippingWeight kg 8 9 8 9 8 9 8 9 Net Dimensions W x H x D mm 950x30x950 950x30x950 950x30x950 950x30x950 Shipping Dimensions W x H x D mm 1 042x93x1 042 1 042x93x1 042 1 042x93x1 042 1 042x93x1 042 Functions Auto Restart O O O O Auto Swing O O O O Group Individual Control O O O O Ex...

Page 10: ... PC4NUSKAN PC4NUSKAN NetWeight kg 6 7 6 7 6 7 ShippingWeight kg 8 9 8 9 8 9 Net Dimensions W x H x D mm 950x30x950 950x30x950 950x30x950 Shipping Dimensions W x H x D mm 1 042x83x1 042 1 042x83x1 042 1 042x83x1 042 Functions Auto Restart O O O Auto Swing O O O Group Individual Control O O O External Contact Control O O O Trouble Shooting by LED O O O Standard Accessories Installation Manual O O O ...

Page 11: ...0 40 40 42 40 Dimensions NetWeight kg 12 0 12 0 12 0 ShippingWeight kg 14 0 14 0 14 0 Net Dimensions W x H x D mm 575 x 250 x 575 75 x 250 x 575 575 x 250 x 575 Shipping Dimensions W x H x D mm 623 x 298 x 653 623 x 298 x 623 623 x 298 x 653 Panel Size Panel model PC4SUSMAN PC4SUSMEN PC4SUSMAN PC4SUSMEN PC4SUSMAN PC4SUSMEN Panel NetWeight 2 7 2 7 2 7 ShippingWeight 4 2 4 2 4 2 Net Dimensions W H D...

Page 12: ...an Output W 65 x 1 65 x 1 65 x 1 Air Flow Rate H M L UL CMM 12 20 11 00 9 80 13 40 11 80 10 20 14 20 12 60 11 00 CFM 430 390 350 470 420 360 500 440 390 External Pressure Min Std Max mmAq Pa Piping Connections Liquid Flare ø mm 6 35 6 35 6 35 ø inch 1 4 1 4 1 4 Gas Flare ø mm 12 7 12 7 12 7 ø inch 1 2 1 2 1 2 Drain Quick Lock ø mm VP25 OD 32 ID 25 VP25 OD 32 ID 25 VP25 OD 32 ID 25 Field Wiring Pow...

Page 13: ...947 365 947 Shipping Dimensions W H D mm 990 330 990 990 330 990 990 330 990 990 330 990 990 414 990 990 414 990 990 414 990 Panel Size CeilingType Panel model PC4NUDMAN PC4NUDMAN PC4NUDMAN PC4NUDMAN PC4NUDMAN PC4NUDMAN PC4NUDMAN Panel NetWeight kg 3 6 3 6 3 6 3 6 3 6 3 6 3 6 ShippingWeight kg 6 0 6 0 6 0 6 0 6 0 6 0 6 0 Net Dimensions W H D mm 1000 66 1000 1000 66 1000 1000 66 1000 1000 66 1000 1...

Page 14: ...23 5 23 5 ShippingWeight kg 23 0 23 0 23 0 23 5 28 0 28 0 Dimensions Net Dimensions W x H x D mm 700 199 600 700 199 600 700 199 600 700 199 600 900 199 600 900 199 600 Shipping Dimensions W x H x D mm 950x270x710 950x270x710 950x270x710 950x270x710 1150 280 710 1150 280 710 Functions Auto Restart O O O O O O Auto Swing X X X X X X Group Individual Control O O O O O O External Contact Control O O ...

Page 15: ...Weight kg 35 0 52 0 52 0 54 0 54 0 Dimensions Net Dimensions W x H x D mm 1 100x199x600 1 300x295x690 1 300x295x690 1 300x295x690 1 300x295x690 Shipping Dimensions W x H x D mm 1350x280x710 1575x370x835 1575x370x835 1575x370x835 1575x370x835 Functions Auto Restart O O O O O Auto Swing X X X X X Group Individual Control O O O O O External Contact Control O O O O O Trouble Shooting by LED X X X X X ...

Page 16: ...ensions Net Dimensions W x H x D mm 900 199 600 900 199 600 900 199 600 900 260 480 Shipping Dimensions W x H x D mm 1150 280 710 1150 280 710 1150 280 710 1170 595 340 Functions Auto Restart O O O O Auto Swing X X X X Group Individual Control O O O O External Contact Control O O O O Trouble Shooting by LED X X X X Standard Accessories Installation Manual O O O O Operation Manual O O O O Pattern S...

Page 17: ...Micom Thermistors Micom Thermistors Micom Thermistors Safety Devices Fuse Fuse Fuse Fuse Fuse Fuse Fuse Piping Connections Liquid Flare ø mm 6 35 9 52 9 52 9 52 9 52 9 52 9 52 Gas Flare ø mm 12 7 15 88 15 88 15 88 15 88 15 88 15 88 Drain ø mm VP25 OD 32 ID 25 VP25 OD 32 ID 25 VP25 OD 32 ID 25 VP25 OD 32 ID 25 VP25 OD 32 ID 25 VP25 OD 32 ID 25 VP20 OD 25 ID 20 Weight NetWeight kg 29 0 29 0 34 0 36 ...

Page 18: ...x1 040 Shipping Dimensions W x H x D mm 1 507x558x1 155 1 507x558x1 155 Functions Auto Restart O O Auto Swing X X Group Individual Control O O External Contact Control O O Trouble Shooting by LED X X Standard Accessories Installation Manual O O Operation Manual O O Pattern Sheet for Installation O O Flexible Drain Hose O O Filter Safety Grille X X Optional Accessories Wireless Remote Controller MR...

Page 19: ...mm VP25 OD 32 ID 25 VP25 OD 32 ID 25 VP25 OD 32 ID 25 Weight NetWeight kg 62 0 62 0 62 0 ShippingWeight kg 70 0 70 0 70 0 Dimensions Net Dimensions W x H x D mm 1200 360 650 1200 360 650 1200 360 650 Shipping Dimensions W x H x D mm 1447x425x769 1447x425x769 1447x425x769 Functions Auto Restart O O O Auto Swing X X X Group Individual Control O O O External Contact Control O O O Trouble Shooting by ...

Page 20: ... Net Dimensions W x H x D mm 1000x650x200 1000x650x200 Shipping Dimensions W x H x D mm 1080x730x300 1080x730x300 Functions Auto Restart O O Auto Swing X X Group Individual Control O O External Contact Control O O Trouble Shooting by LED X X Standard Accessories Installation Manual O O Operation Manual O O Pattern Sheet for Installation X X Flexible Drain Hose O O Filter Safety Grille Filter Washa...

Page 21: ...16 0 16 0 16 0 16 0 ShippingWeight kg 21 0 21 0 21 0 21 0 21 0 Dimensions Net Dimensions W x H x D mm 720x620x199 720x620x199 720x620x199 720x620x199 720x620x199 Shipping Dimensions W x H x D mm 810x710x295 810x710x295 810x710x295 810x710x295 810x710x295 Functions Auto Restart O O O O O Auto Swing O O O O O Group Individual Control O O O O O External Contact Control O O O O O Trouble Shooting by L...

Page 22: ... hose Weight NetWeight kg 8 0 8 0 8 0 13 0 5 13 0 5 ShippingWeight kg 11 0 11 0 11 0 16 0 16 0 Dimensions Net Dimensions W x H x D mm 825x285x189 825x285x189 825x285x189 1 099x315x217 1 099x315x217 Shipping Dimensions W x H x D mm 900x349x252 900x349x252 900x349x252 1 137x377x299 1 137x377x299 Functions Auto Restart O O O O O Auto Swing O O O O O Group Individual Control O O O O O External Contact...

Page 23: ... 11 3 Dimensions Net Dimensions W x H x D mm 825x285x189 825x285x189 825x285x189 Shipping Dimensions W x H x D mm 900x349x252 900x349x252 900x349x252 Functions Auto Restart O O O Auto Swing O O O Group Individual Control O O O External Contact Control O O O Trouble Shooting by LED O O O Standard Accessories Installation Manual O O O Operation Manual O O O Pattern Sheet for Installation X X X Flexi...

Page 24: ...16 5 Dimensions Net Dimensions W x H x D mm 1 099x315x217 1 099x315x217 1 099x315x217 Shipping Dimensions W x H x D mm 1 137x377x299 1 137x377x299 1 137x377x299 Functions Auto Restart O O O Auto Swing O O O Group Individual Control O O O External Contact Control O O O Trouble Shooting by LED O O O Standard Accessories Installation Manual O O O Operation Manual O O O Pattern Sheet for Installation ...

Page 25: ...h Mid Low dBA 28 25 24 33 29 25 36 31 26 37 33 29 Dimensions NetWeight Ꭰ 8 3 8 3 8 3 10 0 ShippingWeight Ꭰ 9 7 9 7 9 7 11 8 Net Dimensions W x Hx D 750 250 245 750 250 245 750 250 245 826 275 260 Shipping Dimensions W x Hx D 800 298 302 800 298 302 800 298 302 886 335 317 Functions Auto Restart O O O O Auto Swing O O O O Group Individual Control O O O O External Contact Control O O O O Trouble Sho...

Page 26: ...gh Mid Low dBA 42 38 35 39 36 33 44 41 36 47 44 41 Dimensions NetWeight Ꭰ 10 0 14 5 14 5 14 6 ShippingWeight Ꭰ 11 8 17 5 17 5 16 6 Net Dimensions W x Hx D 826 275 260 1063 317 294 1063 317 294 1063 317 294 Shipping Dimensions W x Hx D 886 335 317 1123 384 354 1123 384 354 1123 384 354 Functions Auto Restart O O O O Auto Swing O O O O Group Individual Control O O O O External Contact Control O O O ...

Page 27: ...5 110 0 5 Heating W 50 0 5 110 0 5 110 0 5 Sound Level Sound Pressure dB 43 0 45 0 45 0 FAN Type Sirocco Sirocco Sirocco Motor Model OS KRD306 KR035 OS KRD306A KR045 OS KRD306A KR045 Airflow Rate Cooling High min 10 0 5 16 5 5 16 5 5 Heating High min 11 0 5 19 0 5 19 0 5 Refrigerant Type R410 R410 R410 Control Method EEV EEV EEV Temperature Control Micom Thermistors Micom Thermistors Micom Thermis...

Page 28: ...fromroom Item Development Model AM050FNKDEH TK AM100FNKDEH TK Image Product Remote Controller MWR WE10N Power Source Application V Hz ø 220 240 50 1 Function Ventilation HEAT EX BY PASS AUTO Heating Cooling HEATING COOLING AUTO Fan Speed Turbo High Low Quiet Performance Air Volume m3 h 500 1 000 External Static Pressure Pa 160 150 Power Consumption W 220 510 Temperature Exchange Rate Cooling 70 70...

Page 29: ... x 519 Functions Auto Restart O O Auto Swing X X Group Individual Control O O External Contact Control O O Trouble Shooting by LED X X Standard Accessories Installation Manual O O Operation Manual O O Pattern Sheet for Installation O O Flexible Drain Hose O O Filter Safety Grille X X Optional Accessories Wireless Remote Controller MR DH00 MR DH00 Duct Receiver Kits Receiver MRK A10 MRK A10 Receive...

Page 30: ... Receiver needed MR EH00 Cassette Duct Receiver needed MR KH00 360 cassette Wired remote controller Multi function MWR WE10N Cassette Wall mounted Ceiling Duct Console ERV Wired remote controller Multi function MWR WW00N Hydro unit Hydro unit HT Wireless signal receiver MRK A10 Duct For wireless remote controller Remote sensor MRW TA Cassette Wall mounted Ceiling Duct Console ERV CO2 Sensor MOS C1...

Page 31: ... Over 50 HP Header joint MXJ HA2512M Below 46 4 kW DVMS HP HR Requisite MXJ HA3115M Below 69 6 kW MXJ HA3819M Over 69 7 kW EEV kits MXD E13K116A Below 3 6 kW 1 Room 5 6 kW 9 0 kW 1Room Wall mounted Ceiling indoor unit For 2 indoor units Option MXD E13K200A Below 3 6 kW 2 Rooms MXD E16K200A 5 6 kW 9 0 kW 2Rooms MXD E22K200A Over 9 0 kW 2Rooms MXD E13K216A Below 3 6 kW 2 Rooms 5 6 kW 9 0 kW 1Room Wa...

Page 32: ...im 1way cassette PC1NWSMAN Slim 1way cassette PC1MWSKAN Slim 1way cassette 1way cassette Requisite PC1NUPMAN Slim 1way cassette PC2NUSMEN 2 way cassette PC4SUSMAN Mini4way cassette PC4SYSMEN Mini4way cassette PC4NUSKAN 4 way cassette PC4NUSKEN 4 way cassette PC4NBSKAN PC4NUDMAN PC4NUNMAN 4 way 360 cassette 360 cassette cassette MCU MCU S4NEE1N Below 4 indoor units DVMS HR Requisite HR Only MCU S6N...

Page 33: ...Samsung Electronics 3 1 Q Necessary Tools 3 Disassembly and Reassembly Item Remark Screw Driver Monkey Spanner Screw Driver Nipper Electric Motion Driver L Wrench ...

Page 34: ...and open it 2 Separate 1 clip from the Panel and tilt the Grill to 45 and separate the Grille from the Panel 3 Separate the Filter from the Panel 4 Separate 3 cover screws from it 5 Unscrew 6 fixed screws and separate them from the Indoor Unit Use Screw Driver 3 1 Indoor Unit Q Slim 1 way cassette type medium ...

Page 35: ...Disassembly and Reassembly Samsung Electronics 3 3 No Parts Procedure Remark 6 Press the left and right Hooks to separate the Panel from the Indoor Unit ...

Page 36: ... PC1BWSMAN 1 Open the GRILLE as shown in the picture 2 Separate the FILTER from the PANEL 3 Remove the 2 COVER SCREW 4 Remove the 5 screws fixed in PANEL and then separate from the indoor unit Use Screw Driver 5 Press the left and right side HOOK of PANEL and then separate the PANEL from the indoor unit JSF 1 2PANEL ...

Page 37: ...en raise the LINK LEVER SWITCH yellowish green of left and right in the direction of arrow and then separate the LINK LEVER 7 Remove the fixing screws from the COVER DISPLAY using electric motion driver and sepa rate it 8 Disconnect the connectors of remote control receiver PBA display PBA ASSYGRILLEINLET ASSYPANELFRONT ...

Page 38: ...isassembly and Reassembly 3 6 Samsung Electronics No Parts Procedure Remark PANEL FILTER cont 9 Remove the 2 screws fixed in STEP MOTOR and then remove the MOTOR Use Screw Driver 10 Separate the BLADE H ...

Page 39: ...ing screws from the Drain Pan Use Screw Driver 2 Pull the Drain Pan to separate them from the Indoor Unit When disassembling the Pan be careful not to touch the heat exchanger board with a bare hand 3 Control In 1 Undo 3 fixing screws in the Control In appliance part to separate the Cover Use Screw Driver ...

Page 40: ...assembly 3 8 Samsung Electronics No Parts Procedure Remark 2 Separate 8 connecters on the PCB of the Indoor Unit 3 Separate the Control In from the Indoor Unit 4 Drain Sub 1 Push the hook on the Drain Sub to separate it ...

Page 41: ...ger 1 Undo fixing screw in the Heat Exchanger Use Screw Driver 2 Separate an Indoor Sensor from the Heat Exchanger 3 Separate the Heat Exchanger from the Indoor Unit 6 Cross Fan 1 Undo 3 fixing screws on the Cover Fan Motor Use Screw Driver 2 Separate the Cover Fan Motor from the Indoor Unit ...

Page 42: ...onics No Parts Procedure Remark 3 Separate the Cross Fan from the Indoor Unit 7 Drain Pump 1 Separate fixing screw in the Cover Drain Pump Use Screw Driver 2 Separate the Drain Hose from the Drain Pump 3 Separate the Drain Pump from the Indoor Unit ...

Page 43: ... and open the GRILL 2 First remove the clip from the PANEL And then incline the GRILLE by 90 and sepa rate the GRILLE from the PANEL 3 Separate the FILTER from the PANEL 4 Remove the 4 COVER SCREW 5 Remove the 7 screws fixed in PANEL and then separate from the indoor unit Use Screw Driver Q Slim1waycassettetype large ...

Page 44: ...ANEL from the indoor unit 2 DRAIN PAN 1 Remove the 6 screws fixed in DRAIN PAN Use Screw Driver 2 Remove the 2 HOOK fixed in DRAIN PAN and then separate from the indoor unit When disassembling the PAN be careful not to touch the heat exchanger board with a bare hand 3 SPI KIT Option 1 Remove the SPI KIT from the indoor unit as shown in the picture ...

Page 45: ...arts 1 Remove the 3 screws fixed in electrical equipment parts and then separate the COVER Use Screw Driver 2 Separate the 8 connectors from the indoor unit PCB as shown in the picture Turn off the power necessarily in case of contact pan area Be careful it may cause injury on the sharp sides of the pan ...

Page 46: ...mark 3 Separate the electrical equipment parts from the indoor unit 5 DRAIN PUMP 1 Remove the 3 screws fixed in COVER DRAIN PUMP Use Screw Driver 2 First loosen the BAND RING And then separate the DRAIN HOSE from the DRAIN PUMP 3 Separate the DRAIN PUMP from the indoor unit ...

Page 47: ...AIN SUB 1 Remove the screw fixed in DRAIN SUB Use Screw Driver 2 Hold the HOOK of DRAIN SUB and separate it 7 Heat Exchanger 1 Remove the screw fixed in Heat Exchanger Use Screw Driver 2 Separate the indoor unit SENSOR from the Heat Exchanger 3 Separate the EEV connector from the PCB ...

Page 48: ...he indoor unit 5 Separate the EXPANSION COIL from the EEV BODY When servicing the EEV 5 DRAIN PUMP 1 Remove the 3 screws fixed in COVER FAN MOTOR Use Screw Driver 2 Remove the screw fixed in HOLDER FAN Use Screw Driver If the reassembly end surface of HOLDER FAN and surface of ASSY CROSS FAN_L should be consistent ...

Page 49: ...d Reassembly Samsung Electronics 3 17 No Parts Procedure Remark 3 Separate the COVER FAN MOTOR from the indoor unit 4 Remove the screw fixed in CROSS FAN Use Screw Driver 5 Separate the CROSS FAN from the indoor unit ...

Page 50: ...rk 1 MOTOR BLOWER 1 Detach the motor connectors from the PCB 2 Unscew 16 screws and detach Cabinet Base Blower Use Screw Driver 3 Unscrew 8 screws and detach Case Blower Use Screw Driver 4 Unscrew 4 bolts and separate Motor blower from Bracket Motor Use Screw Driver Q BIG DUCT ...

Page 51: ...olt and Separate Blower from the motor Use Screw Driver 2 EVAPORATOR DRAIN PAN 1 Detach EEV and Sensor connectors from the PCB Use Screw Driver 2 Unscrew 8 screws and Detach Cover Pipe Use Screw Driver 3 Unscrew 31 screws and detach Cabinet Base Blower andCabinet Base Drain Use Screw Driver ...

Page 52: ...Disassembly and Reassembly 3 20 Samsung Electronics No Parts Procedure Remark 4 Unscrew 10 screws and detach Drain Pan from the indoor unit Use Screw Driver 5 Separate Evaporator from the indoor unit ...

Page 53: ...towards the product s interior to open the Grille 2 Push up the green knob in the Open direction and detach the white link from the panel Detach the safety clip 3 Remove the 2 fixed screws to remove the Control Box Cover Use Screw Driver 4 Remove the Remocon Receiver and Blade Connector Wire from the PBA 3EA 5 Push the 4 panel corners and cover downwards to remove it ...

Page 54: ... Hangers at both sides of the panel inwards and rotate them 90 degrees to remove it from the indoor unit s Hock Remove the panel from the indoor unit 2 Control Box 1 Disconnect the Connector Wire that is connected to the indoor unit s PBA from the PBA 2 Unscrew the 2 fixed screws on both sides of the Control Box and disassemble the Control Box from the indoor unit Use Screw Driver ...

Page 55: ... Unscrew the screw fixed on the Bell Mouth Use Screw Driver 2 Push the Bell Mouth in the direction opposite to where it s installed on the Control Box to remove it 4 Drain Pan 1 Unscrew the screws on the 4 corners of the indoor unit Use Screw Driver 2 Remove the Drain Pan from the indoor unit ...

Page 56: ...te drainage hose from the Drain Pump Use Screw Driver 2 Remove the 2 screws and take the Drain Hose out from the indoor unit to disassemble the transparent Drain Hose fixed on the side of the indoor unit Use Screw Driver 6 Evap Temperature Sensor 1 Use your hand to remove the temperature sensor attached to the Evap Pipe along with the fixing clip ...

Page 57: ...he three hexangular nuts on the Motor counterclockwise to remove the nuts Take the Motor Wires attached to these three locations out with your hands prior to removing the Motor 8 Evaporator 1 Remove the screws of the 2 Steel Holder Evaps that are used to fix the Heat Exchanger and then remove it Use Screw Driver 2 Remove the 2 fixing screws of the Partition Evap at the Heat Exchanger s In Out Pipe...

Page 58: ...ly 3 26 Samsung Electronics No Parts Procedure Remark 3 Remove the screw of the Cover Pipe that is used to fix the In Out Pipe Remove the In Out Pipe Use Screw Driver 4 Remove the Heat Exchanger from the indoor unit s cabinet ...

Page 59: ...Pull up the corner 4 places of Panel and sepa rate it 2 Remove the 4 screws from the corner of Panel Use Screw Driver 3 Pull the hook of Panel and then separate the Panel from the Indoor Unit 1 Panel Open type Panel 1 Rotate the outside Panel to counterclockwise direction and then separate it Q 360 Cassette ...

Page 60: ...ise direc tion 3 Remove the safety clip of Grill inside and then separate the Panel from the Indoor Unit 4 Pull up the Filter from the Grill and separate it 2 Control Box 1 Reomove the 2 screws which is fixed to the Indoor Unit upper part Use Screw Driver 2 Rotate the Guard Fan to counterclockwise direction and separate it ...

Page 61: ...e Remark 2 Control Box 3 Reomove the 1 screw which is fixed to the Indoor Unit upper part Use Screw Driver 4 Put finger in the PULL marked groove and then pull up the Cover 5 Put finger in the PULL marked groove and then avoids the hook and it opens the Control Box Cover ...

Page 62: ...e the connectors from the Control Box 7 Remove the ground screw Use Screw Driver 3 Top Cover Drain Pan 1 Remove the 3 screws Use Screw Driver 2 Push the hook and separate the Cover Damage can occur to product in case of use a sharp tool 3 Remove the screw which is fixed to Booster Fan Use Screw Driver ...

Page 63: ...assembly Samsung Electronics 3 31 No Parts Procedure Remark 3 Top Cover Drain Pan 4 Pull the Booster Fan connector and separate the connector 5 Remove the 4 screws Use Screw Driver 6 Push the hook and separate the Cover ...

Page 64: ...re Remark 3 Top Cover Drain Pan 7 Remove the screw and separate the Display Cover Use Screw Driver 8 Remove the 2 screws Use Screw Driver 9 Push the hook and separate the Cover 10 Remove the 8 screws Use Screw Driver 11 Separate the Indoor Unit upper part from the Body ...

Page 65: ...ung Electronics 3 33 No Parts Procedure Remark 3 Top Cover Drain Pan 12 Remove the 3 screws Use Screw Driver 13 Pull the hook that is on the side and separate the Cover 4 Drain Pump Hose 1 Separate the Drain Hose from the Drain Pump ...

Page 66: ... Remove the hex nut which is fixed to top of Fan and separate the Fan from the Motor Use Monkey Spanner 2 Remove the 3 hex nuts which is fixed to Motor and separate the Motor from the Indoor Unit Use Monkey Spanner 6 Temperature Sensor 1 Remove the 6 screws which is fixed to Evaporator and separate the Partition 2 Separates the Temperature Sensor which is fixed to Evaporator Pipe with the fixing c...

Page 67: ...r fixing bracket Use Screw Driver 2 Remove screws which is fixed to Indoor Unit and pull the hook and then separate the Drain Cover Use Screw Driver When assemble be careful with the interfer ence structure of piping projecting part 3 Separate the Evaporator from the Indoor Unit If you remove the Evaporator withbare hands it may injure your hands gloves must be worn ...

Page 68: ...er 1 Disassemble the Cabinet Top Motor Unscrew 8 screws 2 Disassemble 2 Cover Blower Uppers After unscrewing 2 screws Disassemble the Cover Blower Upper with pushing its hook 3 Disassemble the Cover Control Unscrew 2 screws 4 Disassemble Motor Wires connected to the inside of PCB and connected to the Capacitor ...

Page 69: ... Motor earth wire connected to the Partition Unscrew a screw 6 Disassemble the band Motor for fixing the Motor Unscrew 2 screws 7 After disassembling the Motor and Blower for the set disassemble the Blower by use of 3mm wrench 2 Ass y Drain Pan 1 Disassemble the Cabinet Top Evap Unscrew 11 screws ...

Page 70: ...crews 3 Disassemble the Drain Cushion from the set 3 Ass y Evap The Evaporator should be disassembled after disassembling the Cover Control 1 3 and the Drain Pan 2 1 2 2 2 3 1 Disassemble the Cover Pipe that fixes the high low pressure Pipe Unscrew 2 screws 2 Disassemble the refrigerant temperature sen sor Inlet air temperature sensor and EEV wire that connected to the inside of PCB ...

Page 71: ...ort Evap RH Unscrew 2 screws 5 Disassemble the Evaporator form the set 4 Ass y Control In The Control In should be disassembled after disassembling the Cover Control 1 3 1 Disassemble all Control Wires connected to the inside of PCB 2 In case of disassembling the PCB separately disassemble the PCB from the case with push ing the hook after unscrewing the screw Unscrew 1 screw ...

Page 72: ...se Control dis assemble the Case Control from the set after unscrewing the screw connected to the direc tion of Blower Disassemble if after disassembling the Cabinet Top Motor 1 1 5 In case of disassembling the Trans Power unscrew the screw fixing on the Case Disassemble if after disassembling the case PCB 4 4 5 Bracket Outlet 1 Disassemble the Bracket Outlet assembled on the Cabinet Unscrew 10 sc...

Page 73: ...sembly Samsung Electronics 3 41 Q Duct type Slim3 No Parts Procedure Remark 1 Filter 1 DPull out the Filter as picture 1 or picture 2 2 DIf it is necessary after disassembling 8 indi cating screws detach the Bracket Filter ...

Page 74: ...n the side of the set the procedure of disassembling the Filter is just as the above 5 Bracket Outlet 1 After disassembling 13 indicating screws detach Ass y Cabinet Top Motor 2 After disassembling 3 indicating screws detach Ass y Case Blower Upper Press the pothook of the Case Blower and detach Ass y Case Blower Upper ...

Page 75: ... 3 After disassembling 2 indicating screws detach the Cover Control 4 Detach the Motor Wire Connected to PCB and Capacitor 5 After disassembling the indicating screws detach the wire connected to the Partition 6 After disassembling 2 indicating screws detach the Ass y Band Motor ...

Page 76: ... disassembling the Motor and Blowers detach the Blowers from the axis of the Motor by 3mm inner hexagon spanner 3 Drain Pan 1 After disassembling 15 indicating screws detach Ass y Cabinet Top Evap 2 After disassembling 6 indicating screws detach the Bracket Outlet 3 Detach the Drain Pan ...

Page 77: ...e procedures above detach the Evaporator 1 After disassembling 2 indicating screws detach Ass y Cover Pipe 2 Detach the Sensor from the Control Box including 2 Sensors 3 After disassembling 2 indicating screws detach Ass y Support Evap LF 4 After disassembling 2 indicating screws detach Ass y Support Evap RH ...

Page 78: ...er disas sembling the Cover Control 1 Detach all the wires connected to the PCB 2 If only the disassembly of PCB required press the Pothook and detach the PCB from the set 3 If only the disassembly of Capacitor is required detach it from the set 4 If only the disassembly of Case Control is required detach it from the set after disassem bling 2 indicating screws ...

Page 79: ... No Parts Procedure Remark 7 Ass y Cross Fan 5 Detach the Transformer after disassembling 2 indicating screws Work is possible after disassembling the Case PCB 6 Ass y Bracket Outlet 2 After disassembling 16 indicating screws detach Ass y Bracket Outlet ...

Page 80: ...rk 1 Filter 1 After disassembling 16 places indicating screws detach Ass y Cabi Bottom Blower Use Screw Driver 2 Detach from Ass y Control In the capacitor connection wire between the Motor Fan and housing connector 3 After disassembling 2 places indicating screws detach the 2 Fan Case Use Screw Driver ...

Page 81: ...s Procedure Remark 4 After disassembling 2 places indicating screws detach Fan Motor and Blower from the set 2 Control In 1 After disassembling 1 Indicating screw detach the Cover control Use Screw Driver 2 Detach the Motor Fan and Sensor Connector from the PCB ...

Page 82: ...rocedure Remark 3 Disassemble 4 indicating screws and detach Control In from the set Use Screw Driver 3 Drain Pan Work is possible when Disassembling the Ass y Cabi Bottom Blower 1 Disassemble 7 indicating screws and detach Ass y Cabi Bottom Drain Use Screw Driver ...

Page 83: ...ung Electronics 3 51 No Parts Procedure Remark 2 Disassemble 2 indicating screws and detach Holder Pipe Use Screw Driver 3 Disassemble 4 indicating screws and detach the Drain Pan 2 screws each at left and right side Use Screw Driver ...

Page 84: ...en Disassembling the Ass y Drain Pan 1 Disassemble 5 indicating screws to detach Cover Pipe Use Screw Driver 2 Disassemble Sensor on the Evap 3 Disassemble 4 indicating screws which are in the near of Hanger Plate to detach the Evap 2 screws each at left and right side Use Screw Driver It needs 2 peoples ...

Page 85: ...Remark 1 Blower Motor 1 After disassembling 15 places indicating screws detach Ass y Cabi Bottom Blower Use Screw Driver 2 Detach from Ass y Control In the capacitor connection wire between the Motor Fan and housing connector 3 After disassembling 4 places indicating screws detach the 2 Fan Case Use Screw Driver ...

Page 86: ...ure Remark 4 After disassembling 2 places indicating screws detach Fan Motor and Blower from the set Use Screw Driver 3 Drain Pan 1 After disassembling 1 Indicating screw detach the Cover control Use Screw Driver 2 Detach the Motor Fan and Sensor Connector from the PCB ...

Page 87: ...rocedure Remark 3 Disassemble 4 indicating screws and detach Control In from the set Use Screw Driver 3 Drain Pan Work is possible when Disassembling the Ass y Cabi Bottom Blower 1 Disassemble 6 indicating screws and detach Ass y Cabi Bottom Drain Use Screw Driver ...

Page 88: ...s and detach Holder Pipe Use Screw Driver 3 Disassemble 6 indicating screws and detach the Drain Pan Use Screw Driver 3 screws each at left and right side 4 Evap Work is possible when Disassembling the Ass y Cabi Bottom Blower 1 Disassemble 6 indicating screws and detach Ass y Cabi Bottom Drain Use Screw Driver ...

Page 89: ...Samsung Electronics 3 57 No Parts Procedure Remark 2 Disassemble Sensor on the Evap 3 Disassemble 2 indicating screws which are in the near of Hanger Plate to detach the Evap 1 screw each at left and right side It needs 2 peoples ...

Page 90: ...lectronics Q CEILING No Parts Procedure Remark 1 Electrical Part 1 Open the Grille by pressing 3 position center and both side 2 Detach the Air Inlet Grille 3 Open the Cover of Component Electrical Box by removing 3 screws center and both side ...

Page 91: ...sassembly and Reassembly Samsung Electronics 3 59 No Parts Procedure Remark 2 Fan Motor 1 Detach the screw and untie earth wire of Motor 2 Disconnect of housing of Motor Wire 3 DisconnecttheCapacitorWire ...

Page 92: ...ssembly 3 60 Samsung Electronics No Parts Procedure Remark 4 Loosen the Guard Safety by removing 6 screws 5 Detach the Upper Case of Fan 2EA 6 Loosen the 4 screws what is fix the Motor 7 Detach the Fan and Motor assembly ...

Page 93: ...Remark 8 Loosen the set fixing bolts with a M3 wrench 9 Detach the Fan 3 DrainPan 1 Disconnect the Display PCB Wire as shown in picture white housing 2 Disconnect the Step Motor Wire as shown in picture blue housing 3 Disassemble the Hanger Bracket by removing the 1 screw ...

Page 94: ...ics No Parts Procedure Remark 4 Loosen the 3 screws of Front Side 5 Disassemble the assembly Front Cover Part 6 Disconnect the Step Motor Wire as shown in picture 7 Detach the Wire Clamp fixed in Base Part 8 Detach the Front Cover assembly completely ...

Page 95: ...ung Electronics 3 63 No Parts Procedure Remark 9 Loosen the screw what is fix with Base Part and Drain Pan Upper Side 2EA 10 Loosen the screw what is fix with Base Part and Drain Pan Lower Side 2EA 11 Detach the Drain Pan completely ...

Page 96: ...t the Thermistor Wire as shown in picture white housing 2 Loosen the 2 screws shown in picture 3 Loosen the 2 screws shown in picture and remove Plastic Part white 4 Loosen the 2 screws shown in picture and remove Steel Bracket 5 Disassemble the 4 screws Steel Plate in rear side of the unit ...

Page 97: ...Disassembly and Reassembly Samsung Electronics 3 65 No Parts Procedure Remark 6 Loosen the 2 screws as shown in picture 7 Detach the Plastic Cover as shown in picture 8 Detach the Evaporator assembly ...

Page 98: ...ver assembly as shown in picture 2 Loosen the 2 screws as shown in picture 3 Disassemble the Blade and Stepping Motor assembly and remove the 2 Screws Stepping Motor 6 DisplayPCB 1 Loosen the 3 screws in rear side of Front Cover assembly as shown in picture 2 Disassemble Display PCB assembly and Disconnect Wire 3 Disassemble the Display PCB ...

Page 99: ...eassembly Samsung Electronics 3 67 Q CONSOLE No Parts Procedure Remark 1 Cabi Parts 1 Open the Panel Front ᐓ Remove the Clip Wire ᐔ 2 Release4screwsontheBodyFront ι 3 OpentheBodyFront ι bypullingfrombottom ofthepart ཿ ྀ ...

Page 100: ... and Reassembly 3 68 Samsung Electronics No Parts Procedure Remark 2 ElectricalParts 1 Open the cover of Control Box ᐖ 2 Pull the PBA out along the slide guide 3 Cut the Cable tie 4 Pull all wires out from the PBA ...

Page 101: ... No Parts Procedure Remark 5 Release the 2 screws one is top of the C Box the other is left of it 6 Release 2 Hold Wires and pull all wires out from it 3 Blowing Evap Part 1 Pull the Bracket Pipe ᐗ out 2 Release 2 screws and pull Top Discharge Kit ᐘ out ...

Page 102: ...ease 2 screws and pull Bottom Discharge Kit ᐙ out 4 Disconect the Step Motor wire ᐚ from the conect wire This part is right side of the Bottom Discharge Kit ᐙ 5 Pull Bottom Discharge Kit ᐙ Out from the bottom of it 6 Release 3 screws and pull the Evap out from top to bottom direction ...

Page 103: ...s Procedure Remark 4 FanPart 1 Release 1 screw and pull the Bell Mouth ᐛ out 2 Release the Nut and pull Fan Turbo ᐜ out 3 Release 6 screw on the Body Back ᐝ Pull the Cap MPI ᐞ Bracket Wire ᐟ and Bracket Motor ᐠ out 4 Pull the MPI Kit ᐡ and Motor ྈ ྉ ྊ ྋ ྌ ྎ ྉ ྍ ...

Page 104: ...y is not required when Fan Motor Element Filter replacement or cleaning 2 Cover Element 1 Remove the 2 bolts of the Cover Element Use Screw Driver 2 Find the Element and 2 Dust Filters 3 Ass y Element Ass y Filter 1 Detach Element and Filter from the unit Make sure detach the Filter before the Element 2 There are 2 Element within the product All the procedure has to be verified because the cover s...

Page 105: ...ng Element Use Screw Driver 1 Guide is located at each left and right end of the product Each guide is attached to the product with 1 bolt 5 Ass y Fan Parts 1 Separate motor connectors 2 Loosen the holder fixing the motor wire by twisting it slightly 3 2 Motors are placed within the product for supply air and exhaust air ...

Page 106: ... center of exhaust air and supply air 2 Pull out the EPS structure through the inspection hole 3 Assemble the product by adjusting it with the direction following the direction carved on the surface of Cushion Mid Put the part written with Down down wards and put the part with Motor towards the Motor when assembling the unit Make sure not to break down EPS structure ...

Page 107: ...nics 3 75 No Parts Procedure Remark 7 Connector Damper Cam 1 Separate the Damper from the unit Use Screw Driver 2 Separate the connectors by holding their bodies and pulling them out 3 Unscrew bolts attached to Bracket and Cam Use Screw Driver ...

Page 108: ...fixing the Bracket 10 turns Input and outlet of the products have 2 bolts each Use Screw Driver The bolts are not required to be removed 9 Ass y Bracket Motor 1 Detach the whole Ass y Blower Motor which is made up of Fan Motor Bracket Motor and Cover Bell Mouse through the inspection hole 2 2 Motors are placed within the unit for supply air and exhaust air ...

Page 109: ...rocedure Remark 10 Blower Motor Fan 1 Unscrew the nuts fixing the Fan by rotating them left Use Monkey Spanner 2 Unscrew the bolts fixing motor to detach if from the Motor Bracket It has 4 bolts Use Screw Driver Do not touch the Fan Its sharp edge may cause injury ...

Page 110: ...ment Humidifier 3 Hold the handle of the Element Humidifier and pull to the direction indicated by the arrow to separate it from the product 12 Ass y Flow Valve 1 Use 2 monkey spanners to hold the Ass y Flow Valve as shown in the image and rotate the moneky spanner on the right hand to the direction indicated by the arrow to unscrew the plug 2 Completely separate the plug by hand and remove foreig...

Page 111: ...Remark 13 Ass y Evap Parts 1 Unscrew 6 screws from the Cover Evap to separate them from the product 2 Unscrew 4 screws from the Case PCB to separate them from the product 3 Separate the PCB connection housing of the Valve Expan and move the housing as shown in the picture ...

Page 112: ...ed to Ass y Evap 5 Unscrew 2 screws from the Support Evap L 6 Unscrew 2 screws from the Support Evap R 7 Pull the Ass y Evap to the direction indicated by the arrow to separate it from the fixed part 8 Hold the end part of the Ass y Evap and pull to the direction indicated by the arrow to separate it from the product ...

Page 113: ... Floor Standin Type No Parts Procedure Remark 1 Cabinnet 1 Unscrew fixed screw of the upper part cabinet and please separate 2 Please separate front cabinet All the procedure has to be verified because the cover should not open when the unit is installed ...

Page 114: ...tExchanger 1 Unscrew two fixed screws and please separate heat exchanger cover 2 Unscrew fixed screw on both side of heat exchanger plate And then pulls heat exchanger to the right side and please separate 3 DrainPan 1 Please remove PLATE for fixation of DRAIN PAN located in the side ...

Page 115: ...tor Fan 1 Process hopes for DRAIN PAN isolation work in this work earlier 2 Unscrew MOTOR BRACKET fixation screw located in the front surface and please separate 3 Unscrew MOTOR BRACKET fixation screw located in the side and please separate 4 Separate out MOTOR BRACKET for front side ...

Page 116: ...s No Parts Procedure Remark 4 Motor Fan 5 Unscrew fixed screw of MOTOR BRACKET and FAN CASING and please separate 6 Unscrew fixed screw of FAN CASING and please separate 7 Unscrew FAN and the fixed screw of the MOTOR axis and please separate use Wrench ...

Page 117: ...Open the Front Grille by pulling right and left sides of the hook 3 Loosen 1 of the right screw CCW and detach the Terminal Cover Use Screw Driver 4 Detach the thermistor from the Front Grille 5 Loosen 2 fixing screws CCW of Front Grille 6 Unlock 3 hooks to fix Panel Front and Tray Drain Use Screw Driver All the procedure has to be verified because the cover should not open when the unit is instal...

Page 118: ...rol In MainPCB 1 Take all the connector of PCB upper side out Inclusion Power Cord 2 Detach the outdoor unit connection wire from the Terminal Block 3 Loosen 4 fixing screws CCW of Ass y Control In Use Screw Driver You can disassembly Ass y Control In without evaporator disassembled 3 TrayDrain 1 Pull Tray Drain out from the Back Body ...

Page 119: ...ide 4 Loosen the 4 fixing screws CCW of right and left side Use Screw Driver 5 Lifting the Heat Exchanger up a little to push the up side for separation from the indoor unit First checkComp Downandthen disconnecttheconnectionpipesbefore youdisassembletheEvaporatorfrom indoorunit 5 FanMotor CrossFan 1 Loosen the fixing screw CCW Use Screw Driver 2 Detach the Fan Motor from the Fan 3 Detach the Fan ...

Page 120: ...L FRONT 1 Stopthedrivingofairconditionerandshutoff mainpowersupply 2 DetachFILTERPREfromthePANELFRONT 3 CoverPanelisassembledonbottomofindoor unitasshowninthefigure RemovetheCapScrewasshownontheright sideandthenremovethescrewandseparate theCoverPanel Q Wall Mounted type A3050 With EEV ...

Page 121: ...anelisfixedtobodybyHookincenter areaandsidearea 5 Separatethehookafterpushingbothendof CoverPanelasshowninthefigure Watchoutforthedamageofthehook 6 Raisefrontpart upwardobliquelyasshownin thefigureandthenremovethehooks Center area Side area Side area HOOK 015 022 028 036 045 056 071 082 ...

Page 122: ... No Parts Procedure Remark Caution AssemblyofCoverPanelafterserviceend Reassembly is in the reverse order of the removal Piping and drain hose must be careful not to damage and Progress must be done with both hands Hook Side Hook Center Screw Cap Screw ...

Page 123: ... TodetachthePANEL FRONTfromthemain frame unfasten2screwsatthebottom use ScrewDriver 8 TodetachtheCOVER PANELfromthemain frame loosen4HOOKStructures Whenseparatethehook Usethe screwDriver ScrewDriverInsertthehookandthenpullthe hookasshownontherightside Watchoutforthedamageofthehook ...

Page 124: ...Disassembly and Reassembly 3 92 Samsung Electronics No Parts Procedure Remark 9 RemovethePanelFrame fromtheMain Frameasshownontherightside ...

Page 125: ...ion When you separate the connector pull pressing the locking button 2 Lossen Stepping Motor EEV Display Sensor SPI FuseWire Caution When you separate the connector pull pressing the locking button 3 Lossen Motor TerminalWire Caution When you separate the connector pull pressing the locking button 4 Loosen EarthWire ...

Page 126: ...s Procedure Remark 5 EVAPORATOR 9 TakeofftheCASE CONTROLfrom themainframeafterloosentheremaining connector Caution Whenyouseparatetheconnector pullpressingthelockingbutton 3 TRAYDRAIN 1 TodetachTRAY DRAINfromthemainframe pullthebottomoftheTRAY DRAINtowards you ...

Page 127: ...nics 3 95 No Parts Procedure Remark 4 Evaporator 1 DetachtheHOLDERPIPE 2 Unfastenthescrewattheleftside use ScrewDriver 3 Unfastenthescrewattherightside use ScrewDriver 4 TodetachEvaporatorfromthemainframe pullthebottomoftheEvaporatortowards you ...

Page 128: ...d Reassembly 3 96 Samsung Electronics No Parts Procedure Remark 5 FANMOTOR CROSSFAN 1 Unfastenthescrew use ScrewDriver 2 DetachtheFANMotorcase 3 Unfastenthescrewalittle use ScrewDriver 4 PulltheCROSS FANtotheleftside ...

Page 129: ...down ward Two safety clips are mounted to the front grille to prevent it from dropping 2 Detach the safity clip and take up the grille 3 Remove the 2 fixed screws to remove the Control Box Cover Use Screw Driver 4 Remove the Remocon Receiver and Blade Connector Wire from the PBA 3EA 5 Push the 4 panel corners and cover down wards to remove it ...

Page 130: ...rners 7 Press the Hangers at both sides of the panel inwards to remove it from the indoor unit s hook Remove the panel from the indoor unit 2 Control Box 1 Disconnect the Connector Wire that is con nected to the indoor unit s PBA 2 Unscrew the 2 fixed screws on both sides of the Control Box and disassemble the Control Box from the indoor unit Use Screw Driver ...

Page 131: ... Unscrew the screw fixed on the Bell Mouth Use Screw Driver 2 Push the Bell Mouth in the direction oppo site to where it s installed on the Control Box to remove it 4 DrainPan 1 Unscrew the screws on the 4 corners of the indoor unit Use Screw Driver 2 Remove the Drain Pan from the indoor unit ...

Page 132: ...e drainage hose from the Drain Pump Use Screw Driver 2 Remove the 2 screws and take the Drain Hose out from the indoor unit to disas semble the transparent Drain Hose fixed on the side of the indoor unit Use Screw Driver 6 Evap Temperature Sensor 1 Use your hand to remove the temperature sensor attached to the Evap Pipe along with the fixing clip ...

Page 133: ...the three hexangular nuts on the Motor counterclockwise to remove the nuts Take the Motor Wires attached to these three locations out with your hands prior to removing the Motor 8 Evaporator 1 Remove the screws of the Steel Holder Evaps that are used to fix the Heat Exchanger and then remove it Use Screw Driver 2 Remove the 2 fixing screws of the Partition Evap at the Heat Exchanger s In Out Pipe ...

Page 134: ...ly 3 102 Samsung Electronics No Parts Procedure Remark 3 Remove the screw of the Cover Pipe that is used to fix the In Out Pipe Remove the In Out Pipe Use Screw Driver 4 Remove the Heat Exchanger from the indoor unit s cabinet ...

Page 135: ...Samsung Electronics 3 103 Q GD S Big Duct No Parts Procedure Remark 1 Commom 1 Disasseble the Cover Control Unscrew 2 screws YoumustturnoffthePowerbeforedisassembly ...

Page 136: ...s No Parts Procedure Remark 2 Motor Fan 1 Disassemble the connection wire to take the motor fan out 2 Disassemble th Cabinet Top Fan Unscrew 6 screws 3 Disassemble the Link Screw Unscrew 3 screws 4 Disassemble Cabinet Top Fan ...

Page 137: ...Samsung Electronics 3 105 No Parts Procedure Remark 5 Disassemble 2 Case Blower Top Unscrew 8 screws 6 Disassemble 1 Holder Motor Unscrew 2 screws 7 Disassemble Motor wire from 2 holder wire ...

Page 138: ...s No Parts Procedure Remark 8 After disassemble the Motor and Blower for the set disassemble the Blower by use of 3mm wrench 9 Disassemble 2 Case blower bottom Unscrew 4 screws 10 Disassemble the Bracket Motor Unscrew 4 screws ...

Page 139: ...Samsung Electronics 3 107 No Parts Procedure Remark 3 Control Box 1 Disassemble Evap Sensor wire and EEV wire 20kW only 2 Disassemble the Case Control Unscrew 3 screws ...

Page 140: ...g Electronics No Parts Procedure Remark 4 Evap 1 Disassemble The Case Evap Top AC JNHFKH Unscrew 8 screws AC JNHPKH Unscrew 6 screws 2 Disassemble The Cushion Front 3 Disassemble The Cushion Support Unscrew 1 screw ...

Page 141: ...Samsung Electronics 3 109 No Parts Procedure Remark 4 Disassemble The Cover pipe Unscrew 3 screws 5 Remove The cable tie on the Support Evap 6 DisassembleTheEvap Unscrew4screws ...

Page 142: ...an out 2 Diassemble The Cabi Fan Bottom Unscrew 9 screws 3 Disassemble the Link Screw Unscrew 3 screws 4 Disassemble 2 Case blower bottom Unscrew 4 screws 5 Disassemble Bracket Motor and Motor Unscrew 4 screws 6 After disassemble the Motor and Blower for the set disassemble the Blower by use of 3mm wrench ...

Page 143: ...Samsung Electronics 3 111 No Parts Procedure Remark 2 Control Box 1 Disassemble Evap Sensor wire and EEV wire 20kW only 2 Disassemble the Case Control Unscrew 3 screws ...

Page 144: ...ap 1 Disassemble The Case Evap Bottom AC JNHFKH Unscrew 11 screws AC JNHPKH Unscrew 7 screws 2 Disassemble The Drain Pan 3 Disassemble The Cover pipe Unscrew 3 screws 4 Remove The cable tie on the Support Evap 5 Disassemble The Support Evap Unscrew 2 screws ...

Page 145: ... 113 No Parts Procedure Remark 6 Disassemble The Evap Unscrew 2 screws ᐭ Moving the Evap 2 5cm to pipe direction ᐮ Holding the pipe side and then rotating the opposite side ᐯ Moving the Evap in the direction of the arrow 3 ...

Page 146: ...load PC SMW200 10black 6 Setupthenumberofconnectedoutdoorunits 2 MICOM download AS PRO SMW200 07Pwhite 7 Forcheckingindoorunitcommunication YW396 02Pred 3 ERRORDISPLAY 8 Transmitter12V YW396 02Pblue 4 StateCheck SMW250 04Pred 9 OutdoorUnitTactSwitch 5 EEPROMSOCKET 10 OutdoorUnitDipSwitch 3 6 8 7 4 9 1 5 2 10 ...

Page 147: ... BLANK K2 Numberofpress Keyoperation Displayonsegment 1time RefrigerantcharginginCoolingmode K 5 BLANK BLANK 2times TrialoperationinCoolingmode K 6 BLANK BLANK 3times PumpdownallunitsinCoolingmode K 7 BLANK BLANK 4times H R Checkingthepipeconnection H P Automaticsettingofoperationmode Cooling Heating fortrailoperation K 8 BLANK BLANK 5times Checkingtheamountofrefrigerant K 9 XX Displayoflasttwodig...

Page 148: ...uct Operationtime Min 60minutes Max 10hours Etc Exceedthemaximumoperatingtimeatstopsandwaits Protectionandcontrol self diagnosisisperformed غ Refrigerant filling operation ـ Operationtofillingtherefrigerantcompressorwasfixedatacertainfrequency Cooling Heating MethodofEntry K2TactSwitchonetime K1TactSwitchonetime Compressor Startingfrequency MildStartfrequency operation IndoorUnit Wholeoperation Th...

Page 149: ...etystart OnlythecorrespondingOutdoorUnitoperation Topumpoutmorethan2 ExceptcommunicationbetweenOutdoorUnitofrelevantsetafterworkingforone remaindersetmakesPumpOutadd غ Cooling Pump Down ـ RecovertherefrigerantofIndoorUnitandPipingtooutdoorside ـ Liquidpipeservicevalveandthegaspipeservicevalveoperation theoperatormanuallyneedtoclose ـ Iftheinstallationofthelongpipe Anyrefrigerantintotheoutdoorunitc...

Page 150: ...operlyrun Waituntilnaturaldischarge Inparticular E464 E364 powerdevicesmaybedamaged thereforedonotusethedischargemode ـ BlocktheInverterPCB3 phaserelayafterconnectedthepower andthroughcompressor DCvoltageisdischarging INV1andINV2DCvoltageduringdischargemodearedisplayedalternately DischargemodeDisplay Rotatethethreepagedisplay asshownbelow K A ࣖDCLinkVolt1 Forexample 120 V 0120display ࣖDCLinkVolt2 ...

Page 151: ...s Startpattern Outdoortemperatureismorethan10 C Coolingcommissioning Outdoortemperatureislessthan10 C Heatingcommissioning Oilrecoverystart Oilrecoverystart Itisafter10minuteswhichSafetyStartfinishes Etc Oilrecoveryshutdownandstopthenormalpatternoftheoutdoorunitstop 4 2 2 DVM S Models EEPROM Code Table No ModelName EEPCode 1 AM080FXVAGH TK DB82 01358A 2 AM100FXVAGH TK DB82 01359A 3 AM120FXVAGH TK ...

Page 152: ...button and Low Temp button 3 Check if you have entered the option setting status Step 2 The procedure of option setting After entering the option setting status select the option as listed below t 5IF UPUBM OVNCFS PG BWBJMBCMF PQUJPOT BSF 4 UP 4 t FDBVTF 4 4 4 BOE 4 BSF UIF QBHF PQUJPOT VTFE CZ UIF QSFWJPVT SFNPUF DPOUSPM NPEFMT UIF NPEFT UP TFU WBMVFT for these options are skipped automatically t...

Page 153: ...g SEG6 SEG8 option Press Low Fan button to enter SEG6 value Press High Fan button to enter SEG8 value Each time you press the button will be selected in rotation 6 Setting Fan mode Press Mode button to be changed to FAN mode in the ON status 7 Setting SEG9 SEG10 option Press Low Fan button to enter SEG9 value Press High Fan button to enter SEG10 value Each time you press the button will be selecte...

Page 154: ...be change to Dry mode in the OFF status 15 Setting SEG18 SEG20 option Press Low Fan button to enter SEG18 value Press High Fan button to enter SEG20 value Each time you press the button will be selected in rotation 16 Setting Fan mode Press Mode button to be change to Fan mode in the OFF status 17 Setting SEG21 SEG22 option Press Low Fan button to enter SEG21 value Press High Fan button to enter S...

Page 155: ... not Step 4 Input option Press operation button with the direction of remote control for set For the correct option setting you must input the option twice Step 5 Check operation 1 Reset the indoor unit by pressing the RESET button of indoor unit or outdoor unit 2 Take the batteries out of the remote controller and insert them again and then press the operation button ...

Page 156: ...11 SEG12 1 Drain pump Hot water heater Electronic heater Opening the electronic expansion valve Master Slave SEG13 SEG14 SEG15 SEG16 SEG17 SEG18 2 External control External control output S Plasma ion Buzzer Number of hours using filter SEG19 SEG20 SEG21 SEG22 SEG23 SEG24 3 Individual control of a remote controller Heating setting compensation EEV opening of an indoor unit stopped during oil retur...

Page 157: ...Option SEG13 SEG14 SEG15 SEG16 SEG17 SEG18 Explanation PAGE Use of external control Setting the output of external control S Plasma ion Buzzer control Number of hours using filter Remote Controller Display Indication and Details Indication Details Indication Details Indication Details Indication Details Indication Details Indication Details 2 0 Disuse 0 Thermo on 0 Disuse 0 Mixedoperation control1...

Page 158: ...ns a Remove the batteries from the remote control b While holding down the Temp and Timer buttons simultaneously insert the batteries into the remote control c Make sure that you are entered to the mode for setting the options 2 Set the option values CAUTION t 5IF UPUBM OVNCFS PG BWBJMBCMF PQUJPOT BSF 4 UP 4 t FDBVTF 4 4 4 BOE 4 BSF UIF QBHF PQUJPOT VTFE CZ UIF QSFWJPVT SFNPUF DPOUSPM NPEFMT UIF N...

Page 159: ... rotating the Wheel counterclockwise until the value you want to set appears on the remote control display SEG4 b Set the SEG5 value by rotating the Wheel clockwise until the value you want to set appears on the remote control display SEG5 When you rotate the Wheel values appear in the following order 4 Press the Mode button Dry and On appear on the remote control display 5 Set the SEG6 and SEG8 v...

Page 160: ...b Set the SEG12 value by rotating the Wheel clockwise until the value you want to set appears on the remote control display SEG12 When you rotate the Wheel values appear in the following order 10 Press the Mode button Auto and Off appear on the remote control display 11 Set the SEG14 and SEG15 values a Set the SEG14 value by rotating the Wheel counterclockwise until the value you want to set appear...

Page 161: ...llowing order 16 Press the Mode button Fan and Off appear on the remote control display 17 Set the SEG21 and SEG22 values a Set the SEG21 value by rotating the Wheel counterclockwise until the value you want to set appears on the remote control display SEG21 b Set the SEG22 value by rotating the Wheel clockwise until the value you want to set appears on the remote control display SEG22 When you rot...

Page 162: ... sound from the indoor unit If the command is not received press the Power button again 5 Check whether the air conditioner operates in accordance with the option values you have set a Reset the indoor unit by disconnecting and then reconnecting the power cable of the indoor unit or by pressing the RESET button on the outdoor unit b Remove the batteries from the remote control insert them again an...

Page 163: ...F PQUJPO JT BVUPNBUJDBMMZ TFU UP CZ EFGBVMU t 5IF 4 PQUJPO 6TF PG DFOUSBM DPOUSPM JT TFU UP 6TF CZ EFGBVMU 5IFSFGPSF ZPV EPOhU OFFE UP TFU UIF 4 PQUJPO additionally Note that even if the central control system is not connected no errors occur If you want a specific indoor unit not to be controlled by the central control system set the SEG option of that indoor unit to 0 Disuse t 5IF FYUFSOBM PVUQV...

Page 164: ...ion when thermostat is off 0 2 0 Disuse Cooling Heating Disuse 0 Disuse 0 Disuse recessed installation 1 Use Cooling Heating Disuse 2 Disuse Heating Use 2 1 Use 1 High ceiling mode recessed installation 3 Use Heating Use 2 4 Disuse Cooling Use 4 Disuse exposed installation 5 Use Cooling Use 6 Disuse Cooling Heating Use 2 5 High ceiling mode exposed installation 7 Use Cooling Heating Use 2 Option SE...

Page 165: ... 2 Use 4 3 Window ON or OFF control 3 Use 4 Option SEG19 SEG20 SEG21 SEG22 SEG23 SEG24 Function Page Individual control with remote control Heating setting compensation offset Removing condensated water in the Heat mode EEV step of stopped unit during the oil return or the defrost mode Motion detection sensor Cycle time of Swing Indication and details Indication Details Indication Details Indicatio...

Page 166: ...ng only indoor unit To use this option install the Mode Select switch MCM C200 on the outdoor unit and fix it to the Cool mode 4 When the following 2 or 3 is used as external heater On or Off signal the signal for monitoring external contact control will not be output 2 The fan is turned on continually when the external heater is turned on 3 The fan is turned off when the external heater is turned...

Page 167: ...oling reference temperature When setting SEG3 Reference for change from Heat mode to Cool mode SEG7 SEG8 SEG9 SEG10 SEG11 SEG12 1 When setting SEG3 Reference for change from Cool mode to Heat mode When setting SEG3 Time required for mode change Compensation option for a long pipe and the height difference between indoor units SEG13 SEG14 SEG15 SEG16 SEG17 SEG18 2 Control variables when the hot wate...

Page 168: ...5mmAq 0 1 1 0 5 4 1 9 5 5 F 3 2 3 1 C 1 C 3 1 1 1 1 0 28mmAq Floor Standing AM036FNFDEH TK 0 1 A 0 5 4 1 0 5 0 0 0 2 0 2 4 2 4 3 3 0 0 1 0 AM056FNFDEH TK 0 1 A 0 5 4 1 0 5 0 0 0 2 0 3 8 3 8 3 3 0 0 1 0 AM071FNFDEH TK 0 1 A 0 5 4 1 0 5 0 0 0 2 0 4 7 4 7 3 3 0 0 1 0 ERV Plus AM050FNKDEH TK 0 1 E 0 4 4 1 9 5 5 8 0 2 0 2 4 2 4 3 3 2 0 0 0 AM100FNKDEH TK 0 1 E 0 4 4 1 9 5 5 7 3 2 0 4 7 4 7 3 3 2 0 2 0 ...

Page 169: ...1 0 0 5 4 1 3 5 4 C F 2 0 2 4 2 4 3 1 1 1 1 0 6mmAq 0 1 0 0 5 4 1 3 5 4 2 C 2 0 2 4 2 4 3 1 1 1 1 0 4mmAq 0 1 0 0 5 4 1 3 5 0 F B 2 0 2 4 2 4 3 1 1 1 1 0 2mmAq 0 1 0 0 5 4 1 3 5 0 E A 2 0 2 4 2 4 3 1 1 1 1 0 0mmAq MSP DUCT S Uplevel Static Pressure AM045FNMDEH TK 0 1 0 0 5 4 1 2 5 9 0 6 2 0 2 D 2 D 3 1 1 1 1 0 8mmAq 0 1 0 0 5 4 1 2 5 5 A 4 2 0 2 D 2 D 3 1 1 1 1 0 6mmAq 0 1 0 0 5 4 1 2 5 5 8 3 2 0 ...

Page 170: ...F C 2 0 A 0 A 0 3 3 1 1 1 0 10mmAq 0 1 0 0 5 4 1 2 5 E D B 2 0 A 0 A 0 3 3 1 1 1 0 8mmAq 0 1 0 0 5 4 1 2 5 E A A 2 0 A 0 A 0 3 3 1 1 1 0 6mmAq 0 1 0 0 5 4 1 2 5 E 7 9 2 0 A 0 A 0 3 3 1 1 1 0 4mmAq GD S Big Duct AM180JNHPKH TK 0 1 2 0 7 4 1 C 5 0 8 0 2 0 B 4 B 4 3 3 1 1 1 0 5 SP 7 5 0 1 2 0 7 4 1 C 5 0 A 1 2 0 B 4 B 4 3 3 1 1 1 0 7 5 SP 10 0 1 2 0 7 4 1 C 5 0 D 3 2 0 B 4 B 4 3 3 1 1 1 0 10 SP 12 5 ...

Page 171: ... 4 3 1 0 0 0 0 AM045FNQDEH TK 0 1 0 0 4 4 1 1 6 4 3 F 2 0 2 D 2 D 3 1 0 0 2 0 AM056FNQDEH TK 0 1 0 0 4 4 1 1 6 4 6 F 2 0 3 8 3 8 3 1 0 0 2 0 AM071FNQDEH TK 0 1 0 0 4 4 1 1 6 4 8 F 2 0 4 7 4 7 3 1 0 0 2 0 A3050 EEV INCLUDED AM015JNVDKH TK 0 1 2 0 4 4 1 9 9 0 D 9 2 0 0 F 0 F 3 1 0 0 0 0 AM022JNVDKH TK 0 1 2 0 4 4 1 9 9 4 2 A 2 0 1 6 1 6 3 1 0 0 0 0 AM028JNVDKH TK 0 1 2 0 4 4 1 9 9 4 5 C 2 0 1 C 1 C ...

Page 172: ...unitsensorerrorthatisnotontheabovelist E221 E237 E251 1 Whenthereisnocommunicationbetweentheindoor outdoorunitsfor 2minutes 2 Communicationerrorreceivedfromtheoutdoorunit 3 3miniutetrackingerroronoutdoorunit 4 Communicationerroraftertrackingduetounmatchingnumberof installedunits 5 Errorduetorepeatedcommunicationaddress 6 CommunicationaddressnotconfirmedOtheroutdoorunit communicationerrorthatisnoto...

Page 173: ...rdownduetolowpressuresensorpreventioncontrol_1 14 Simultaneousopeningofcooling heatingMCUSOLvalve 1stdetection 15 Simultaneousopeningofcooling heatingMCUSOLvalve 2nddetection Otheroutdoorunitself diagnosiserrorthatisnotontheabovelist E241 E554 E450 E451 E416 E559 E425 E403 E301 E306 E428 E413 E410 E180 E181 Flowatings w 2nddetection E153 EEPROMerror E162 EEPROMoptionerror E163 Errorduetoincompatib...

Page 174: ...dunits 5 Errorduetorepeatedcommunicationaddress 6 Communicationaddressnotconfirmed Otheroutdoorunitcommunicationerrorthatisnotontheabovelist E101 E102 E202 E201 E108 E109 Selfdiagnosiserrordisplay 1 ErrorduetoopenedEEV 2nddetection 2 ErrorduetoclosedEEV 2nddetection 3 Evainsensorisdetached 4 Evaoutsensorisdetached 5 Thermalfuseerror Open E151 E152 E128 E129 E198 1 CONDmidsensorisdetached 2 Refrige...

Page 175: ...e air conditioner when the LED is flickering the LED is also turned off If you re operate the air conditioner it operates normally at first then detect an error again When E108 error occurs change the address and reset the system Ex When address of the indoor unit 1 and 2 are set as 5 address of the indoor unit 1 will become 5 and indoor unit 2 will display E108 A002 LED lamp display with error de...

Page 176: ...etection E152 3 Theevaporator insensorisdetached E128 4 Theevaporator outsensorisdetached E129 5 Thecondensermidsensorisdetached E241 6 Refrigerantleakage 2nddetection E554 7 Abnormalhightemperatureonthecondenser 2nddetection E554 8 Lowpressureswitch 2nddetection E451 9 Abnormalhightemperatureontheairdischargedfromtheoutdoorunit 2nddetection E416 10 Theindoorunitstopsduetoanunknownerroroftheoutdoo...

Page 177: ...numberoftheinstalledindoorunitsthatistransmittedvia communicationafterthetrackingisdifferent E201 Errorofduplicatedcommunicationaddresses NASAonly E108 Thecommunicationaddressisnotconfirmed NASAonly E109 Communicationerrorsotherthentheerrorslistedabove Erroroftheseconddetectionofthefloatswitch E153 X X EEPROMerror E162 X EEPROMoptionerror E163 Errorofincompatibilityoftheindoorunit E164 X X Errorof...

Page 178: ...nocommunicationbetweentheindoor outdoorunitsfor 2minutes 2 Communicationerrorreceivedfromtheoutdoorunit 3 3miniutetrackingerroronoutdoorunit 4 Communicationerroraftertrackingduetounmatchingnumberof installedunits 5 Errorduetorepeatedcommunicationaddress 6 Communicationaddressnotconfirmed Otheroutdoorunitcommunicationerrorthatisnotontheabovelist E101 E102 E202 E201 E108 E109 Selfdiagnosiserrordispl...

Page 179: ...mpressordownduetolowpressuresensorpreventioncontrol_1 14 Simultaneousopeningofcooling heatingMCUSOLvalve 1stdetection 15 Simultaneousopeningofcooling heatingMCUSOLvalve 2nddetection Otheroutdoorunitself diagnosiserrorthatisnotontheabovelist E241 E554 E450 E451 E416 E559 E425 E403 E301 E306 E428 E413 E410 E180 E181 Flowatings w 2nddetection E153 EEPROMerror E162 EEPROMoptionerror E163 Errorduetoinc...

Page 180: ...rduetoclosedEEV 2nddetection 3 Evainsensorisdetached 4 Evaoutsensorisdetached 5 Thermalfuseerror Open E151 E152 E128 E128 E198 1 CONDmidsensorisdetached 2 Refrigerantleakage 2nddetection 3 AbnomallyhightemperatureonCond 2nddetection 4 Lowpressures w 2nddetection 5 Abnomallyhightemperatureondischargedaironoutdoorunit 2nddetection 6 Indooroperationstopduetounconfirmederroronoutdoorunit 7 Errorduetor...

Page 181: ...rrordisplay 1 ErrorduetoopenedEEV 2nddetection 2 ErrorduetoclosedEEV 2nddetection 3 Evainsensorisdetached 4 Evaoutsensorisdetached 5 Thermalfuseerror Open E151 E152 E128 E128 E198 1 CONDmidsensorisdetached 2 Refrigerantleakage 2nddetection 3 AbnomallyhightemperatureonCond 2nddetection 4 Lowpressures w 2nddetection 5 Abnomallyhightemperatureondischargedaironoutdoorunit 2nddetection 6 Indooroperatio...

Page 182: ...02 E202 E201 E108 Selfdiagnosiserrordisplay 1 ErrorduetoopenedEEV 2nddetection 2 ErrorduetoclosedEEV 2nddetection 3 Evainsensorisdetached 4 Evaoutsensorisdetached 5 Thermalfuseerror Open E151 E152 E128 E128 E198 1 CONDmidsensorisdetached 2 Refrigerantleakage 2nddetection 3 AbnomallyhightemperatureonCond 2nddetection 4 Lowpressures w 2nddetection 5 Abnomallyhightemperatureondischargedaironoutdoorun...

Page 183: ...nitsfor 2minutes 2 Communicationerrorreceivedfromtheoutdoorunit 3 3miniutetrackingerroronoutdoorunit 4 Communicationerroraftertrackingduetounmatchingnumberof installedunits 5 Errorduetorepeatedcommunicationaddress 6 Communicationaddressnotconfirmed Otheroutdoorunitcommunicationerrorthatisnotontheabovelist E101 E102 E202 E201 E108 E109 Selfdiagnosiserrordisplay 1 ErrorduetoopenedEEV 2nddetection 2 ...

Page 184: ...ltaneousopeningofcooling heatingMCUSOLvalve 1stdetection 15 Simultaneousopeningofcooling heatingMCUSOLvalve 2nddetection Otheroutdoorunitself diagnosiserrorthatisnotontheabovelist E241 E554 E450 E451 E416 E559 E425 E403 E301 E306 E428 E413 E410 E180 E181 Flowatings w 2nddetection E153 EEPROMerror E162 EEPROMoptionerror E163 Errorduetoincompatibleindoorunit E164 On Flickering Off If you turn off th...

Page 185: ...cation numbersandinstallednumbersaftertracking E121 IndoorTemperatureSensor open short Errorsrelatedto ventilator ERV operation E175 OutdoorTemperatureSensor open short E139 CO2sensor open short E162 EEPROMERROR E163 EEPROMoptionsettingerror E186 SPIError E561 SupplyAirFanMotorerror E562 ExhaustAirFanMotorerror E654 DamperERROR Whenthereisnoswitchinputfor100secondswhilemonitoringthedamper ERV Plus...

Page 186: ...unit andothermethodsoferrordisplay Error Number ࣖ Outdoor unit address ࣖ Error Number repeat display E471 ࣖU200 ࣖE471 ࣖU200 E206 ࣖC001 ࣖE206 ࣖC002 Displayedalphabet Explanation When displaying Error 101 700 When displaying Error 701 800 When E206 occurs Displaysaddressofsubordinatewithintheset C001 HUB C002 FAN C003 INV1 C004 INV2 When MCU error occurs DisplaysaddressofMCU Ex C100 MCUaddress0 C101...

Page 187: ...tion E 153 Error on floating switch of indoor unit 2nd detection E 154 RPM feedback error of indoor unit E 161 Mixed operation mode error of indoor unit When outdoor unit is getting ready to operate in cooling or heating and some of the indoor unit is trying to operate in heating or cooling mode E 162 EEPROM error of MICOM Physical problem of parts circuit E 163 Indoor unit s remote controller opt...

Page 188: ...ary switch E 216 When indoor unit is not installed to a MCU port but the switch on the port is set to On E 217 hen indoor unit is connected to a MCU port but indoor unit is assigned to a MCU and the switch on the port is set to Off E 218 When there s at least one or more actual number of indoor unit connection compared to number of indoor units assigned to MCU E 219 Error on temperature sensor loc...

Page 189: ...or due to overcurrent of Fan2 E 385 Error due to input current of inverter 2 E 386 Over voltage low voltage error of Fan2 E 387 Hall IC connection error of Fan2 E 389 V limit error on Fan2 of compressor E 393 Output current sensor error of Fan2 E 396 DC voltage sensor error of Fan2 E 399 Heat sink temperature sensor error of Fan2 E 400 Error due to overheat caused by contact failure on IPM of Inve...

Page 190: ...ror due to input current of inverter 1 E 486 Error due to over voltage low voltage of Fan E 487 Hall IC error of Fan1 E 489 V limit error on Fan1 of compressor E 493 Output current sensor error of Fan1 E 496 DC voltage sensor error of Fan1 E 499 Heat sink temperature sensor error of Fan1 E 500 Error due to overheat caused by contact failure on IPM of Inverter PBA1 E 503 Error due to alert the user...

Page 191: ...of the product 1 Tracking is complete and after the initial installation if you do not have a history of commissioning is completed UP will be dis played 2 Execute the automatic commissioning by Tact Switch 3 UP display disappears after commissioning is complete normal operation is possible 4 Automatic commissioning is completed if there is a history nor mal operation execution immediately No Yes ...

Page 192: ...CBdefective HubPCBdefective Highpressureswitchoperation 1 Causeofproblem ReplaceFanPCB ChecktheconnectionstatusofEMIPCB ChecktheshortcircuitofEMIPCBFuse Refrigerantovercharge Highpressureswitchisdefective No No Yes Yes Yes HUBPCBCN70AC220Visconnected Isahighpressureswitchnormal ChecktheshortcircuitofHubPCB ReplaceHubPCB No Yes ConfirmablinkingofHubPCBLED Connectingthecommunicationwire CN96 No Yes ...

Page 193: ...e of problem Yes Yes Is indoor room temperature sensor connector dislocated At that time is the resistance value significantly deviated from the temp table After separating indoor room temperature sensor connector from PCB measure the resistance values between both terminals Re start after replacing PCB Re start after connecting the connector to the PCB As it is due to an indoor oom temperature se...

Page 194: ...1 How to check Is indoor EVAP IN sensor connector separated from the PCB At that time is the resistance value significantly deviated from the temp table After separating indoor EVAP IN sensor connector from the PCB measure the resistance values between both terminals Re start after connecting the connector to the PCB As it is due to an indoor EVAP IN sensor defect replace it Yes No No Ex Room temp...

Page 195: ... How to check Is indoor EVAP OUT sensor connector separated from the PCB At that time is the resistance value significantly deviated from the temp table After separating indoor EVAP OUT sensor connector from the PCB measure the resistance values between both terminals Re start after replacing PCB Re start after connecting the connector to the PCB As it is due to an indoor EVAP OUT sensor defect re...

Page 196: ...hpressure 25kg cm OK Averagelowpressure 8 5kg cm OK Tcond out Tair out 3 C OK Tair in Teva out 2 C NO Tcond out Tair out 2 C OK Compressorinoperation Indoor Unitoperation ThermoOn OK Errordetails BreakawayErrorofIndoorHeat ExchangerEVAOutsensor 2 How to check HydroUnit BeforeandaftertheCompressoroperation EVAOuttempera turedifferenceislessthan3 C Restartoperationafterconnecting theconnectortothePC...

Page 197: ...ressure 8 5kg cm OK Tcond out Tair out 3 C OK Tair in Teva out 2 C NO Tcond out Tair out 2 C OK Compressorinoperation Indoor Unitoperation ThermoOn OK Errordetails BreakawayErrorofIndoorHeat ExchangerEVAOutsensor 2 How to check HydroUnit BeforeandaftertheCompressoroperation EVAOuttempera turedifferenceislessthan3 C Restart operation after connecting the connector to the PCB After separating the In...

Page 198: ...or details Simultaneous indoor heat exchanger s EVA IN OUT sensor dislocation error 2 During Heating operation Average high pressure 25kg OK Average low pressure 8 2kg OK Teva out Tair out 3 C NO Tair in Teva out 2 C NO Tcond out Tair out 2 C OK Compressor in operation Indoor unit operation Thermo On OK Error details Simultaneous Indoor heat exchanger s EVA IN OUT sensor dislocation error 2 How to...

Page 199: ...wer than 0 C for more than 20 minutes without cessation 2 How to check 1stdetection P703 OutdoorUnitdisplayonly 2nddetection x x x x x x The address of the error occurred indoor unit How to turn off the Hydro Unit E151 Hydro Unit PCB k1 k2 switch At the same time push for more than 4 seconds After resolving the cause of the error restart operation Excessive reset operation can cause damage to the ...

Page 200: ...if there is any rust on the surface of the electronic expansion valve with naked eyes then check the resistance between each terminal to find any wire breaking or short circuit 4 Press the RESET KEY K3 of the outdoor unit then see if the same error occurs 4 In case of closure problem operate the indoor unit in which the error has occurred 4 In case of opening problem please do not operate the indo...

Page 201: ...there is any rust on the surface of the electronic expansion valve with naked eye then check the resistance between each terminal to find any wire breaking or short circuit 4 Press the RESET KEY K3 of the outdoor unit then see if the same error occurs 4 In case of closure problem operate the indoor unit in which the error has occurred 4 In case of opening problem please do not operate the indoor u...

Page 202: ...t then check if drain pump operates vibrates during operation Normal operation Indoor unit s power reset after replacement Reassembly Floating Sensor Connector and reset Outdoor Unit power Indoor unit power reset required Normal operation Diagnosed as a defective Floating sensor Indoor unit s power reset after replacement Replace Drain pump Replace Drain pump Replace Indoor Unit PCB Error occurs O...

Page 203: ...determine below Indoor unit display Criteria Cause of problem Outdoor unit display 1 How to diagnose 1 Occurs when RPM valve fails to feedback to MICOM at a PID control type fan motor 2 How to check 1 Check HALL IC connector that carries out feedback of RPM value 2 If a fan motor operation capacitor is a PCB separating type check the connection terminal 3 Check the operational status of the fan mo...

Page 204: ... product problem but is displayed when the operational mode input in an indoor unit is different from current operational status other indoor unit s operational mode Check the operational mode of outdoor unit or other indoor unit then re enter or stop the operational mode of the relevant unit If it is necessary to apply a different operational mode to an indoor unit from others please stop other i...

Page 205: ...problem t Communication failure between EEPROM and MICOM Outdoor unit display Yes Are there any problems such as short or dewetting between EEPROM PIN If you restart after reentering model options and power reset does the error occur again Replace PCB Yes No Normal operation No 1 How to check Check the location of EEPORM by referring to the schematic diagram Replace PCB ...

Page 206: ...h model then enter correct options 4 4 17 Error due to confused use of Fahrenheit and Celsius Indoor unit display Operation Timer Fan Filter Defrost t JTTFE JOQVU PG SFNPUF DPOUSPMMFS PQUJPOT Criteria Cause of problem t JTQMBZ OVNCFS UZQF PG JOEPPS VOJU o PDDVST BNQ UZQF o BMM MBNQT GMBTI t 0DDVST JO BO JOEPPS VOJU XJUI FMTJVT TFUUJOH Outdoor unit display Check relevant remote controller options f...

Page 207: ...check up methods 1 How to check Yes Are an indoor unit address cooling heating position of the MCU SOL VALVE connector correctly connected Check the indoor unit address cooling heating position and make the correct connection Yes No Yes Replace MCU SOL VALVE BODY Is a coil of MCU SOL VALVE Correctly connected Check the coil connection and fasten it again No When you restart it after replacing MCU ...

Page 208: ...on Cable Connection Indoor unit display t Apply power 220V to the terminal of the indoor unit communication block F1 F2 Criteria Cause of problem t Check for Power input 220V for the Terminal block F1 F2 Outdoor unit display Check for disconnected line after turning off the Main power wall mount type ...

Page 209: ...fect Criteria Cause of problem t Check if the output of SPI Feedback is 12V Outdoor unit display 1 How to check 예 Is the SPI connector of an indoor unit separated from PCB Connect the connector to PCB and reoperate Yes No Replace Main PCB Can you measure 12V from 1 4 power with SPI connector being connected Replace SPI No Yes 1 4 ...

Page 210: ...the relevant MCU ports Check if the indoor unit usage setup switch is turned on for the MCU port connected to the indoor unit Outdoor Unit Display No change of EVA IN or wrong EVAN IN change during pipe inspection No change of EVA OUT or wrong EVA OUT change during pipe inspection Indoor Unit Display Judgment Method t 3FGFS UP UIF KVEHNFOU NFUIPE CFMPX Special Cause t 5IF MJRVJE QJQF HBT QJQF PG U...

Page 211: ...ble whichconnectstheoutdoorunittotheindoorunit Ifthereisnopeculiarity thenconnecttheindoorunitsonebyone tofindtheindoorunitthatisinterferingwiththecommunicationfor inspectionandchangetheindoorunitPCB Isthevoltagebetween the2cablesasquarewavewith DC 0 7Vormore Arethenumberof actualinstalledindoorunitsandthesetvalueforthe installationquantitysetup switchthesame Correctlysettheindoorunitinstallationq...

Page 212: ...connects theoutdoorunittotheindoornit andmeasure the2outdoorunitcableswithascope Connectthecommunicationcableagainto connecttheoutdoorunittotheindoorunit RemoveallthecommunicationconnectorsonthePCBof theindoorunit andconnectthemonebyonetofind theindoorunitwhichinterfereswiththecommunication tocheckandchangetheindoorunitPCB Aftertwominutes findtheindoorunitwhichdisplays thecommunicationerrorandchec...

Page 213: ...display JudgmentMethod Causeofproblem Outdoorunitdisplay Reseterror Key3 Checktheoutdoorunitwitherror U200 U201 U202 U203 Isthepowersupplynormal 15V 5V Checkwiringofoutdoorunit communicationcable CheckK13andK14setup optionsforoutdoorunit ReplacePCB Checkthepower Changewiringorconnect Changesettings Yes Yes Yes No No No 1 Causeofproblem EssentialRequirementsbeforeChangingPCBinCaseofCommunicationErr...

Page 214: ...e MCUs one by one to find the MCU which interferes with the communication to check and change the MCU PCB Is the voltage between the 2 cables a square wave with DC 0 7V or more Are the quantity of the actually installed MCUs and the set value of the installation quantity setup switch the same Correctly set the installation quantity setup switch of the outdoor unit MCU and press the reset key K3 of...

Page 215: ...wer No Yes DidtheCommunicationconnector breakawayfromthePCB RestartoperationaftercheckingtheInverter PCB2CN31andPCB2CN32Communication wire Connector 3 4PinShort ServiceafterturnofftheMainPower No Yes Yes IsInverterPCB1CN32andInverterPCB CN31connectoraccuratelyconnected 1 ChecktheInverterPCB1CN32 CN91andFan PCBCN12Communicationwire Connector 2 RestartoperationafterconnectingtheHubPCB CN97andFanPCBC...

Page 216: ...spondtotheinvokedMainPCB Causeofproblem C BoxinternalInverterPCB FanPCB HubPCBdefective 1 Causeofproblem ReplaceHubPCB ReplaceFanPCB FanPCBTXpart Breakage ReplaceConnectionwire Checktheconnectionstatus CN12connector FanPCBCN13connection No No No Yes Yes Yes Connectionwireof HubPCB MainPCBdidconfirmation Verifythebrokenwire LightingofFanPCBLD41didconfirmation IsFanPCBCN13connectoraccuratelyconnecte...

Page 217: ...t to the MCU and measure the 2 cables of the outdoor unit with a scope Connect the communication cable which connects the outdoor unit to the MCU again remove all communication connectors from the MCU PCB Connect each unit one by one and find the MCU which interferes with communication to check and change the MCU PCB After two minutes find the MCU which displays the communication error and check i...

Page 218: ...g them consecutively Outdoor unit display 1 How to check Find an MCU that is composed as the following picture to carry out assembly of branch part again After completing the re setting press K3 button on the button to reset or turn it off to restart Indoor unit display MCU BOX 0 MCU PCB OFF MCU address setup ON Setting error Indoor unit Indoor unit address Branch part use setup 4 2 1 2 5 6 0 Bran...

Page 219: ...mes in MCU Outdoor unit display 1 How to check Find an MCU that is composed as the following picture to carry out assembly of branch part again After completing the re setting press K3 button on the button to reset or turn it off to restart Indoor unit display MCU BOX 0 MCU PCB OFF MCU address setup ON Setting error Indoor unit Indoor unit address Branch part use setup 4 2 2 2 5 6 0 Branch A 4 B 2...

Page 220: ... 6 SFHJTUFSFE JOEPPS VOJUT Outdoor unit display 1 How to check Find an MCU that is composed as the following picture to carry out assembly of branch part again After completing the re setting press K3 button on the button to reset or turn it off to restart Indoor unit display MCU BOX 0 MCU PCB OFF MCU address setup ON Indoor unit Indoor unit address Branch part use setup 4 4 2 1 5 6 0 Branch A 4 B...

Page 221: ...hen turn it on again Indoor Unit Display MCU BOX 0 Outdoor Unit PCB MCU PCB OFF MCU Address Setup MCU Address Setup Setup for Indoor Quantity Used MCU Address Setup Setup for Indoor Quantity Used ON Indoor Unit Indoor Unit Indoor Unit Address Setup for Using Branch Sphere 4 4 2 1 5 5 1 6 0 Branch Sphere A 4 B C D E 5 F 6 MCU BOX 1 MCU PCB OFF ON 1 3 7 9 0 0 1 Branch Sphere A B D E 0 7 F 1 MCU BOX ...

Page 222: ... turn off to restart MCU BOX 0 MCU PCB OFF MCU address setup ON Indoor unit address Branch part use setup 4 2 2 0 5 6 0 Branch A B C D E F MCU BOX 1 MCU PCB OFF MCU address setup ON Indoor unit address Branch part use setup 4 0 1 2 5 7 1 Branch A B C D E F t 3FQFBUFE JOEPPS VOJU address Criteria Cause of problem t 0DDVST XIFO BO JOEPPS VOJU BEESFTT TFUVQ TXJUDI JO 6 IBT CFFO PWFSMBQQFE Outdoor uni...

Page 223: ...Not Used After completing resetting press the outdoor unit s K3 button to reset or turn off to restart t 1JQF JT OPU JOTUBMMFE UP UIF JOEPPS VOJU XJUI BTTJHOFE address on MCU Criteria Cause of problem t 0DDVST XIFO 6 1 1 JT TFU BT CFJOH VTFE ZFU OPU DPOOFDUFE UP BO JOEPPS VOJU Outdoor unit display Indoor unit display MCU BOX 1 MCU PCB OFF ON 1 3 7 9 0 0 1 Branch A B C D E 0 F Operation Timer Fan F...

Page 224: ... JOEPPS VOJU JT SFHJTUFSFE Outdoor unit display 1 How to check Check the actual use of the branch part If it is used turn on the Dip switch for branch part setup After completing resetting press the outdoor unit s K3 button to reset or turn off to restart Indoor unit display MCU BOX 1 MCU PCB OFF MCU address setup ON Indoor unit Indoor unit address Branch part use setup 4 4 2 1 5 6 0 Branch A 4 B ...

Page 225: ...door unit display 1 How to check Check the number of indoor units connected to MCU then readjust the switch for the number of units After completing resetting press the outdoor unit s K3 button to reset or turn off to restart Indoor unit display MCU BOX 0 Outdoor unit PCB MCU PCB OFF MCU address setup Indoornumbersetup MCUnumbersetup ON Indoor unit address Branch part use setup 1 2 2 1 8 6 1 6 0 B...

Page 226: ...nsorconnectorbreakaway fromthePCB Didtheresistance valuesignificantlystrayfromthefollowing temperaturetable Afterseparatingtheoutdoortemperaturesensor connectorfromthePCB measuretheresistancevalue betweentheterminals RestartoperationafterreplacethePCB Restartoperationafterconnecting theconnectortothePCB Replacethissinceitisthedefectiveof theoutdoortemperaturesensoritself Yes No No Yes Temperature ...

Page 227: ...temperature table to the next After separating the outdoor temperature sensor connector from the PCB measure the resis tance value between both terminals Restart after replacing the PCB Restart after connecting the connector to the PCB As it is due to a problem with the outdoor temperature sensor replace it Yes No No Yes Yes Temperature C Resistance KΩ 70 60 50 40 30 21 10 0 10 2 2 3 0 4 2 5 8 8 3...

Page 228: ...dOut sensorconnectorbreakawayfrom thePCB Didtheresistance valuesignificantlystrayfromthefollowing temperaturetable AfterseparatingtheoutdoorCondOut sensorconnectorfromthePCB measuretheresistance valuebetweenthetwoterminals RestartoperationafterreplacethePCB Restartoperationafterconnecting theconnectortothePCB Replacethispartasitisthedefectiveofthe outdoorCondOutsensoritself Yes No No Temperature C...

Page 229: ...ingoperation Eachoftheconditionsbelowneedstobesatisfiedformorethan20minutes Highpressureaverage 25kg cm OK Lowpressureaverage 8 5kg cm OK Teva out Tair in 3 C OK Teva in Tair in 2 C OK Tcond out Tair out 0 C NO Everycompressorisinoperation indoorunitoperationandThermoOn OK ErrorContent OutdoorCondOutsensorbreakawayerror No DefectiveSensor ReplaceSensor No BlockedSensorPath ChangeheatexchangerAss y...

Page 230: ...hanging PCB Restart operation after connecting the connector to PCB Change this part as it is the fault of the discharge temperature sensor itself Yes No No Temperature C 130 120 100 80 60 25 20 10 0 Resistance KΩ 8 9 11 2 18 5 32 0 59 0 200 0 242 0 362 0 553 0 4 4 41 Digital Compressor Discharge Temperature Sensor Error OPEN SHORT Operation Reservation Blast Filter Defrost t JHJUBM DPNQSFTTPS EJT...

Page 231: ... compressor discharge temperature sensor break away from the PCB Did the resistance value significantly stray from the following temperature table Separate the connector for the outdoor constant rate compressor discharge temperature sensor from the PCB and measure the resistance value between the 2 terminals Restart operation after changing PCB Restart operation after connecting the connector to P...

Page 232: ...schargeorTopTemperaturesensorconnector breakawayfromthePCB Didtheresistance valuesignificantlystrayfromthefollowing temperaturetable AfterseparatingtheCompressorDischargeor TopTemperaturesensorconnectorfromthePCB measuretheresistancevaluebetween thetwoterminals RestartoperationafterreplacethePCB Restartoperationafterconnecting theconnectortoPCB Replacethispartasitisthedefectiveofthe CompressorDisc...

Page 233: ...ature right before the start of compressor Tsump ini current compressor s SUMP temp Tsump real When the difference between Tsump ini and Tsump real is an absolute value so that it cannot be more than 2 C In other words the condition of Tsump real Tsump ini 2 C has been satisfied for 60 minutes since a compressor started it is diag nosed as an error After 60 minutes of compressor operation there wi...

Page 234: ...ghest issetatTsuc ini andthesuctiontemperatureofthecurrentCompissetatTsuc real itisconsideredtohaveanerroriftheconditionof Tsuc real Tsuc ini 2 Cismaintainedfor30minutes Suction temperature sensor breakaway defective Outdoorunitdisplay 1 Causeofproblem Complete Is Suction sensor and sensor Holder accurately attached Is Suction sensor resistance value reasonable Refer to E231 DefectiveSensor Replac...

Page 235: ... SUMP sensor break away from the PCB Did the resistance value significantly stray from the following temperature table Separate the connector of the outdoor SUMP sensor from the PCB and measure the resistance value between the two terminals Restart operation after changing PCB Restart operation after connecting the connector to PCB Change this part as it is the fault of the outdoor SUMP sensor its...

Page 236: ...erissuppliedor2minutesafterRESET andonlywhensetisstopped 2 AnOpen Shorterrorwilloccuriftheinputvoltagestandardrangeof0 5V 4 95Visexceeded 2 InspectionMethod ReplaceHighPressuresensor Pleasere inspectafterconnecting theconnectortothePCB No Yes DidtheHighPressure sensorconnectorgetdisconnected fromthePCB Refillrefrigerantaftervacuum No Yes Isthererefrigerantinsidetheset Pleasecheckbyconnectingthemen...

Page 237: ...werissuppliedor2minutesafterRESET andonlywhensetisstopped 2 AnOpen Shorterrorwilloccuriftheinputvoltagestandardrangeof0 5V 4 95Visexceeded 2 InspectionMethod Replace LowPressuresensor Pleasere inspectafterconnecting theconnectortothePCB No Yes DidtheLowPressuresensorconnector getdisconnectedfromthePCB Refillrefrigerantaftervacuum No Yes Isthererefrigerantinsidetheset Pleasecheckbyconnectingthemenu...

Page 238: ...eOutdoorSuctionsensorbreakaway fromthePCB Didtheresistance valuesignificantlystrayfromthefollowing temperaturetable SeparatetheconnectoroftheOutdoorSuctionsensor fromthePCBandmeasuretheresistancevalue betweenthe2terminals RestartoperationafterreplacethePCB Restartoperationafterconnecting theconnectortoPCB Replacethispartasitisthedefectiveofthe OutdoorSuctionsensoritself No No Yes Yes Temperature C...

Page 239: ...Temperaturesensorbreakaway fromthePCB Didtheresistance valuesignificantlystrayfromthefollowing temperaturetable SeparatetheconnectoroftheLiquidPipeTemperature sensorfromthePCBandmeasuretheresistancevalue betweenthe2terminals RestartoperationafterreplacethePCB Restartoperationafterconnecting theconnectortoPCB Replacethispartasitisthedefectiveof theLiquidPipeTemperaturesensoritself No No Yes Yes Tem...

Page 240: ...eEVIIn Temperaturesensorbreakawayfrom thePCB Didtheresistancevalue significantlystrayfromthefollowing temperaturetable SeparatetheconnectoroftheOutdoorEVIIn TemperaturesensorfromthePCBandmeasure theresistancevaluebetweenthe2terminals RestartoperationafterreplacethePCB Restartoperationafterconnecting theconnectortoPCB Replacethispartasitisthedefectiveofthe OutdoorEVIInTemperaturesensoritself No No ...

Page 241: ...uresensorbreakaway fromthePCB Didtheresistancevalue significantlystrayfromthefollowing temperaturetable SeparatetheconnectoroftheOutdoorEVIOut TemperaturesensorfromthePCBandmeasurethe resistancevaluebetweenthe2terminals RestartoperationafterreplacethePCB Restartoperationafterconnecting theconnectortoPCB Replacethispartasitisthedefectiveofthe OutdoorEVIOutTemperaturesensoritself No No Yes Yes Tempe...

Page 242: ...Suction 2 sensor break away from the PCB Did the resistance value significantly stray from the following temperature table Separate the connector of the Suction 2 sensor from the PCB and measure the resistance value between the two terminals Restart operation after changing PCB Restart operation after connecting the connector to PCB Change this part as it is the fault of the outdoor Suction 2 sens...

Page 243: ...s cut Service valve locked Excessive refrigerant JudgmentMethod Valueofthehighpressuresensorisdetectedat40kg cm ormore Outdoorunitdisplay IstheS net estimatedvalueandtheManifold Gaugevalueinrange AretheIndoorUnit andOutdoorUnitEEVnormally operating Arethereanyblockageinside thepipe filteretc Checktherefrigerantamount AretheOutdoorFan operatingnormallyforthecoolingandtheIndoor Fanoperatingnormallyf...

Page 244: ...ssforCooling JudgmentMethod Inspectionwhenthevalueoflowpressuresensoris0 8kg cm orlessforairconditioningand0 6kg cm forheating Outdoorunitdisplay IstheS net estimatedvalueandtheManifold Gaugevalueinrange AretheIndoorUnitandOutdoor UnitEEVnormallyoperating Arethereanyblockageinside thepipe filteretc Checktherefrigerantamount Isthereanyleakagein theLiquidPipeValveorthedischargecheck valveofthenot go...

Page 245: ... the compressor Refer to the solution method for the liquid compression prevention error E477 Re connect and check the connector Yes Yes Yes No No Re attach and check sensor Check by referring to the other temperature sensor problem check up methods Outdoor Unit Display Indoor Unit Display Operation Reservation Blast Filter Defrost Judgment Method t BJOUBJO TVNQ UFNQFSBUVSF PG PS NPSF GPS GJWF NJO...

Page 246: ...not go endoutdoorunit JudgmentMethod Whenvalueofcompressordischargetemperaturesensorischeckedat120 Cormore Outdoorunitdisplay Istheresistance valuenormalfortheCompressor DischargeTemperaturesensor RefertoE251 Commissioning Areallservicevalvesopen AretheIndoorUnit andOutdoorUnitEEVnormally operating Arethere anyblockageinsidethepipe filteretc Checktherefrigerantamount ReplaceCompressorDischarge Tem...

Page 247: ...tbeproperlyconnected Causeofproblem Check the input wiring EMI Fuse short ReplaceInverterPCB PowerOff Yes Yes No Yes DidtheMain TerminalBlockandPowerR S T Nis connectedproperly PowerBOXTerminal Checkthephase to phase connection380VoftheR S Tandthenrestart N phasemustbeproperlyconnected No No No Yes Connectionandthenrestartit Lowvoltageerrorduringthisinitialcharge ReplaceFuse iftherectifierdiodeoft...

Page 248: ...herefrigerant Yes Yes No IstheS netestimatedvalueandthe ManifoldGaugevalueinrange ConnectS netandManifoldGauge essentialrequirement No No No No Outdoorunitdisplay Indoorunitdisplay Operation ስ Reservation ስ Blast ስ Filter Defrost JudgmentMethod Whencompressionratio highpressure 1 lowpressure 1 lessthan1 5andlastsfor10minutesormore Differentialpressure highpressure lowpressure lessthan0 4MPa gandla...

Page 249: ...EVIEEVconnectoraccuratelyconnectedtoPCB Yes No Reassemblecoil IsEEVcoilaccuratelyinstalled Yes Breakdown ReplaceIntercooler ChecktheIntercoolerleakage Normal ChecktheIndoorUnitEEVleakage Breakdown ReplaceIndoorUnitEEV Normal Reinstallpipe ChecktheconnectionforIndoorUnitPipe Connectliquidpipe gaspipedirectly No ReplaceEVIEEV ChecktheEVIEEVleakage Yes ఐIndoorEEVleakagecanbeeasilycheckedduringtheoper...

Page 250: ... occur if the input voltage standard ranges of 0 5V 4 95V of both the high and low pressure sensors are exceeded 3 Will occur if the measured value of both high and low pressure sensors is 1kgf cm2G 1 Inspection method Did the high low pressure connector get disconnected from the PCB Out of the PCB high pressure sensor terminals is there voltage between pins 3 and 4 5V Replace high low pressure se...

Page 251: ... prohibits the operation in outdoor temperature over 15 C Outdoor unit display 1 How to check The above error code is not caused by a product s problem but a function to protect the product by limiting the available tempera ture range so please refer to the usable temperature range in the product manual If the error code is displayed despite a condition that does not belong to any of the above dia...

Page 252: ...hManifoldgauge Reconnectandcheckconnector No No Yes Yes Supplementorrechargetherefrigerant Outdoorunitdisplay Indoorunitdisplay Operation ስ Reservation ስ Blast ስ Filter Defrost JudgmentMethod OperationshouldbeforbiddenifHighPressuresensorvalueoftheMainUnitbeforethepumpdownisstartedat2 2kg cm g orbelowforair conditioningand1 0kg cm Gorlessforheatingforthreeconsecutiveseconds Restartingoperationisno...

Page 253: ...me then display E445 Outdoor Unit Display Indoor Unit Display Judgment Method t 3FGFS UP UIF KVEHNFOU NFUIPE CFMPX Special Cause t POOFDUPS 1 JT OPU DPOOFDUFE 4VNQ TFOTPS DPNQSFTTPS TFQBSBUFE 0XO QSPCMFN PG No Connect CCH connector to PCB Is the CCH connector connected to PCB Yes No Attach the sump sensor to the lower part of the compressor Is the sump sensor attached to the lower part of the comp...

Page 254: ...orS W Causeofproblem Compressorconnectionerror DefectiveCompressor DefectivePCB PowerOffandthenRestart ReplaceFanPCB Yes Istheresistance valuebetweendifferentphasesof anMotor U V V W W U lessthan10Ω ReplaceFanMotor No Yes Istheresistancebetweenthebodyof FanMotorandchassisMΩ ReplaceFanMotor No Yes DoestheCompressorconnection wireproperlyconnect Checktheconnectionwire No 1 Causeofproblem ...

Page 255: ... PowerOnandthenCommissioning PowerOff ReplaceFanPCB Yes Didtheerroroccurs EndofService No Yes Didyoucheck theforeignobjectsontheFan rotarywing Removetheforeignobjectsandrestart No Yes Fandorotatebyhand ReplaceFanMotor No No Ifyourotatethefanbyhand thenoiseoccurs ReplaceFanMotor Yes Yes Connectionwireof FanMotordidconfirmation Checktheconnectionstatusof theFan1andFan2 Checktheconnectionstatus andth...

Page 256: ...or Indoorunitdisplay Operation ስ Reservation ስ Blast ስ Filter Defrost Momentary stop of compressor due to momentary blackout JudgmentMethod Causeofproblem Momentarystopofcompressorduetomomentaryblackout Outdoorunitdisplay 1 Precautions ReplaceHubPCBorMainHubConnectionwire ...

Page 257: ...seofprob lem Defectiveconnectionwire DefectiveFanMotor DefectivePCB Defectiveinstallationconditions PowerOff PowerRestart ReplaceFanMotor Yes Didtheerroroccurs EndofService No Yes Connectionwireof FanMotordidconfirmation Verifythatthewirefolded ortheconnectionis detached Checktheconnectingwireandrestartit No Yes Isthereanythingstrangein appearanceFanMotor ReplaceFanPCB No 1 Causeofproblem ...

Page 258: ... NPSF compared to the instructed value Indoor Unit Display Judgment Method Special Cause Outdoor Unit Display 1 Inspection Method No Yes No Yes No Yes No Yes Connect connector as normal Is connection for feedback connector normal Re connect connector Is the connection for the fan connector normal Re connect connector Is connection for fan power condenser normal Complete Is the motor operating cond...

Page 259: ...lem HeatsinkandIPMassemblydefective Defectiveheatsinkcooling PowerOff Yes Didchecktheforeignobjectsbetween theheatsinkpin Removeforeignobjects Coldheatsinkassemblydefectoccurs No Yes Istheboltoftheheatsinkfullytightened TightenBolt No Yes Didchecktheforeignobjectsbetween theheatsinkandIPM No 1 Causeofproblem Complete Removeforeignobjectsand applytheheatsinkgrease Andthenreassembly ...

Page 260: ...down 3 Need to check if there is a problem with fan load status 4 4 72 Counter Rotation Error of an Outdoor Fan Motor t VF UP XJOE UIBU DBO SVO UIF GBO DPVOUFS XJTF t 8IFO UIF SPUBUJPOBM EJSFDUJPO PG BO PVUEPPS GBO NPUPS JT DPVOUFS DMPDLXJTF CFGPSF PQFSBUJOH Indoor unit display Criteria Cause of problem Outdoor unit display 1 How to diagnose 1 Check if the start instruction of outdoor unit s fan i...

Page 261: ... Judgment Method Special Cause Outdoor Unit Display 1 Inspection Method Is the CT sensor connector resistance normal Are all the CT values 0 when the compressor is stopped Is the CT value measured at 20A or more during the operation Is the measured value from the separate ammeter the same as the CT sensor value Test Operation Inspection Complete Change CT sensor Change CT sensor Change CT sensor B...

Page 262: ...PowerOffandthenRestart Continue Yes IsHotGasBypassValvestartup theinitialpowerisapplied HubReplacePCB No Yes HotGasBypassValveinitial startupdoesitwork ReplaceHotGasBypassValve No Yes Istheresistance valuebetweendifferentphasesof compressor U V V W W U lessthan2Ω ReplaceCompressor No Yes Istheresistance betweenthebodyofCompressorand chassisMΩ ReplaceCompressor No Yes DoestheCompressor connectionwi...

Page 263: ...orunitinstalledproperly Removetheobstaclesandcheck thestatusoftheinstallation No Yes Istemperature sensorlocationandthemeasurement valuenormally PowerOff andthenreplacement orcorrectionofthesensorlocation No Yes Istheresistancevalue betweenphaseofCompressorwire U V V W W U lessthan2Ω ReplaceCompressor No Yes Istheresistancebetween thebodyofCompressorand chassisMΩ ReplaceCompressor No Yes DoestheCo...

Page 264: ...short DC LinkOvervoltage Lowvoltageoccurs Causeofproblem Checktheinputwiring EMIFuseshort PowerOff Yes Yes 380Visthevoltage betweenterminalblocks R S Twire PowerR S T Nwirevoltagecheckandrestartit ReplaceInverterPCBandthenrestartit Checkthe3 phasesensingcircuitpart ReplaceFuse iftherectifierdiodeof theinverterPCBisnormal No No DidtheEMIPCBFuseisshort 1 Causeofproblem ...

Page 265: ...gerror MomentaryOvervoltage Lowvoltageoccurs PCBvoltagesensingcircuitdefective PowerOff Yes IsPowerconnectionaccuratelyconnected PowerCablere connection No Yes IsReactoraccuratelyconnected ChecktheReactorconnection No No DidtheFuseisshort ReplaceFuse Yes Yes IsEMIPCBandInverterPCB accuratelyconnected PowerOffandthenre connection No Yes IsInverterPCBand FanPCBDC Linkvoltageconnectionwire accurately...

Page 266: ...k and change the discharge valve leakage Re check the sensor connection attachment No Normal Normals Yes Breakdown Breakdown Resolve the relevant EEV problem Resolve the relevant valve problem Outdoor Unit Display Indoor Unit Display Judgment Method t 46 1 UFNQFSBUVSF EFDSFBTF 4 NJO Special Cause t 7 7 BOE TVQFS DPPMFS MJRVJE CZQBTT WBMWF MFBLBHF SFGSJHFSBOU PWFSDIBSHF JOEPPS VOJU 7 MFBLBHF direct...

Page 267: ...B Connectorerror DefectiveMotor 1 Causeofproblem FANReplacePCB Reinstallafterremovingobstacle No Yes Yes Istheoutdoorunitinstalledproperly OutdoorFanMotor No Yes Istheresistancevalue betweendifferentphasesofFanMotor UࣖV VࣖW WࣖU lessthan10Ω OutdoorFanMotor Checktheconnectionwire CheckthestatusoftheconnectionUVW No No Yes Yes Istheresistancebetweenthebodyof FanMotorandchassisMΩ DoestheFanMotorconnec...

Page 268: ...Currentsensor OUTDOORFANPCB FAN1OutputCurrentsensor OUTDOORFANPCB FAN2OutputCurrentsensor JudgmentMethod SensorOutputdetection Judgedasanerrorifthedetectedvalueismorethan2 8Vor0 2Vlessthan Causeofproblem Inputvoltagedefective PCBvoltagesensingcircuitdefective PowerOff ReplaceInverterPCB ReplaceFanPCB Yes No IsPowerconnectionaccuratelyconnected E485orE385 E468orE368 E493orE393 PowerCablere connecti...

Page 269: ...oorunitdisplay JudgmentMethod N phasewiringerrorandEMIFuseshort DC LinkOvervoltage Lowvoltageoccurs Causeofproblem Checktheinputwiring EMIFuseshort PowerOff Yes IsInverterPCBCN15 andFanPCBCN11DC Linkvoltageconnection wireaccuratelyconnected Connectionandthenrestartit No ReplaceFanPCB 1 Causeofproblem ...

Page 270: ...serror HallICwiredisconnection Defectivecircuitpartsanddefectivemanufacturing FanMotordefective 1 Causeofproblem ReplaceFanPCB Restart Whentheerrorisrepeated replacetheFanMotor EndofService No Yes Yes Didtheerroroccurs Checktheconnectingwireandrestartit No Yes Connectionwireof HALLICdidconfirmation Verifythatthewirefolded ortheconnectionis detached Checktheconnectingwireandrestartit No Yes HALLICo...

Page 271: ...3000 1 80 50 2000 1 47 60 1600 1 29 70 1200 1 07 80 750 0 76 90 650 0 68 Complete Yes Yes Yes Applytheheatsinkgreaseandthenreassembly No Didproperlyapplytheheatsinkgrease BetweentheheatsinkandtheIPM Yes TightenBolt Screw Removeforeignobjectsandapplytheheatsink grease Andthenreassembly No No Istheboltoftheheatsinkfullytightened Didchecktheforeignobjectsbetweentheheatsink andIPM ReplaceInverterPCB E...

Page 272: ... PriortoJuly2011 ifthesoftwareversionoftheindoorunit Causeofproblem Checkthesoftwareversionoftheindoorunit Checkwhetherthesupportoftheindoorunit PowerOn Yes Yes Doesconnected indoorunitbecomecompatiblewith DVMINV Replacetheindoorunitthatis compatiblewiththeDVMINV Softwareupgrade ReplaceindoorunitPCB No No Issoftwareversionof indoorunitsinceJuly 2011 1 Causeofproblem ...

Page 273: ...is any rust on the surface of the coil of an electronic expansion valve with the naked eye and then check the resistance between each terminal to find any wire breaking or short circuit 4 Press the RESET KEY K3 of the outdoor unit then see if the same error occurs 4 In case of closure problem operate the indoor unit in which the error has occurred 4 In case of opening problem please do not operate...

Page 274: ...ectlypluggedintothemainbody 3 Checkifthereisanyrustonthesurfaceofthecoilofanelectronicexpansionvalvewiththenakedeye andthenchecktheresistancebetween eachterminaltofindanywirebreakingorshortcircuit 4 PresstheRESETKEY K3 oftheoutdoorunitthenseeifthesameerroroccurs Incaseofclosureproblem operatetheindoorunitinwhichtheerrorhasoccurred Incaseofopeningproblem pleasedonotoperatetheindoorunitinwhichtheerr...

Page 275: ...nspection Method Is the electronic expansion valve wire connected to the PCB After measuring the coil terminal resistance is there a disconnection or short circuit inside the coil Is the electronic expansion valve coil connected to the main body properly After Resetting the outdoor unit does an error occur even after running it again with the same combination Connect to PCB and run again No No Yes...

Page 276: ...ss of where error occurred 1 Inspection Method Is the electronic expansion valve wire connected to the PCB After measuring the coil terminal resistance is there a disconnection or short circuit inside the coil Is the electronic expansion valve coil connected to the main body properly After Resetting the outdoor unit does an error occur even after running it again with the same combination Connect ...

Page 277: ...Samsung Electronics 5 1 5 PCB Diagram and Parts List 5 1 Indoor Unit 5 1 1 Slim 1 way cassette type medium 22 1 2 3 4 5 16 11 17 6 18 7 19 8 20 9 12 14 13 23 15 21 10 ...

Page 278: ...ROM_SI 7 EEPROM_CLK 1 DC12V 2 VENT SIGNAL OUTPUT GND 1 DC12V 2 HUMAN SENSOR COMM TXD 3 HUMAN SENSOR COMM RXD 4 GND 1 GND 2 GND 3 SPI POWER OUTPUT DC12V 1 DC5V 2 GND 3 MOTOR FEEDBACK 1 DC12V 2 5 LOUVER SIGNAL OUTPUT 6 DC12V 7 10 LOUVER SIGNAL OUTPUT 1 DC12V 2 5 LOUVER SIGNAL OUTPUT 1 DC12V 2 5 LOUVER SIGNAL OUTPUT 1 4 EEV SIGNAL OUTPUT 5 DC12V 6 DC12V 1 POWER L 2 POWER N 1 COM1 F1 2 COM1 F2 3 V1 DC...

Page 279: ...PCB Diagram and Parts List Samsung Electronics 5 3 5 1 2 2 way cassette type 4 3 1 7 9 10 13 14 17 18 21 2 5 8 6 13 11 12 15 16 19 20 ...

Page 280: ...HERMOR INPUT 2 GND 1 Flow SW INPUT 2 GND 1 2 12V 3 6 BLADE CONTROL 7 8 12V 9 12 BALDE CONTROL 1 12V 2 3 COM 5 GND 1 4 EEV CONTROL 5 6 12V 1 2 GND 3 SPI CONTROL 1 FUSE CHECK 2 GND CN100 AC INPUT CN902 SSR MOTOR1 CN905 SSR MOTOR2 CN905 SSR FAN FEED BACK CN903 FAN FEED BACK CN804 VENT CN103 DRAIN PUMP CN101 EARTH CN413 THERMO CN901 DISPLAY CN412 ROOM THERMO CN411 FLOW SW CN301 MICOM DOWNLOAD CN2 BLAD...

Page 281: ...PCB Diagram and Parts List Samsung Electronics 5 5 5 1 3 4way cassette mini 4way casette type Slim 1 way cassette type large 22 1 2 3 4 16 5 11 6 7 8 20 10 13 15 23 17 18 19 9 12 21 14 ...

Page 282: ...LECT 5 EEPROM_SO 6 EEPROM_SI 7 EEPROM_CLK 1 DC12V 2 VENT SIGNAL OUTPUT GND 1 DC12V 2 HUMAN SENSOR COMM TXD 3 HUMAN SENSOR COMM RXD 4 GND 1 ROOMTHERMISTOR 2 GND 1 4 EEV SIGNAL OUTPUT 5 DC12V 6 DC12V 1 DC12V 2 5 LOUVER SIGNAL OUTPUT 1 DC12V 2 5 LOUVER SIGNAL OUTPUT 6 DC12V 7 10 LOUVER SIGNAL OUTPUT 1 DC12V 2 5 LOUVER SIGNAL OUTPUT 1 GND 2 GND 3 SPI POWER OUTPUT DC12V 1 POWER L 2 POWER N 1 COM1 F1 2 ...

Page 283: ...PCB Diagram and Parts List Samsung Electronics 5 7 5 1 4 360 cassette MAIN PCB 1 2 3 4 5 6 7 8 9 10 11 12 13 ...

Page 284: ... CN501 1 2 BUZZER 3 CENTER3COLORLED BLUE 4 CENTER3COLORLED GREEN 5 CENTER3COLORLED RED 6 CENTERLED ICEBLUE 7 10 CENTERLED CN502 1 12V 2 6 VISUALIZATIONLED 7 11 REMOTECONTROLRECEIVER PBACONNECTION CN201 EEPROM CN81 83 AIM B14 CN950 SUCTIONFAN CN412 INDOOR TEMPERATURESENSOR 1 SGND 2 NC 3 5V 4 EEPROM_SELECT 5 EEPROM_SO 6 EEPROM_SI 7 EEPROM_CLK CN81 1 3 12V 2 ERRORCHK 12VJUNCTION 4 COMPCHK 12VJUNCTION...

Page 285: ...ORDCONNECTION N L2 1 EARTH PBA SETGND CN81 1 310V DCLINK 2 NC 3 PGND 4 15V VCC 5 MAINFANMOTORPWM 6 MAINFANMOTORF B 1 FUSESHORT OPENCHK 2 SGND TB300 COMM T B CN100 POWERTOMAINCONNECTOR 1 F1 INDOOR OUTDOORCOMM 2 F2 INDOOR OUTDOORCOMM 3 V1 12V 4 V2 SGND 5 F3 WIREDREMOTECONTROL COMM 6 F4 WIREDREMOTECONTROL COMM CN81 1 3 12V 2 ERRORCHK 12VJUNCTION 4 COMPCHK 12VJUNCTION CN83 1 EXT_CTRL 5V 2 SGND ...

Page 286: ...ISUALIZATION LED_SECTION3 LAYER1 5 VISUALIZATION LED_SECTION3 LAYER2 6 VISUALIZATION LED_SECTION3 LAYER3 CN501 DISPLAY2 1 BUZZER1 2 BUZZER2 3 CENTER 3 COLOR LED BLUE 4 CENTER 3 COLOR LED GREEN 5 CENTER 3 COLOR LED RED 6 CENTER LED ICE BLUE 7 VISUALIZATION LED_SECTION1 LAYER1 8 VISUALIZATION LED_SECTION1 LAYER2 9 VISUALIZATION LED_SECTION1 LAYER3 10 VISUALIZATION LED_SECTION2 LAYER1 ...

Page 287: ...PCB Diagram and Parts List Samsung Electronics 5 11 5 1 7 Duct type Slim Duct 2 Ŷ MAIN PCB 1 4 6 8 7 9 11 12 13 14 15 17 19 18 16 10 2 3 5 ...

Page 288: ... BZ_2 1 12V 2 GND 3 VCC 4 MOTOR SIGNAL PWM1 OUT 5 R903 CONTROL SIGNAL 6 INRUSH OUT 1 GND 2 NO USED 3 VCC 4 EEPROM_SELECT 5EEPROM_SO 6 EEPROM_SI 7 EEPROM CLK 1 4 CONTROL SIGNAL 5 6 12V 1 12V 2 VENT OUT 1 GND 2 GND 3 CONTROL SIGNAL 4 NOT USED 1 12V 2 COM2_PCTRL_MICOM 3 COM2_VCHECK_A 4 COM2_VCHECK_B 5 COM2_MICOM_AD 6 VCC 7 COM2_ENABLE 8 COM2_C 9 COM2_D 10 COM2_Tx 11 COM2_Rx 12 GND 1 2 COM1 3 12V 4 GN...

Page 289: ...List Samsung Electronics 5 13 Duct type Slim Duct 2 cont Ŷ Sub PCB 1 1 12V 2 COM2_PCTRL_MICOM 3 COM2_VCHECK_A 4 COM2_VCHECK_B 5 COM2_MICOM_AD 6 VCC 7 NO UESD 8 COM2_C 9 COM2_D 10 COM2_TXD 11 COM2_RXD 12 GND CN313 2WIRES COMM ...

Page 290: ...PCB Diagram and Parts List 5 14 Samsung Electronics 5 1 8 Duct type Slim Duct 3 MAIN PCB 8 5 3 2 1 6 7 4 10 11 12 13 14 15 17 16 18 9 ...

Page 291: ...1 GND 2 NO USED 3 VCC 4 EEPROM_SELECT 5EEPROM_SO 6 EEPROM_SI 7 EEPROM CLK 1 4 CONTROL SIGNAL 5 6 12V 1 GND 2 GND 3 CONTROL SIGNAL 4 NOT USED 1 12V 2 COM2_PCTRL_MICOM 3 COM2_VCHECK_A 4 COM2_VCHECK_B 5 COM2_MICOM_AD 6 VCC 7 COM2_ENABLE 8 COM2_C 9 COM2_D 10 COM2_Tx 11 COM2_Rx 12 GND 1 12V 2 VENT_OUT 1 2 COM1 3 12V 4 GND 5 6 COM2 1 DC310V 2 NOT USED 3 AGND 4 DC15V 5 PC04 OUTPUT 6 RPM OUTPUT CN103 DRAI...

Page 292: ...List 5 16 Samsung Electronics Duct type Slim Duct 3 cont Ŷ Sub PCB 1 1 12V 2 COM2_PCTRL_MICOM 3 COM2_VCHECK_A 4 COM2_VCHECK_B 5 COM2_MICOM_AD 6 VCC 7 NO UESD 8 COM2_C 9 COM2_D 10 COM2_TXD 11 COM2_RXD 12 GND CN313 2WIRES COMM ...

Page 293: ...PCB Diagram and Parts List Samsung Electronics 5 17 5 1 9 Duct type MSP HSP Big Duct 4 1 1 2 3 5 6 7 1 11 12 13 14 15 16 18 17 8 9 10 ...

Page 294: ... 7 BZ1 8 庲微珮 柦笾 犢崫 9 AUTO SW 10 REMOCON INT 11 GND 12 VCC 13 BZ2 1 12V 2 GND 3 VCC 4 MOTOR SIGNAL PWM 5 MOTOR FEEDBACK 6 INRUSH OUT 12 VCC 1 4 洊壟懆 洢檺 5 6 12V 1 2 GND 3 SPI 洢檺 1 2 柪喺歾匶 皻柦 3 12V 4 GND 5 氦昦庲微珮 皻柦 1 L 2 N CN904 SSR MOTOR CN702 HOT COIL CN140 FUSE CHECK CN103 DRAIN PUMP CN903 SSR AC 洢檺 CN413 欮壊 時昢 CN412 ROOM 欮壊時昢 CN81 EXTERNAL CONTROL OUT CN902 SSR DC 犢崫 CN83 EXTERNAL CONTROL CN301 MIC...

Page 295: ...PCB Diagram and Parts List Samsung Electronics 5 19 5 1 10 Duct type HSP BLDC PCB 1 2 3 4 ...

Page 296: ...HSP cont BLDC PCB 1 DC12V 2 Fan Signal 3 DC5V 4 Fan feedback signal 5 GND 1 AC power L 2 AC power N 1 DC12V 2 Fan signal 1 DC310V 3 GND 4 DC15V 5 Fan signal 6 Fan feedback signal CN35 Main PCB Connection CN71 AC Power CN36 BLDC PCB Connection CN12 Motor Connector ...

Page 297: ...PCB Diagram and Parts List Samsung Electronics 5 21 5 1 11 Duct type Super 1 2 3 5 4 6 9 10 11 12 13 14 15 16 7 8 ...

Page 298: ...OUT 3 LED_1_OUT 4 LED_2_OUT 5 LED_3_OUT 6 LED_4_OUT 7 BZ_1 8 REMOCON_SIGN_OUT 9 AUTO_SW 10 REMOCON_INT 11 GND 12 5V 13 BZ_2 1 EEV _B_OUT 2 EEV _A_OUT 3 EEV_B_OUT 4 EEV_A_OUT 5 12V 6 12V 1 12V 2 VENT_OUT 1 GND 2 GND 3 SPI_CTRL_OUT_1 4 1 COM1_A 2 COM1_B 3 12V 4 GND 5 COM2_C 6 COM2_D CN100 POWER CN703 FAN STEP CN702 HOT COIL CN140 FUSE CHECKER CN81 ERROR COMP CHECK CN413 EVA IN EVA OUT DISCHARGE TEMP...

Page 299: ...PCB Diagram and Parts List Samsung Electronics 5 23 5 1 12 Celing type 1 2 3 4 5 6 7 19 18 9 10 11 12 17 15 14 13 8 ...

Page 300: ... USED 1 DC 12V 2 DC 12V 3 6 LVR SIGNAL 1 4 EEV SIGNAL 5 DC 12V 6 DC 12V 1 DC 12V 2 VENT_OUT 1 DC 12V 2 COM4_TXD 3 COM4_RXD 4 NOT USED 5 GND 1 GND 2 GND 3 Q1_OUT 4 NOT USED 1 DC12V 2 5 COMM SIGNAL 6 VCC DC5V 7 11 COMM SIGNAL 12 GND 1 GND 2 NOT USED 3 VCC DC5V 4 7 EEPROM SIGNAL 1 2 COM1 SIGNAL 3 DC12V 4 GND 5 6 COM2 SIGNAL 1 DRAIN SIGNAL 2 GND CN100 VENTILATOR CN703 FAN MOTOR CN101 GND CN140 FUSE CH...

Page 301: ...PCB Diagram and Parts List Samsung Electronics 5 25 5 1 13 Console MAIN PCB 2 1 3 19 18 14 4 13 5 12 15 6 11 16 17 10 9 8 7 ...

Page 302: ... SIGNAL OUT 9 TOUCH SWITCH SIGNAL 10 REMOCON SIGNAL IN 11 GND 12 VCC DC5V 13 NOT USED 1 ROOMTEMP SENSOR 2 GND 1 EVA IN OUTTEMP SENSOR 2 GND 1 FUSE CHECK SIGNAL 2 GND 1 DC12V 2 VENT SIGNAL 2 5 CONTROL SIGNAL 1 4 EEV CONTROL SIGNAL 5 6 DC12V ױ For Developer only Not available in Actual Site ױ 20 Pin Down Loader 1 GND 2 NOT USED 3 7 EEPROM SIGNAL CN401 HUMAN SENSING CN313 2WIRES COMM CN31 COMM 1 CN32...

Page 303: ...ram and Parts List Samsung Electronics 5 27 Console cont Sub PCB 1 1 2 19 20 COMM SIGNAL 3 18 EXTERNAL CONTROL 4 17 COMP CHECK 5 16 ERROR CHECK 6 VCC DC5V 7 14 GND 8 13 15 DC12V 9 12 COMM SIGNAL CN1 2WIRES COMM ...

Page 304: ...ung Electronics Console cont DISPLAY DC Connector 1 2 3 4 5 Display LED Control 6 TOUCH S W Reset DC5V 7 TOUCH S W out DC5V 8 Receive REMOCON Signal 9 GND 10 VCC DC5V CN01 Panel Display 1 DAMPER 1 DC Connector 1 DC5V 2 GND CN01 Damper S W ...

Page 305: ...1 2 GND 3 SPI 洢檺 1 VCC 2 5 挚崎決姢 洢檺 1 EVA INTEMP 2 4 6 GND 3 EVA OUTTEMP 5 DISCHARGETEMP 1 4 洊壟懆 洢檺 5 6 12V 1 欮壊 沋崫 2 GND 1 FUSE CHECK 2 GND 1 12V 2 7 LED 洢檺 8 庲微珮 柦笾 犢崫 9 AUTO SW 10 REMOCON INT 11 GND 12 VCC CN803 旇穞 挚崎決姢 CN402 欮壊 時昢 CN804 洊壟懆 CN401 ROOM 欮壊時昢 CN701 SSR MOTOR CN101 AC INPUT CN702 HALL IC 沋崫 CN805 SPI CN140 FUSE Check CN313 2 昦皻柦 CN301 MICOM DOWNLOAD CN501 DISPLAY ...

Page 306: ...PCB Diagram and Parts List 5 30 Samsung Electronics Wall Mounted type Neo Forte cont SUB SWITCH No CN COLOR FUNCTION CN61 Black Main Sub PCB Connecor CN83 White External Contact Control 17 18 ...

Page 307: ...PCB Diagram and Parts List Samsung Electronics 5 31 5 1 15 Wall Mounted type A3050 MAIN 1 2 4 5 6 7 8 10 11 9 12 13 3 ...

Page 308: ...URE SENSOR SIGNAL 6 GND 1 3 LED SIGNAL 4 REMOCON SIGNAL 5 GND 6 DC 5V 7 8 REMOCON SIGNAL 9 11 NOT USED 1 GND 2 NOT USED 3 DC 5V 4 7 EEPROM SIGNAL 1 8 DOWNLOAD SIGNAL 9 GND 10 11 DC 5V 12 16 DOWNLOAD SIGNAL 17 GND 18 20 DOWNLOAD SIGNAL 1 2 COMMUNICATION SIGNAL 3 4 SUB PBA SIGNAL 5 EXTERNAL CONTROL SIGNAL 6 COMP CHECK SIGNAL 7 ERROR CHECK SIGNAL 8 DC 5V 9 GND 10 DC 12V 11 14 COMMUNICATION SIGNAL CNP...

Page 309: ...Parts List Samsung Electronics 5 33 1 1 2 19 20 COMM SIGNAL 3 18 EXTERNAL CONTROL 4 17 COMP CHECK 5 16 ERROR CHECK 6 VCC DC5V 7 14 GND 8 13 15 DC12V 9 12 COMM SIGNAL CN1 2WIRES COMM Wall Mounted type A3050 cont Sub PCB ...

Page 310: ...PCB Diagram and Parts List 5 34 Samsung Electronics 5 1 16 ERV Plus MAIN 4 1 2 3 5 6 7 8 10 12 13 14 22 21 20 19 18 17 16 15 ...

Page 311: ...TROL signal 2 GND 1 COND SENSOR 2 GND 3 EVA IN SENSOR 4 GND 5 EVA OUT SENSOR 6 GND 1 IN SIDE SENSOR 2 GND 3 OUT SIDE SENSOR 4 GND 1 DC 12V 2 CO2 SENSOR 3 GND 1 4 EEV signal 5 DC12V 6 DC12V 1 GND 2 GND 3 SPI POWER OUTPUT DC12V 1 FLOAT SWITCH signal 2 GND 1 DAMPER SWITCH signal 3 GND 1 HOOD signal 2 GND TB_POWER AC POWER CN102 GND TB_DAMPER CN73 BLDC MOTER1 CN74 BLDC MOTER2 CN72 INNER DAMPER CN71 HU...

Page 312: ...83 EXT T SMW250 02 RED 9 3711 002001 CN301 DOWNLOAD YDW200 20 10 3711 007817 CN201 EPPROM B7P MQ WHT 11 3711 004773 CN311 2 WIRE BMW200 12 WHT 12 3711 001037 CN302 COMM SMW250 06 RED 13 3711 000941 CN801 SPI SMW250 04 YEL 14 3711 000795 CN804 VEN SMW250 02 BLU 15 3711 001036 CN808 EEV SMW250 06 BLU 16 3711 004182 CN905 FAN MOTOR COMM SMW200 10P WHT 17 3711 003895 CN501 DISPLAY SMW200 13P WHT 18 37...

Page 313: ... 37 GD S Big Duct cont EMI PBA No part code location No Function Description 1 3712 001139 L IN L TAB MALE 6 35x0 8mm 2 3712 001139 N IN N TAB MALE 6 35x0 8mm 3 3712 001139 L OUT L TAB MALE 6 35x0 8mm 4 3712 001139 N OUT N TAB MALE 6 35x0 8mm 1 3 2 4 ...

Page 314: ...cont BLDC PBA No part code location No Description 1 3711 001080 CN12 Motor signal 2 3711 004712 CN11 Main to BLDC signal 3 3711 005852 CN15 Reactor connect 4 3711 003404 CN10 BLDC PBA power 5 3711 006048 CN14 Main PBA power 6 3711 000260 CN13 Motor power 6 3 4 5 2 1 ...

Page 315: ...or 6 1 1 Global 4way Global Mini 4way cassteet type Slim 1way cassette large This Document can not be used without Samsung s authorization Motor Control Display Control Pipe Temp Sensor Float S W Drain Pump Louver Control EEV Control Room Temp Sensor ...

Page 316: ...Wiring Diagram 6 2 Samsung Electronics 6 1 2 Slim 1 way cassette type medium This Document can not be used without Samsung s authorization ...

Page 317: ...Wiring Diagram Samsung Electronics 6 3 6 1 3 360 cassette AM045 056 071 090 112 128 140KN4DEH6 This Document can not be used without Samsung s authorization ...

Page 318: ...Wiring Diagram 6 4 Samsung Electronics 6 1 4 BIG Duct This Document can not be used without Samsung s authorization ...

Page 319: ...Wiring Diagram Samsung Electronics 6 5 6 1 5 Ceiling This Document can not be used without Samsung s authorization ...

Page 320: ...Wiring Diagram 6 6 Samsung Electronics 6 1 6 Console This Document can not be used without Samsung s authorization ...

Page 321: ...Wiring Diagram Samsung Electronics 6 7 6 1 7 Wall Mounted type Neo Forte without EEV This Document can not be used without Samsung s authorization ...

Page 322: ...Wiring Diagram 6 8 Samsung Electronics 6 1 8 Wall Mounted type A3050 This Document can not be used without Samsung s authorization ki _TW W_ hTW ...

Page 323: ...Wiring Diagram Samsung Electronics 6 9 6 1 9 2way cassette type This Document can not be used without Samsung s authorization ...

Page 324: ...Wiring Diagram 6 10 Samsung Electronics 6 1 10 DUCT type Slim III This Document can not be used without Samsung s authorization ...

Page 325: ...Wiring Diagram Samsung Electronics 6 11 6 1 11 DUCT type Slim I II MSP This Document can not be used without Samsung s authorization ...

Page 326: ...Wiring Diagram 6 12 Samsung Electronics 6 1 12 Duct type HSP This Document can not be used without Samsung s authorization ...

Page 327: ...Wiring Diagram Samsung Electronics 6 13 6 1 13 Floor Stand Type This Document can not be used without Samsung s authorization ...

Page 328: ...Wiring Diagram 6 14 Samsung Electronics 6 1 14 ERV Plus This Document can not be used without Samsung s authorization ...

Page 329: ...Wiring Diagram Samsung Electronics 6 15 6 1 15 GD S Big Duct This Document can not be used without Samsung s authorization ...

Page 330: ... Capacity x 1 10 HP 3 digits Product Notation 1 1 way cassette 2 2 way cassette N Mini 4 way cassette 4 4 way cassette L LSP Duct Slim Duct M MSP Duct H HSP Duct C Ceiling J Console F Floor Standing T NEO FORTE Q NEO FORTE EEV B HYDRO UNIT Floor Standing K FLAT CEILING TYPE VTL Feature D DELUXE F FLAGSHIP G EHS CASCADE EEV RatingVoltage E 1Ø 220 240V 50Hz G 3Ø 380 415V 50Hz Mode H Heat Pump R 410A...

Page 331: ...N Standard 1 way CST 1B Large size 1 way 2N 2 WAY 4N 4 WAY 4S MINI 4 WAY 4R Round Panel version 1 2 Korean market use A B Export foreign market use Communication Mode N New Communication Color B Black E WINE U White V Ivory Language K Korean C Chinese M 8 Languages E English TYPE A Automatic boarding slide S STANDARD H PREMIUM Global 4 Way Panel Pattern Waffle Stripe Korean market use 1 5 Export f...

Page 332: ...hat the low pressure is 12 2kg cm2 g 4 If the low pressure goes below around 2kg cm2 g then immediately close the SVC valve for the gas and finish the pump down operation Finish the pump down operation press K2 button two more times or reset the operation by pressing the K3 button once more 7 2 3 When Two or More Outdoor Units are Installed 1 Close the gas valves of each sub unit 2 Press the K2 bu...

Page 333: ...the refrigerant container valve so that the refrigerant flows from the liquid pipe to the refrigerant container 6 Check the changes in the weight of the container using the scale Once the desired amount of refrigerant is filled up inside the container close the valves and then remove the Manifold gauge 7 The amount of refrigerant that can be contained inside the container is about 50 of the amount...

Page 334: ...domestic law Samsung Electronics Co Ltd August 2016 Printed in Korea Code No AC 00129E_3 GSPN GLOBAL SERVICE PARTNER NETWORK e t i S b e W a e r A Europe CIS Mideast Africa gspn1 samsungcsportal com m o c l a t r o p s c g n u s m a s 2 n p s g a i s A North Latin America gspn3 samsungcsportal com m o c l a t r o p g n u s m a s a n i h c a n i h C ...

Reviews: