Active
AX
|
Operation
6
User’s manual — 2900453/2
4)
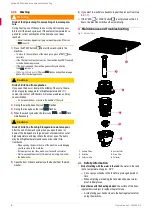
Check that the filters are correctly fitted. [
5)
Turn on the machine.
2.7
General machine settings
2.7.1
Initial Settings
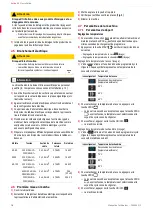
Temperature settings
1)
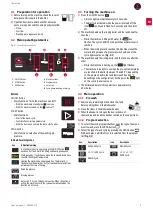
To enter the temperature settings section, when turning on the
machine, press and hold the
PROG
button
in the first two
seconds while the program is loading.
2)
Press the
START
button
to choose between the icons:
– Tank temperature settings
(washing).
– Boiler temperature settings
(rinsing).
Tank temperature settings (washing)
1)
The
icon lights up and one of the program/cycle icons
flashes. Each symbol represents a tank temperature as shown
in the following table:
2)
To select the tank temperature, press the
PROG
button
.
⇒
After 3
seconds without pressing the
PROG
button
,
the
temperature is selected and the cycle led stops flashing.
3)
To confirm the machine, press the
ON/OFF
button.
⇒
The machine shuts down.
Boiler temperature settings (rinsing)
1)
The
icon lights up and one of the program/cycle icons
flashes. Each symbol represents a tank temperature as shown
in the following table:
2)
To select the tank temperature, press the
PROG
button
.
⇒
After 3
seconds without pressing the
PROG
button
,
the
temperature is selected and the cycle led stops flashing.
3)
To confirm the machine, press the
ON/OFF
button.
⇒
The machine shuts down.
Thermal lock
If the thermal lock function is activated:
•
If you press the
START
button
, the cycle cannot advance.
•
The icon
lights up when the boiler has not yet reached the
setpoint temperature at the time of rinsing. The wash pump
continues to run until the boiler reaches its pre-set temperature.
To activate the
Thermal lock
function:
1)
Switch the appliance on by pressing the ON/OFF button.
2)
To activate this function, access the electronic board and set
switch 1 to position 1. See the
SW1 position
last figure in the
appendix at the end of the manual.
2.7.2
Auto start settings
The "auto start" option allows the machine to start the wash cycle
automatically when the door/dome is closed.
To enable/disable the "auto start" option:
1)
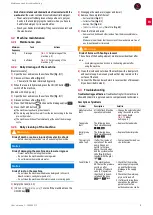
With the door/dome open, press the
START
button
.
⇒
Icon
on: auto start enabled.
⇒
Icon
off:
auto start disabled.
2.7.3
Model settings
If the electronic board is changed or de-configured, the machine
requires the model to be adjusted by means of the following adjust
-
ment section:
1)
To access the electronic board, turn off the machine: press the
ON/OFF
button.
2)
To activate this function, access the control board and set
switches 2-5 to position 1 or position 0 as shown in the table
below. See the
SW1 position
last figure in the appendix at the
end of the manual.
3
Operation
Icon flashes
Tank temperature
Disconnection of elements (room
temperature)
50 °C
60 °C60 °C
65 °C
Icon flashes
Boiler temperature
Disconnection of elements (room
temperature)
75
°C
80
°C
85
°C
No.
SW-
2
SW-
3
SW-
4
SW-
5
Model
Models
Drain
pump
17–
18
0
0
0
1
AX-40
Glass
-
washer 3
cycles
NO
19–
20
1
0
0
1
AX-40/B
YES
13–
14
0
1
1
0
AX-40 [*]
[*] Optional for cycles of 90/120/180.
Glass
-
washer 3
cycles
NO
15–
16
1
1
1
0
AX-40/B[*]
YES
17–
18
0
0
0
1
AX-50
Dish
-
washer 3
cycles
NO
19–
20
1
0
0
1
AX-50/B
YES
21–
22
0
1
0
1
AX-100
3-cycle
hood
NO
23–
24
1
1
0
1
AX-100/B
YES
⚠
Warning
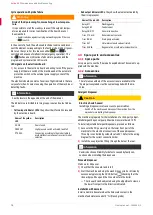
Risk of serious injury due to operation when the
machine is faulty
Using the machine when it is faulty or in poor condition can af
-
fect personal safety and damage the machine.
– If you detect any fault or anomaly in the machine, contact an
authorised service agent immediately.
Summary of Contents for AX-50
Page 12: ...Active AX Technical specifications 12 User s manual 2900453 2...
Page 36: ...Active AX 36 Manual de usuario 2900453 2...
Page 37: ...Active AX 12 2900453 2...
Page 41: ...Active AX 8 2900453 2 4 5 6 3 4 1 1 PROG START 2 5 4 3 4 1 60 1 4 2 5 3 6 1 2 3 4 5 6...
Page 47: ......
Page 48: ...10 22 2900453 2 ER 0437 1 96 AX 40 AX 50 AX 100 ACTIVE AR...


