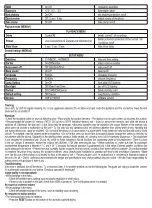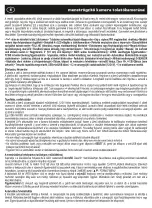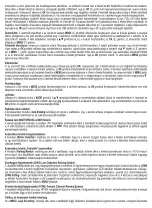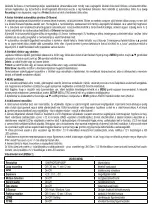
The length of recording that can be recorded on a particular memory card depends on the selected resolution and image quality. Approximately 60
minutes of FULL HD 1080 p recording requires 8 GB of storage. By reducing the resolution, the recording time is significantly increasing. When setting a
continuous recording mode, recording will continue even when the memory card is full. The oldest recordings will be deleted at the specified cycles (e.g.
every 2 minutes). To fully switch off the device, press and hold the
OK
button, then disconnect the USB cable from the video camera or the DC plug from
the cigarette lighter socket.
Operational modes:
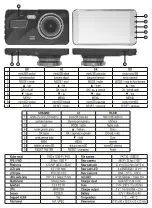
3 modes can be selected by using the mode selector
MODE
(3.) button: video recording, photoshooting, video and photo playback.
The associated pictograms appear in the top left corner. The symbols in the various menu items can also be seen on the basic screen when the function is
activated. To move up / down, use the
▲▼
buttons (4., 6.), press
OK
(5.) to open the function, press
MENU
(7.) to exit the submenus.
Checking the recordings:
select the playback mode (film strip symbol in the upper left corner). Use the stepper buttons to locate the desired recording.
In case of video, press
OK
to start or pause playback, while adjust the volume using the
▲▼
stepper (4., 6.) buttons. After pressing the
MENU
(7.) button
once, you can erase or protect the recording from a later deletion or start an automatic slideshow with the desired delay. Select the desired function using
the stepper buttons and then press the
OK
button. Press the
MENU
button to return to the main menu from the submenus.
Video recording
This mode is active after the charging cable is connected or the power button (
OK
) is pressed. Recording starts if an appropriate memory card has
been placed in the device. A red indicator starts flashing in the lower left corner of the screen; the recording can be paused and resumed using the
OK
button. In the menu, you can turn on the delayed switch-off of the background lighting or this can be done manually at any time by pressing and holding
the
MENU
button as well. In this case, the recording continues but the screen will be dark. By pressing and holding the
MENU
button once again, the
background lighting of the screen can be turned on again. You can turn audio recording on and off if you press the
▼
button during the recording of a
video footage. If you can see a microphone symbol in the upper band of the screen, crossed out by a red X, this means that audio is not being recorded
with the video footage.
Camera
Select the photo mode with the
MODE
button (camera icon in the top left corner). Press
OK
(7) to take a picture. During video recording, you can not
switch to another mode, stop recording first.
Playback
Select playback mode using the MODE button. You can select photographs and video footages found on the memory card using the
▲▼
buttons.
Photographs and videos can be told apart based on their .
avi
or .
jpg
file extensions. To play back or pause the selected video file, press the
OK
button.
You can change the volume using the up/down buttons.
Anti-shaking protection
In the camera menu (
Anti-Shaking
) it is possible to adjust the camera’s powerful motion in the recording less disturbing. Probe recording allows you to
check the most suitable setting for you.
Night mode (NIGHTVISION) and WDR function
The night vision function of the camera provides high sensitivity without the usual LED illumination even in low light conditions. Dark details are more visible
than usual. Turning
WDR
(Wide Dynamic Range) on regardless of the light conditions provides the best picture quality available.
Automatic recording to motion detection
In the menu (
Motion Detection
), it is possible to adjust if the camera detects movement, the recording starts automatically and records a short period. If no
changes are made in front of the lens, recording will be paused. This function detects a significant change in the field of vision.
Automatic recording in „Parking monitor” mode
In the menu (
Parking Monitor
) there is an option, which allows you to configure that when a collision occurs, the recording will start automatically and
record for 5-10-30 seconds. If someone has injured your car parked in your absence, it is likely to be able to capture the camera. The magnitude of the
collision resulting in the recording can be controlled by the sensitivity of the gyroscope (
G-Sensor
).
Lane departure warning (LDWS; Lane Departure Warning System)
The device has been prepared to signal the driver with a beep- beep sound if he or she leaves the traffic lane due to inadvertence. Activate the function in
the
LDWS
menu. For reliable operation of the function, continuously, smoothly, properly and visibly painted markings are necessary. If this is not provided
because of the local road network deviations, it is recommended that you disable this feature to prevent false warnings.
LDWS Setting:
for calibration, use the
UP / DOWN
arrows to move up and down and left to right the coloured image appearing on the screen. The top red
line represents the distance between the vehicle ahead and the green dashed lines indicate the lane markings. Standing in a parking place, set the desired
view according to the vehicle’s features. Exit with
MENU
button.
Forward collosion warning (FCWS; Forward Collosion Warning System)
The device has been prepared to alert the driver with a Beep-Beep sound if it is too small for an inadequate tracing distance. Operation depends on the
calibration described in the previous section.
Cyclical, but continuous shooting
When the „
Loop Recording
” function of the
MENU
is active, the camcorder is taken one after the other for the duration of the recording depending on the
setting, which is added to continuous recording. After using the full capacity of the memory card, only the oldest recording cycle will be erased according
to the selected duration. This ensures the least possible loss of information when deleting old recordings. Auto-delete does not work if
Loop Recording
is
off or if
Protect
is used to protect the recordings against erasing.
Automatically lock important shots (G-Sensor)
Thanks to the built-in gyroscope, the camera can detect when a collision has occurred. In this case, the current recording cycle is locked and will not be
cancelled even if the recording is prolonged. When the memory card is full, the oldest recordings are always erased, but the protected file will be retained.
Cameras without this feature often automatically and unnoticeably erase the important recording by the time it is needed. This function can be activated


