


31
3
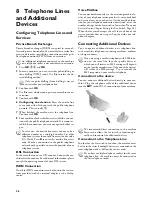
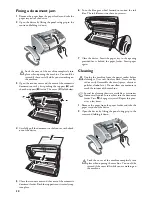
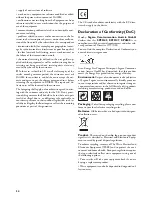
Open the scanner cover and the cover of the automatic
document cover by first pushing the support (
A
) and
then the support (
B
) inside. The cover (
C
) folds below.
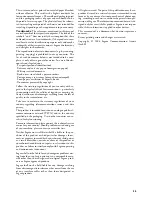
4
Lightly wipe the upper side of the scanner glass (
A
) and
the lower side of the document feeder/scanner film (=
white plastic plate) (
B
) with a cloth.
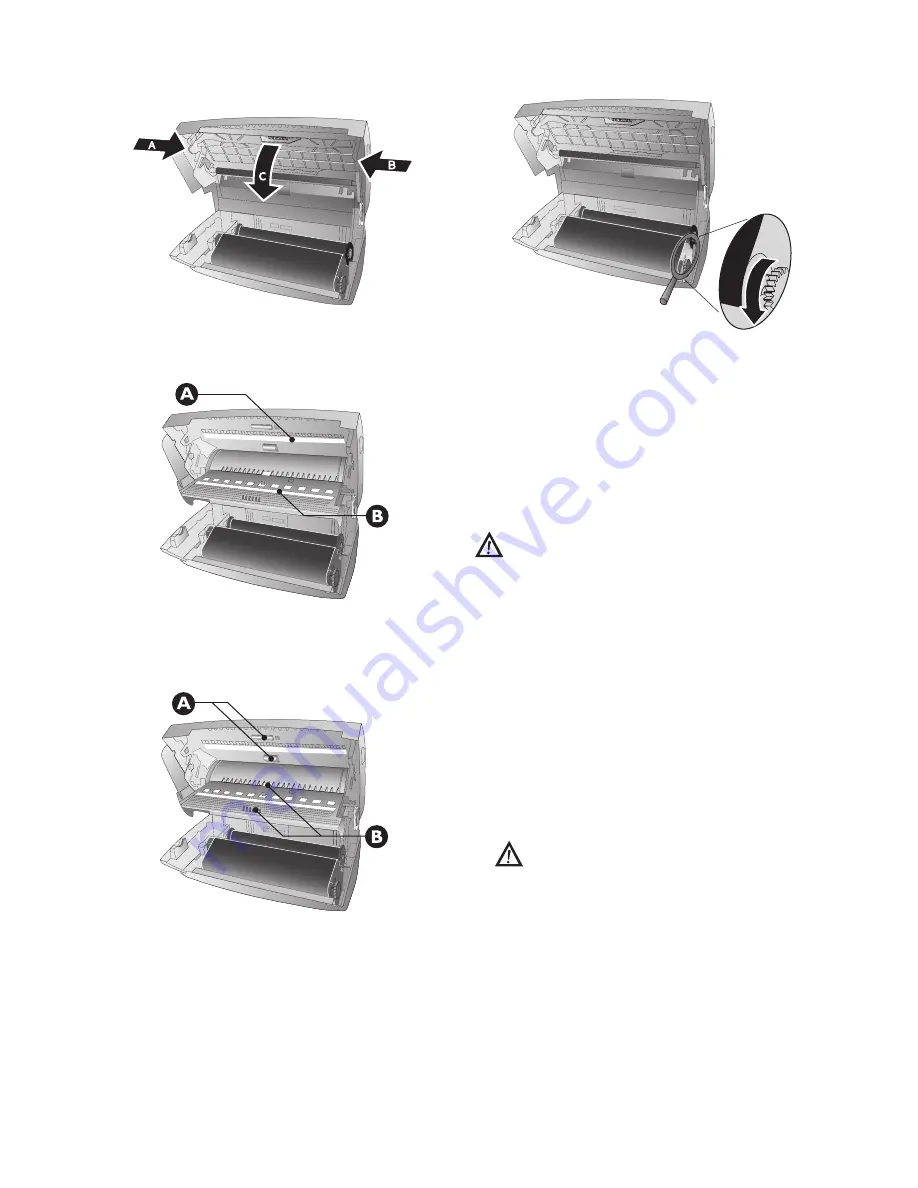
5
Clean the feed roller (
A
) and the underside of the sup-
port pad of the feeder roller (
B
) with a soft, lint-free
cloth moistened with cleaning alcohol (96 percent).
Rotate the feed roller; You must clean the entire roller.
6
Close the scanner cover and the cover of the automatic
document feeder. Both the supports must securely snap
into place.
7
Turn the blue gear wheel forward to tension the ink
film. The ink film must not have any creases.
8
Close the device. Insert the paper tray in the opening
provided for it behind the paper feeder. Insert paper
again.
Using Service Codes
The service codes delete all the changed settings and your
device is reset to factory settings. It may be possible that the
device with the changed settings reacts differently than ex-
pected.
Using the Service Code
1
Press
OK
,
45
and
OK
.
2
Enter a service code:
7117
—Deletes all changed settings and saved data.
The device is reset to factory settings and the initial instal-
lation process is started.
7140
—Deletes all changed settings. Saved data and
telephone book entries remain intact.
7227
—Deletes saved faxes, when there are prob-
lems with printing.
3
Confirm using
OK
.
4
Dial using
[
SURE: YES
.
5
Confirm using
OK
.
Power Cycling
If a problem occurs that cannot be corrected with the in-
structions in this user manual (see also the help below), fol-
low the steps given here.
1
Pull out the power plug.
2
Wait at least ten seconds, then plug the power plug
back into the socket.
3
If the error occurs again, please contact our technical
customer service or your retailer. Follow the instruc-
tions on the display and on the error report.
Only use the service code if this is absolutely neces-
sary. Many service codes also delete saved messages
and telephone book entries.
If you have entered the incorrect code, you can
cancel the entry with
SURE: NO
.
Summary of Contents for PHONEFAX 47TS
Page 1: ...User Manual...