


XXXXX
32
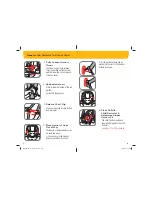
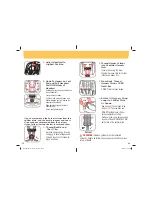
• Switchable Retractor
These belts switch from ELR to ALR (Automatic Locking Retractor).
You
MUST
have the vehicle belts in the locking mode to use them.
With a switchable retractor, pull the shoulder belt all the way out to
switch the retractor into the ALR mode before tightening.
Feed the slack back into the retractor while tightening.
• ALR (Automatic Locking Retractor)
These belts lock after pulling the webbing out and letting the belt
go back into the retractor an inch or two.
With an ALR belt, pull the belt all the way out before threading
through the child restraint.
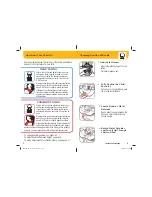
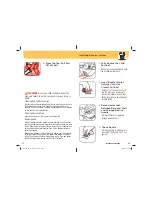
Vehicle Latch Plates
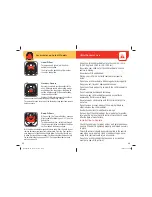
• Check Latch Plates
Grasp the tongue portion of the
latch plate (the part that goes
inside the buckle) and pull straight
out, in line with the lap belt.
If the latch plate does not slide
up and down the vehicle belt, you
have a locking latch plate. You
should not need to use a locking
clip.
Check your vehicle owner’s manual to determine the best way to
lock a child restraint in place and whether the latch plate or
retractor will accomplish this. If the latch plate slides up and down
on the belt, and you have an ELR retractor, you
MUST
use a lock-
ing clip to install the child restraint. See pages 55-56.
You may not need to use the locking clip with a switchable or ALR
retractor.
Locking Latch
Plate
Sliding Latch
Plate
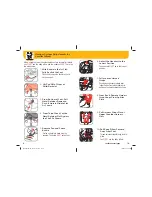
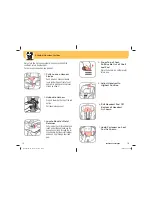
Aircraft Information
31
This restraint is certifi ed for aircraft use when used with the
internal harness.
This child restraint is not certifi ed for use in aircraft when
used as a booster seat because aircraft seats do not have
shoulder belts.
Install the child restraint in a window seat to avoid blocking the
aisle. If the aircraft lap belt is too short, ask the flight attendant for
a belt extender.
Use only on forward facing aircraft seats.
Contact the airline for their specific policies.
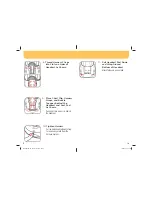
Some airlines may ask to see a label stating
that this child restraint is certified for aircraft
use.
There is an airplane certification label located
on the side of this child restraint as shown.
WARNING:
Store the lower anchor belt and tether
strap when using the aircraft belts.
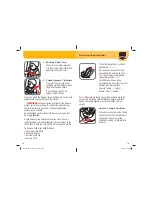
Forward Facing Aircraft Installation
For forward facing installation follow
pages 49-51.
Rear Facing Aircraft Installation
For rear facing installation follow pages
39-42.
4358-6835 Grow and Go Air.indd 37-38
4358-6835 Grow and Go Air.indd 37-38
10/29/15 3:33 PM
10/29/15 3:33 PM