background image

1

www.safety1st.com/airprotect

1 in 4 car crashes involving children are 
side impact collisions. They are by far the 
deadliest type of collision for children, 
accounting for 1 in 3 child fatalities; nearly all 
of which are caused by head trauma. These 
are frightening facts, but Safety 1st has been 
by your side for over 25 years providing 
innovative products to help protect your child 
from becoming a statistic. It is in this tradition 
that we proudly announce Air Protect® side 
impact technology.

Safety 1st engineers designed Air Protect® 
using next generation testing methods that 
simulate the most violent types of side 
impact crashes, those with vehicle intrusion. 
Using this advanced methodology, Air 
Protect® was engineered to defend your 
child in two vital ways.  During a crash, the 
system immediately shields your child’s head 
from the impact. In a second layer of defense, 
Air Protect® allows air to escape from the 
headrest: channeling crash energy away from 
your child, creating more ride down time. It is 
this double layer of protection that makes Air 
Protect® technology unique.

At Safety 1st, we are proud of our history, 
but are always looking towards the future 
and developing innovative products.  
Products like Air Protect® that help shield 
your child from the most violent real world 
threats. 

®

side impact protection

Summary of Contents for Complete air 65

Page 1: ...4358 6537 rear facing 5 40 lbs 2 3 18 kg 19 40 in 48 101 6 cm forward facing 22 65 lbs 10 1 29 kg 29 49 in 73 6 125 cm and at least 1 year old 2013...

Page 2: ...n testing methods that simulate the most violent types of side impact crashes those with vehicle intrusion Using this advanced methodology Air Protect was engineered to defend your child in two vital...

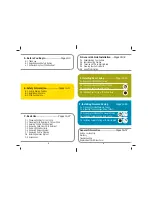
Page 3: ...ild Restraint Use A Before You Begin Pages 4 9 A 1 Thank you A 2 Registration and Safety Notices A 3 Understanding Your Child Restraint C Basic Use Pages 12 27 D General Vehicle Installation Pages 28...

Page 4: ...g Address Dorel Juvenile Group Inc P O Box 2609 Columbus IN 47202 2609 Telephone 1 800 544 1108 8 A M to 6 P M EST M TH 8 A M to 4 30 P M EST FRI A 1 Thank You A Before You Begin 5 Para recibir las in...

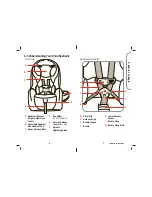
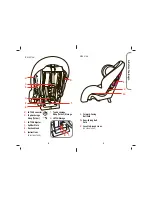
Page 5: ...elect models E Harness Release Lever under flap F Harness Tightening Strap A 3 Understanding Your Child Restraint continued on next page 7 A B C G Chest Clip H Harness Strap I Buckle Tongue J Buckle K...

Page 6: ...up Inc P O Box 260 9 Col um bus IN 472 02 Attn Con sum er Rel atio ns or reg iste r onli ne at ww w d jgus a co m r egis trat ion car sea ts u s For rec all info rma tion call the U S Gov ern me nt s...

Page 7: ...rnings On the back of this child restraint there is an expiration date Do not use this child restraint after the expiration date B 1 Vehicle Seating Position Never place a child rear facing in a seati...

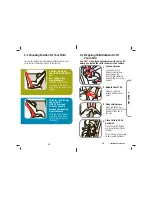
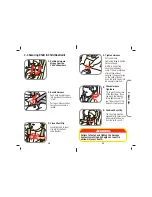
Page 8: ...ack seat facing the front of the vehicle C 2 Preparing Child Restraint to Fit Your Child Release Chest Clip Press on chest clip release button and pull apart Loosen Harness Push down on the harness re...

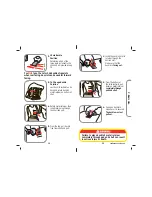
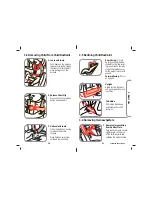
Page 9: ...shell 6 You MUST use the 1st or 2nd buckle strap slots when rear facing Any slot can be used for forward facing 1 2 3 C Basic Use 15 Insert the buckle s metal retainer through the desired slot Make su...

Page 10: ...rs If the upper harness slots are above the child s shoulders with the headrest in the lowest position do not use this child restraint Forward Facing Position Upper harness slots must be even with or...

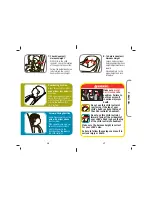
Page 11: ...ly NOTE A snug strap should not allow any slack It lies in a relatively straight line without sagging It does not press on the child s flesh or push the child s body into an unnatural position 4 Posit...

Page 12: ...3 20 21 C 5 Reclining Child Restraint Rear Facing 1 Must be fully reclined Recline restraint so that the level to ground line on the side of shell that matches your child s weight is level with ground...

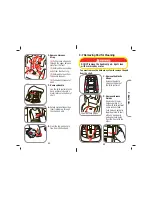
Page 13: ...ild restraint on its back and locate buckle s metal retainer on bottom of shell 3 a b 23 C 7 Removing Pad for Cleaning You must remove the harness system to remove the pad from the shell Remove the El...

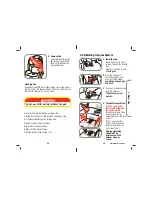
Page 14: ...o not use bleach or use other harsh cleaners Do not dry clean C 8 Installing Harness System Install Buckle Insert the buckle s metal retainer through the desired slot Make sure that the buckle is faci...

Page 15: ...raps or harness tightening strap and make sure the harness strap loops are COMPLETELY ON the splitter plate C 9 Accessories Install Cup Holder on select models Pull pad off corner Hook bottom of cup h...

Page 16: ...g Position Use the child restraint only on vehicle seats that face forward Do not use on seats that face the sides or rear of the vehicle Some seating positions in your vehicle may not be safe for thi...

Page 17: ...u must determine if your vehicles belts are compatible with this child restraint Vehicle Belts Automatic Passive vehicle seat belts You MUST have a vehicle lap belt to install any child restraint An a...

Page 18: ...es up and down on the vehicle belt and you have an ELR retractor you MUST use a locking clip to install the child restraint You may not need to use the locking clip with a switchable or ALR retractor...

Page 19: ...r Child Restraint Store Top Anchorage Hook Tether Attach the top anchorage hook tether to recline stand as shown Tighten tether to remove the slack E 3 Installing Rear Facing with LATCH 2 1 Place Chil...

Page 20: ...check the recline angle to make sure it is reclined according to your child s weight Repeat steps if not reclined correctly To Remove LATCH Belt From Vehicle Anchor Remove child from child restraint P...

Page 21: ...through the rear facing belt path 5 Fully Recline and Place Child Restraint in the Back Seat Rear Facing For children 5 22 lbs 2 3 10 kg the bottom level to ground line MUST be level to the ground Fo...

Page 22: ...rward Facing using 5 point harness Never place a child less than 1 year old or weighing less than 22 lbs 10 1 kg forward facing Safety Tip Experts agree that children should remain rear facing as long...

Page 23: ...op anchorage lock and push lock adjuster toward top anchorage hook tether To tighten After the child restraint is locked into place with LATCH or vehicle belt ppush down on child restraint and pull on...

Page 24: ...ion F 4 Installing Forward Facing With LATCH NOTE Review your vehicle owner s manual for LATCH belt use 1 Do not use the LATCH system along with the vehicle belt Check LATCH belt before each use Use o...

Page 25: ...Remove LATCH Belt From Vehicle Anchor Remove child from child restraint Press down firmly on child restraint and press the red release button on each connector F 5 Installing Forward Facing With Vehi...

Page 26: ...e belt through the belt path opening as shown With a switchable retractor pull the vehicle shoulder belt all the way out to switch the retractor into the ALR mode before tightening Feed the slack back...

Page 27: ...e forward facing belt path Using the Locking Clip Place Child Restraint in Vehicle Rear Facing With child restraint fully reclined place child restraint in the back seat Check for proper recline NOTE...

Page 28: ...with a child restraint Rebuckle Vehicle Belt 8 Rear Facin g For Childr en 5 22 lbs 2 3 1 0 kg Bottom Line MUST Be Level with the Ground Rear Facing For Children 22 40 lbs 10 1 18 kg AND can sit up un...

Page 29: ...included on the form to ensure proper replacement parts Your model number with color code and the date code can be found on a sticker on the side of child restraint Payment in U S dollars must accompa...

Page 30: ...DJG will at its option provide replacement parts or replace this product DJG reserves the right to substitute if the part or model has been discontinued To make a claim under this warranty you may co...

Reviews: