


23
24
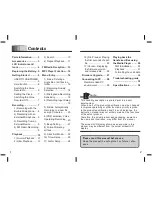
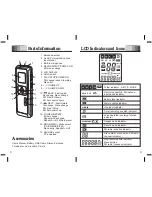
Menu Entry
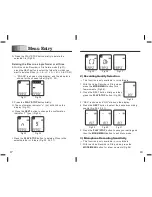
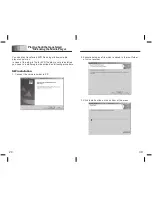
8. The time will now blink. Set the time in the same manner
as you set the date, using the
NEXT
or
BACK
buttons to
select the desired values (Fig.64).
9. After you set the minutes, press the
PLAY/STOP
button to
save your settings and then the
MODE/MENU
button to
exit Menu mode.
→ The clock will begin to run as soon as you save your
time setting.
→ With the Voice Recorder in stop mode, Press the
FOLDER/REPEAT
button briefly, current time is shown.
Press the
FOLDER/REPEAT
button briefly again,
go back previous display.
Fig.62
Fig.63
Fig.64
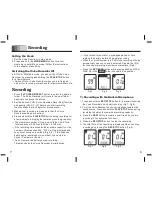
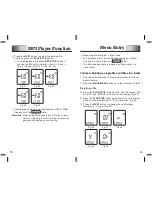
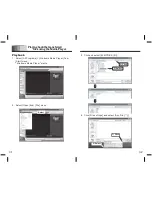
10) Timer Setup
1. With the Voice Recorder in Stop mode, press the
MODE/MENU
button for a few moments (Fig.26).
2. Press the
NEXT
button repeatedly until “TIMER” is shown
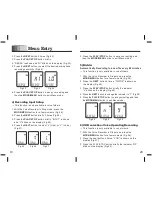
on the display (Fig.65).
3. Press the
PLAY/STOP
button briefly, “OF” (timer setup
off) blinks on the display (Fig.66).
4. Press the
NEXT
button to select “V” (Voice) or “Fm”(FM).
→ When you select the “Fm”, current frequency of FM will
be recorded (Fig.67, 68).
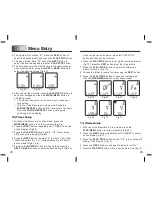
5. Press the
PLAY/STOP
button briefly and then press the
NEXT
or
BACK
buttons to enter the desired hours (Fig.69).
6. Press the
PLAY/STOP
button to set up the recording interval
(Fig.70), press the
NEXT
button to set the interval time.
7. Press the
PLAY/STOP
button to select the folder you
want to record to (Fig.71).
8. Choose the folder to record to by pressing the
NEXT
button.
6. The month will now blink “01”, press the
NEXT
button to
select the desired month and press the
PLAY/STOP
button.
7. The day will now blink “01”, press the
NEXT
button to
select the desired day and press the
PLAY/STOP
button.
9. Press the
PLAY/STOP
button to save your setting and
then the
MODE/MENU
button to exit Menu mode.
11) Alarm Setup
1. With the Voice Recorder in Stop mode, press the
STOP/MENU
button for a few moments (Fig.26).
5. Press the
PLAY/STOP
button briefly to set the alarm time (Fig.74).
4. Press the
NEXT
button to change the indicator to “On” .
3. Press the
PLAY/STOP
button briefly. “OF” (alarm setup off)
blinks on the display (Fig.73).
2. Press the
NEXT
button repeatedly until “ALARM” is shown
on the display (Fig.72).
Fig.69
Fig.70
Fig.71
Fig.65
Fig.66
Fig.67
Fig.68
Once you have set the hours, press the PLAY/STOP
button and then set the minutes.


