16
ADJUSTMENTS
—
DOOR/BULB SEAL ADJUSTMENT
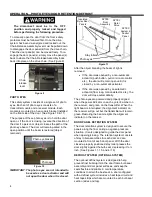
NOTE: The head assembly trolley track is arranged
to pull the door panel up and away from the
bulb seal as the door opens, so the offset of
the swivel hanger with respect to the bulb
seal side of the door panel will be less at the
leading edge swivel hanger than at the
trailing edge swivel hanger.
Top/Head-Door Bulb Seal Adjustment
1. To adjust the top bulb seal/door panel alignment,
move the door panel(s) to the fully closed
position.
2. Turn off the power to the door.
The disconnect must be in the OFF position
and properly locked and tagged before
performing the following procedure.
3. Check and confirm that each insulated door
panel is level along its top edge and aligns/mates
with the top bulb seal. If adjustment is necessary
do so according to the “DOOR PANEL
ALIGNMENT AND ADJUSTMENT
” procedure on
page 14.
4. Arrange the door panel(s) so they may be
checked as follows:
a. On bi-parting doors, manually move the door
panel which is not being checked to the fully
open position. Leave the door panel to be
checked in the closed position.
b. On single slider doors, leave the door panel in
the closed position.
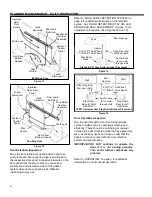
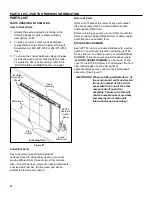
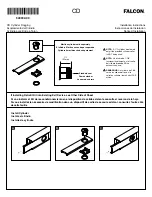
Figure 38
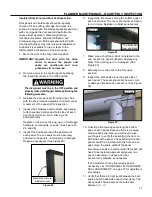
5. From the back side of the door panel (left or right
side of the door), check the horizontal and
vertical seal between the door panel and bulb
seal on the door opening top jamb. The door top
bulb seal must fit tight against the back of each
door panel along the complete door panel width.
The door panel should compress the bulb seal
¼-½ inch. Check this at the leading, trailing, and
vertical top door panel edges. Bi-parting door
panel centers must be aligned. (See Figure 38)
6. If any door seal adjustment is required on the top
of the door, loosen the screws securing the door
panel to the swivel hanger plate at the top of the
door opening. Then move the door panel until it
mates correctly against the full length of the bulb
seals along the back of the door panel(s).
Tighten the screws to 15 ft-lbs using a figure 8
pattern, locking the door panels in place.
7. Do this for all the door panels.
8. Restore power to the door and return to service.
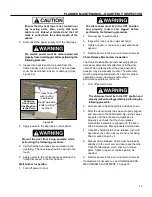
It is critical the door is not compressed against
the bulb seal too tight. Too much compression
will cause the door motor to stall out and
premature wearing of the bulb seals.
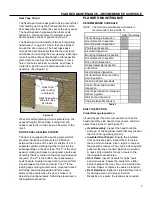
Door Retention/Stay Roller-Door Bulb Seal
Adjustment
Once the top seal has been properly adjusted the
lower floor seal should be adjusted. Adjust the
bottom and vertical side seals in the same manner as
adjusting the top/head-door bulb seal.
1. To adjust the bottom bulb seal/door panel
alignment, move the door panel(s) to the fully
closed position.
2. Turn off the power to the door.
The disconnect must be in the OFF position
and properly locked and tagged before
performing the following procedure.
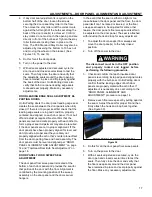
3. From the back side of the door panel (left or right
side of the door), check the vertical seal between
the door panel and the bulb seal on the door
jamb of the door opening. The doors bulb seal
must fit tight against the back of each door panel
along the complete door panel height. The door
panel should compress the bulb seal anywhere
from ¼-½ inch. Check this at the trailing vertical
door panel edge when the door panel is in the
fully closed position.
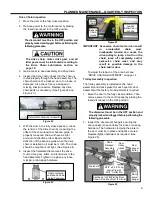
Bulb seal/door
panel mating
seal
Swivel hanger
fastening bolts
Adjust door
panel in swivel
hanger
Stay roller
door retainer
Adjust stay roller
to compress
door panel


