17
ADJUSTMENTS
—DOOR PANEL ALIGNMENT AND ADJUSTMENT
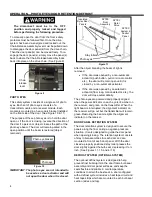
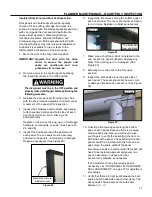
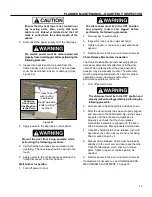
4. If any door seal adjustment is required on the
bottom half of the door, loosen the screws
securing the door panel stay roller to the floor.
Then move the stay roller until the correct mate
against the full length of the bulb seal along the
back of the door panel(s) is achieved. Confirm
stay rollers do not encroach the opening and are
directly in front of the bulb seal. Tighten the stay
roller fasteners, locking them in place on the
floor. The F80 Standard Stay Roller may also be
adjusted by loosening the bottom ¾-10 hex nut
and moving the wheel on the bracket. (See
Figures 38, 15, and 16)
5. Do this for all the door panels.
6. Turn on the power to the door.
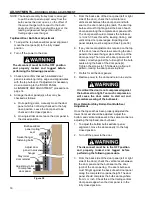
7. With all seals adjusted and secured, cycle the
door open and closed several times to test the
seals. Then fully close the door and verify that
the adjustable seals around the door opening
have remained in place and fit properly against
the back of the door. On Bi-Parting doors also
verify that both door panel leading edge seals
mate and seal properly. Make any necessary
adjustments.
DOOR LEADING EDGE SEAL ADJUSTMENT BI-
PARTING DOORS
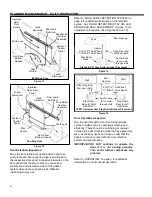
On Bi-Parting doors the door panel leading edge seal
creates the seal between the door panels when fully
closed.
If there isn’t a proper seal first check that the
leading edge seals are in good condition, properly
centered, and aligned on each door panel. If not, pull
off and adjust as required. Next confirm that the
panels are level and mate properly with each other to
form a proper seal. Adjustment may also be required
if the door panels are not in proper alignment. If the
door panels have been properly aligned for level and
don’t provide a proper seal they are likely not
properly aligned with each other’s center plane offset
from the door opening face and head assembly. The
door panels must be level and aligned per
“DOOR
PANEL ALIGNMENT AND ADJUSTMENT” on page
14 and
“Top/Head-Door Bulb Seal Adjustment” on
page 16.
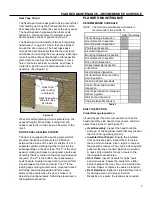
DOOR PANEL FLOOR SWEEP SEAL
ADJUSTMENT
The door panel floor sweep seal is located at the
bottom of each door panel and provides the seal for
that portion of the door with the floor. Alignment is
controlled by the mounting position of the sweep
assembly on the door panel and the doors swivel
hangers.
In the event that the seal is either too tight or too
loose between the door panel and the floor, the door
panel itself can’t be raised or lowered, or the floor
sweep seal needs to be adjusted for some other
reason,
the door panel’s floor sweep seal itself can
be adjusted on the door panel. The seal is attached
with industrial hook and loop for easy adjustment.
1. To adjust the door panel(s) floor sweep seal,
move the door panel(s) to the fully closed
position.
2. Turn off the power to the door.
The disconnect must be in the OFF position
and properly locked and tagged before
performing the following procedure.
3. Check and confirm that each insulated door
panel is level along its top edge and aligns/mates
properly with the bulb seal. On Bi-Parting doors
confirm that the leading edges of both door
panels are properly mated with each other. If
adjustment is necessary do so according to the
“DOOR PANEL ALIGNMENT AND
ADJUSTMENT” procedure on page 14.
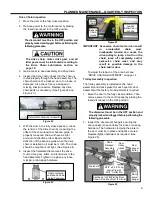
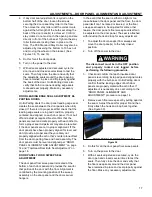
4. Remove each floor sweep seal by pulling apart at
the seam. Adjust the seal for proper fit and then
firmly attach the hook and loop back together.
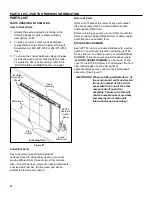
(See Figure 39)
Figure 39
5. Do this for all the door panel floor sweep seals.
6. Turn on the power to the door.
7. With all seals adjusted and secured, cycle the
door open and closed several times to test the
seals. Then fully close the door and verify that
the floor sweep seals around the door panel
have remained in place and seal properly against
the floor. Make any necessary adjustments.
DOOR PANEL FLOOR SWEEP SEAL


