background image

19

OPERATION

EDGING WITH PILOTS

See Figure 22.

You can cut rabbets and molded edges using piloted
cutters. The pilot, which extends below the cutter, allows
the cutter to turn while the pilot follows the edge of the
workpiece. Some pilots are solid extensions of the cutter.
Others are ball bearing guides that are fastened to the
end of the cutter.

Arbor-type bits with pilots are excellent for quick, easy
edge shaping. They follow workpiece edges that are
either straight or curved. The pilot prevents the bit from
making too deep a cut. Holding the pilot firmly in contact
with the workpiece edge throughout the cut prevents the
cut from becoming too shallow.

Whenever the workpiece thickness together with the
desired depth of cut (as adjusted by router depth setting)
are such that only the top part of the edge is to be
shaped (leaving at least a 1/16 inch [1.6 mm] thick uncut
portion at bottom), the pilot can ride against the uncut
portion, which serves to guide it. However, if the
workpiece is too thin or the bit is set so low that there will
be no uncut edge to ride the pilot against, an extra board
must be placed under the workpiece to act as a guide.
This guide board must have exactly the same contour —
straight or curved — as the workpiece edge. If the guide
is positioned so that its edge is flush with the workpiece
edge, the bit will make a full cut (in as far as the bit
radius). On the other hand, if the guide is positioned as
shown (out from the workpiece edge), the bit will make
less than a full cut — which will alter the shape of the
finished edge.

NOTE: 

When edge shaping with guides, you can use any

of the piloted bits without a pilot. The size (diameter) of
the pilot determines the maximum cut width that you can
make with the pilot against the workpiece edge. The
small pilot exposes all of the bit; the large one reduces
this amount by 1/16 inch (1.6 mm).

When routing all edges of a panel or board, rout the end
grain first. Any splintering that occurs at the corners will
then be removed when routing the sides. Start each side
1/4 in. (6.35 mm) away from the end. Feed the cutter into
the wood until the pilot contacts the uncut edge. Then,
slowly back the router to shape the corner. Next, move
the router forward to shape the rest of the edge. Be
careful to keep the pilot pressed against the uncut edge.
Repeat this procedure on each side of the panel.
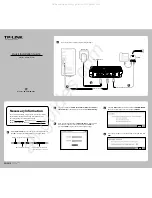
Fig. 22

PILOT

WORK

WORK

PILOT

TOP EDGE SHAPING

WHOLE EDGE SHAPING

GUIDE

ROUTER

ROUTER

Summary of Contents for R181D

Page 1: ...een engineered and manufactured to our Ryobi s high standard for dependability ease of operation and operator safety When properly cared for the router will give you years of rugged trouble free perfo...

Page 2: ...for use over eyeglasses or standard safety glasses with side shields Always wear eye protection which is marked to comply with ANSI Z87 1 TABLE OF CONTENTS INTRODUCTION This router has many features...

Page 3: ...your finger on the switch or plugging in tools that have the switch on invites accidents Remove adjusting keys or wrenches before turning the tool on A wrench or a key that is left attached to a rotat...

Page 4: ...for an extension cord 50 feet or less in length A cord exceeding 50 feet is not recommended If in doubt use the next heavier gage The smaller the gage number the heavier the cord An undersized cord wi...

Page 5: ...d injury and machine damage Eye Protection Always wear safety goggles or safety glasses with side shields and a full face shield when operating this product Wet Conditions Alert Do not expose to rain...

Page 6: ...d into an outlet double check the power supply EXTENSION CORDS When using a power tool at a considerable distance from a power source be sure to use an extension cord that has the capacity to handle t...

Page 7: ...adjust the motor speed to required job conditions The variable speed control is located on the front of the router and allows the router to develop a no load speed from 15 000 to 25 000 min LOCKING AR...

Page 8: ...stance WARNING If any parts are missing do not operate the tool until the missing parts are replaced Failure to do so could result in possible serious personal injury PACKING LIST Router Fixed Base Pl...

Page 9: ...collet nut Refer to Removing Inserting Cutters later in this manual 3 Set the desired depth of cut Refer to Adjusting Depth of Cut later in this manual 4 Secure the workpiece 5 Plug the router into a...

Page 10: ...ck button As they align the gold spindle lock button will depress fully 6 Turn the depth adjusting ring counterclockwise until the motor is to its highest position NOTE As the motor is rising the gold...

Page 11: ...e depressing the gold spindle lock button As they align the gold spindle lock button will depress fully 6 Remove the motor housing from the plunge base NOTE As the motor is being removed from the base...

Page 12: ...ptions To remove the cutter Remove the cutter from the collet To insert the cutter a Insert the shank of the cutter until the shank bottoms out then pull it out 1 16 in 1 6 mm to allow for expansion w...

Page 13: ...that cuts be made at a depth not exceeding 1 8 in 3 2 mm and that several passes be made to reach deeper cuts Adjusting the depth of cut for the plunge router is different from adjusting the depth of...

Page 14: ...bar down so it touches the depth stop 8 Tighten the stop bar knob securely 9 Set the depth indicator to zero 10 Loosen the stop bar knob 11 Set the depth indicator to the desired depth of cut Note Ea...

Page 15: ...eness of your cut if you are not prepared Such a kickback is always in the direction opposite to the direction of bit rotation To guard against such a kickback plan your setup and direction of feed so...

Page 16: ...smooth cuts if allowed to run freely without the overload of a forced too fast feed Three things that cause force feeding are bit size depth of cut and workpiece characteristics The larger the bit or...

Page 17: ...he bit 1 8 in for each new pass In order to save time do all the cutting necessary at one depth setting before lowering the bit for the next pass This will also assure a uniform depth when the final p...

Page 18: ...e When freehand routing we suggest the following Draw or layout the pattern on workpiece Choose the appropriate cutter NOTE A core box or V groove bit is often used for routing letters and engraving o...

Page 19: ...der the workpiece to act as a guide This guide board must have exactly the same contour straight or curved as the workpiece edge If the guide is positioned so that its edge is flush with the workpiece...

Page 20: ...ed depth and lock the depth lock Adjust the subbase so that the end of the cutter is centered in the collar of the bushing Tighten the four subbase screws securely WARNING Failure to tighten screws co...

Page 21: ...router WARNING Failure to unplug your router could result in accidental starting causing serious injury Slide the two straight guide mounting posts into the holes in the side of the router base Set t...

Page 22: ...uct damage LUBRICATION All of the bearings in this tool are lubricated with a sufficient amount of high grade lubricant for the life of the unit under normal operating conditions Therefore no further...

Page 23: ...23 NOTES...

Page 24: ...00 525 2579 for your nearest Ryobi Authorized Service Center You can also check our Web site at www ryobitools com for a complete list of Authorized Service Centers MODEL NO AND SERIAL NO The model nu...

Reviews: