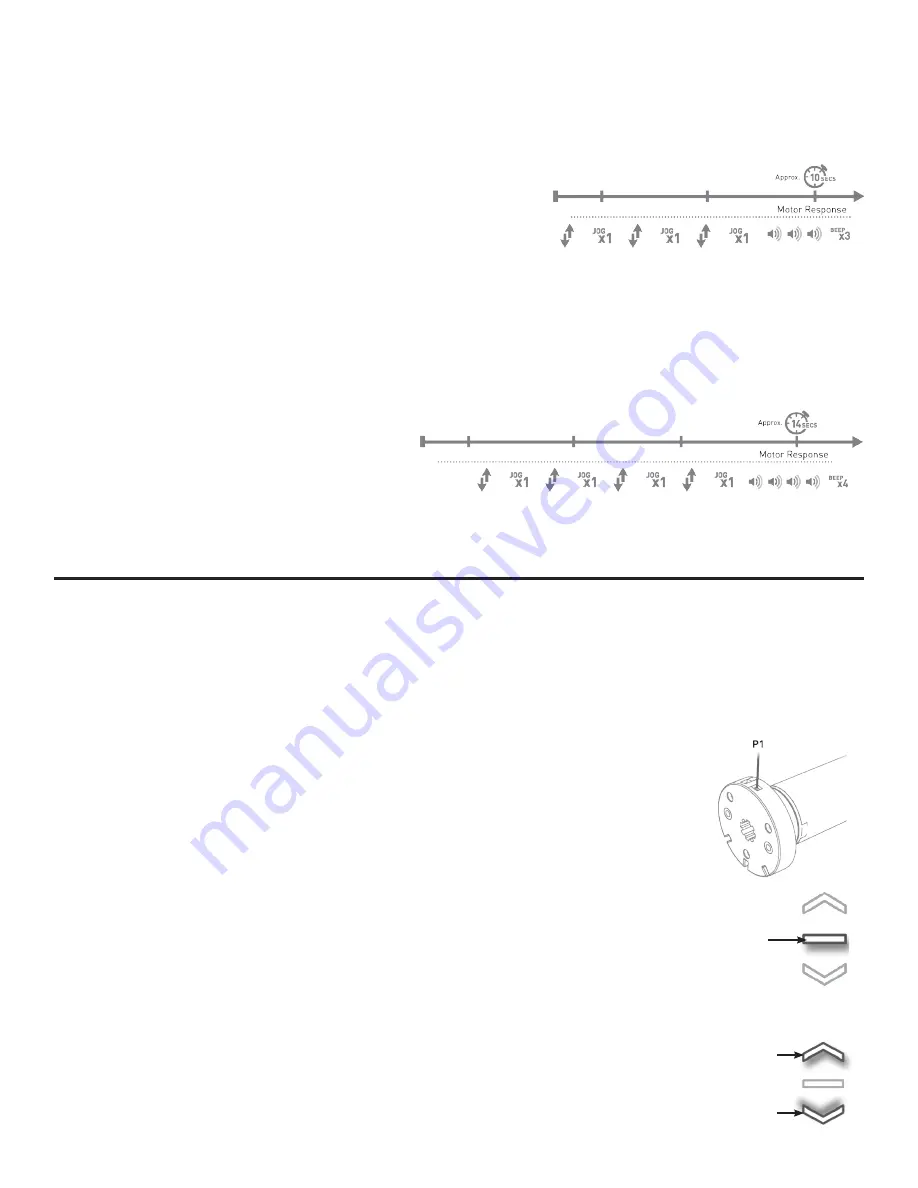
4
• Hold the
P1
button until the shade jogs a third time (approx. 10 seconds), then release.
The shade will beep 3 times, confirming you’ve reversed the direction of the roll.
REVERSE DIRECTION
• Use this only if the shade is moving in the opposite direction of the button you press.
• Hold the
P1
button until the shade jogs a fourth time (approx. 14 seconds.) The shade will
beep 4 times after the fourth jog, confirming you’ve reset the shade to factory settings.
RESET THE FACTORY SETTINGS
• This will clear everything from the shade, including limits, and any programmed remotes or
switches. Proceed to I
NITIAL SETUP
to program shade for usage.
INITIAL SET UP
IMPORTANT: Please read through this section completely before beginning.
Once a shade has been reset to factory settings it will need to complete the initial setup. The initial setup
pairs a remote with your shade, sets upper and lower limits, and prepares the shade for use.
NOTE:
Initial Setup cannot be performed with a wall switch. It must be done with either a single channel
or 15 channel remote.
1. If using a 15 channel remote, select which channel you would like shade
programmed to. If using a single channel remote, proceed to step 2.
I. PAIR SHADE WITH REMOTE
2. Hold the
P1
button on the motor until the shade jogs once,
then release (approx. 2 seconds.) The shade will give one beep
after the button has been released. This confirms it’s ready to pair.
3. Hold the
STOP
button on the controller until the shade jogs 2 times,
then release (approx. 2 seconds.) The shade will give 3 beeps.
This confirms the remote has been paired with the shade.
1. Check the direction of the shade using the
UP
or
DOWN
buttons.
Shade will move in small steps unless button is held.
II. CHECK MOTOR DIRECTION
IMPORTANT:
Limits are not set at this point. Damage to shade may
occur when operating motor prior to setting limits. Please pay attention.
STOP
UP
Down


