2. Select the media.
Procedure
1.
Tap
[Setup].
The registered media is displayed in a list.
2.
Select the media name to use.
3.
Tap [Next].
4.
The [Setup Method] screen appears. Select whether to use the take-up unit.
5.
Tap [Start Setup].
The cutting carriage moves and detects the width of the media and the positions of the media
clamps. This operation is called initialization.
6.
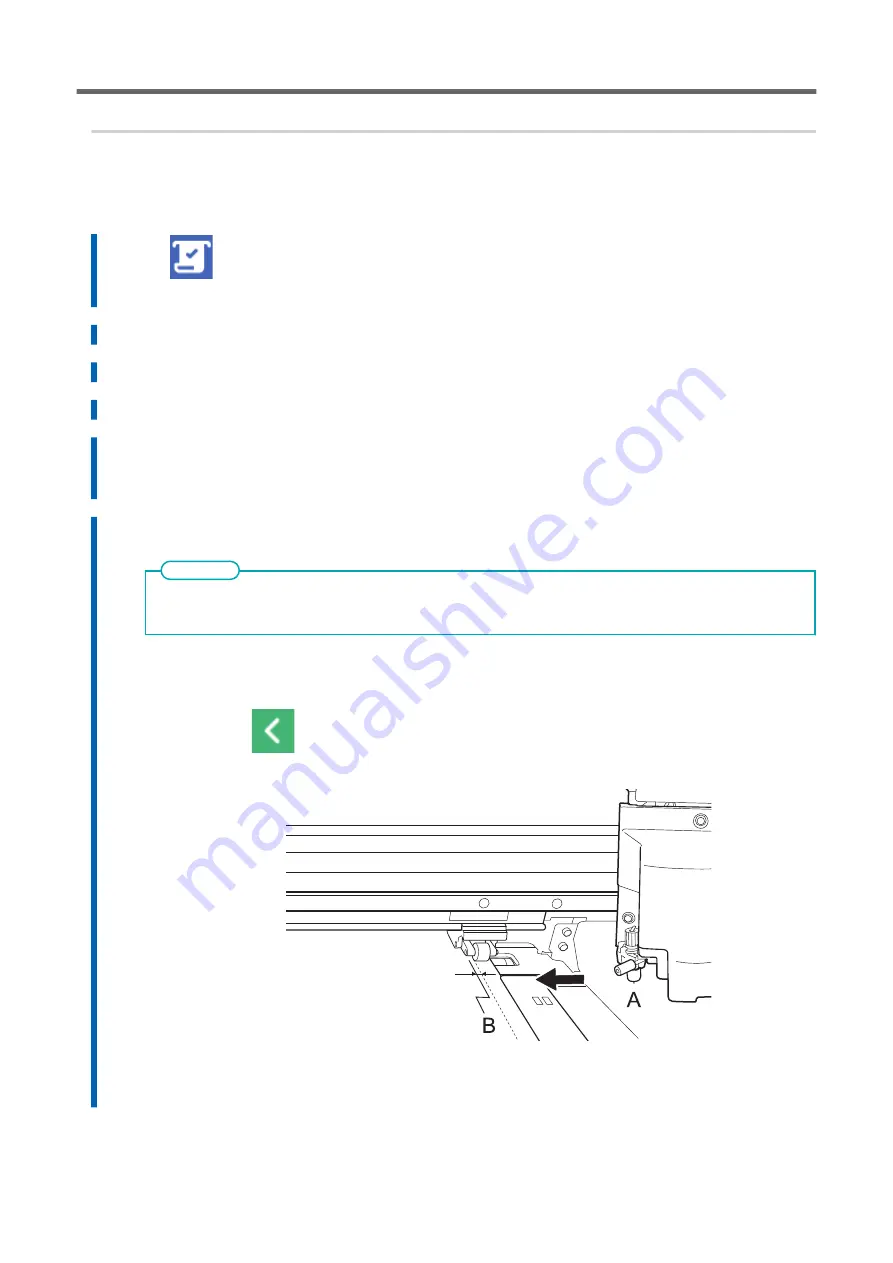
When [Printing Area (Width)] screen appears, use the following procedure to configure the settings.
The media selected in step 2 is media whose printing area was set manually when registered as new media.
The printing area must be set manually each time, so the [Printing Area (Width)] screen appears.
MEMO
(1)
Tap [Change].
The [Set the right edge of the printing area within the area specified by the pinch roll-
ers.] window appears.
(2)
Hold down
to move the center of the blade (A) approximately 2 mm (0.08 in.) to the inside
(B) from the left edge of the right pinch roller.
(3)
Tap [OK].
The [Set the left edge of the printing area within the area specified by the pinch rollers.]
window appears.
Setup of Registered Media
98
Basic Operations
Summary of Contents for TrueVIS SG3-300
Page 8: ...Basic Handling Methods 7...
Page 28: ...Power Supply Operations Basic Operations 27...
Page 58: ...11 Close the front cover Setup of New Media Basic Operations 57...
Page 63: ...13 Close the front cover Setup of New Media 62 Basic Operations...
Page 93: ...11 Close the front cover Setup of Registered Media 92 Basic Operations...
Page 98: ...13 Close the front cover Setup of Registered Media Basic Operations 97...
Page 116: ...Output Method 115...
Page 147: ...Optimizing Quality and Ef ficiency 146...
Page 181: ...Accurately Adjusting the Cutting Settings 180 Optimizing the Output Quality...
Page 222: ...Maintenance 221...
Page 274: ...Troubleshooting Methods 273...
Page 314: ...Appendix 313...
Page 327: ......


