


2-4 If Ink Runs Out
47
Chapter 2 Operation
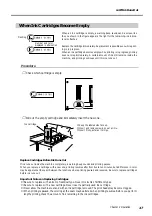
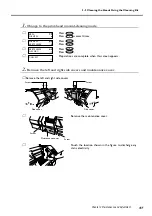
When Ink Cartridges Become Empty
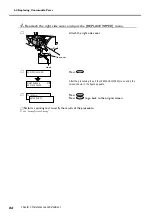
When an ink cartridge is empty, a warning beep sounds and a screen like
the one shown in the figure appears. The light for the remaining-ink indica-
tor also flashes.
Replace the cartridge immediately. Replacement is possible even while print-
ing is in progress.
When an ink cartridge becomes empty while printing is in progress, printing
does not stop immediately. A certain amount of ink still remains inside the
machine, and printing continues until this ink runs out.
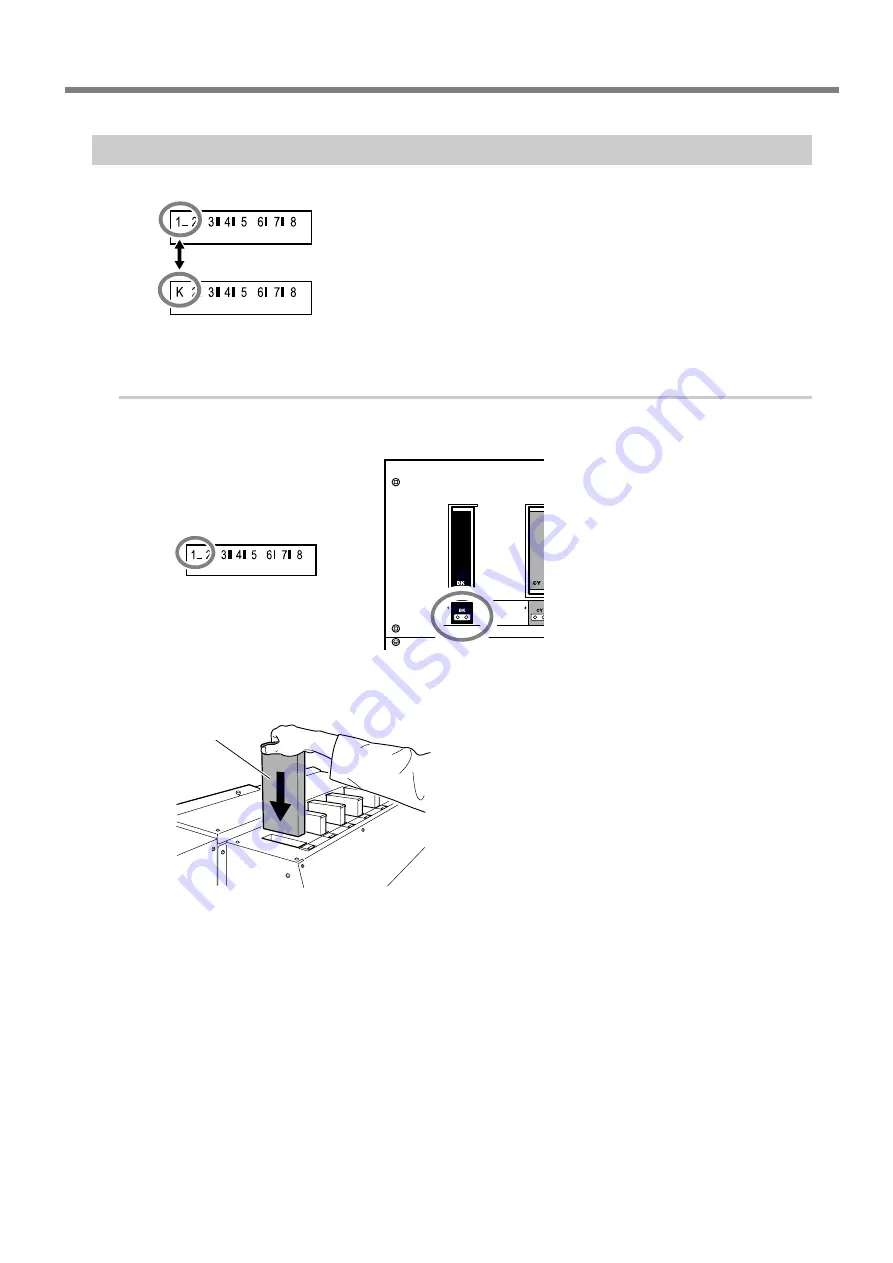
Procedure
➊
Check which cartridge is empty.
➋
Pull out the empty cartridge and immediately insert the new one.
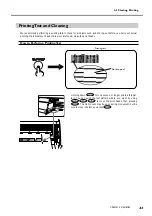
Replace Cartridges Before Ink Runs Out
If ink runs out inside the machine completely, a warning beep sounds and printing pauses.
When you replace a cartridge with a new one, printing resumes after from five to ten minutes, but a difference in color
may be apparent at the seam between the locations where printing paused and resumed. Be sure to replace cartridges
before ink runs out.
Important Notes on Replacing Cartridges
➢
Be sure to replace with an item of identical type. Never mix items of different types.
➢
Be sure to replace with a new cartridge. Never insert a partially used ink cartridge.
➢
Never allow the machine to stand with an ink cartridge removed. The print heads may become clogged.
➢
When printing is paused, the coloring at the seam may be altered when printing resumes. Before you perform
lengthy printing, check the amount of ink remaining in the ink cartridges.
➢
Keep the labeled side face up.
➢
Insert and remove slowly, one at a time.
➢
Insert firmly, as far as it will go.
Ink cartridge
Flashing
Number and color
displayed in alternation
Summary of Contents for Hi-Fi Express FP-740
Page 22: ...20 ...
Page 23: ...21 Chapter 1 Introduction ...
Page 28: ...26 ...
Page 29: ...27 Chapter 2 Operation ...
Page 50: ...48 ...
Page 51: ...49 Chapter 3 Maintenance and Adjustment ...
Page 68: ...66 ...
Page 69: ...67 Chapter 4 Feature Reference ...
Page 100: ...98 ...
Page 101: ...99 Chapter 5 What to Do If ...
Page 112: ...110 ...
Page 113: ...111 Chapter 6 Specifications ...
Page 118: ...116 ...
Page 119: ......
Page 120: ...R2 070228 ...


