3 Replacement of Main Parts
28
3
5
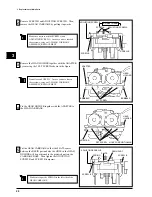
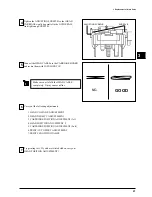
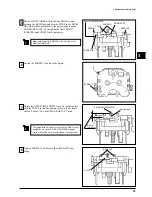
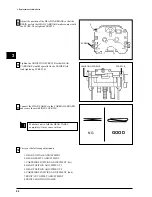
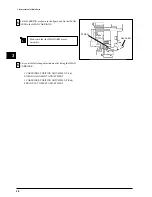
Fold the SPRING as shown in the figure and fix the HEAD
ARM to the HEAD CARRIAGE.
6
Make sure that the HEAD ARM moves
smoothly.
Carry out the following adjustments after fixing the HEAD
CARRIAGE.
1. CARTRIDGE POSITION ADJUSTMENT (1st)
2. HEAD ALIGNMENT ADJUSTMENT
3. CARTRIDGE POSITION ADJUSTMENT (2nd)
4. PRINT/CUT OFFSET ADJUSTMENT
HEAD ARM
SPRING
Summary of Contents for Color Camm Pro PC-60
Page 4: ... MEMO ...
Page 6: ...2 1 Structure Spare Parts 1 1 2 FRAME 1 ...
Page 8: ...4 1 Structure Spare Parts 1 1 3 FRAME 2 ...
Page 88: ...84 4 Adjustment 4 MEMO ...

