


7
3
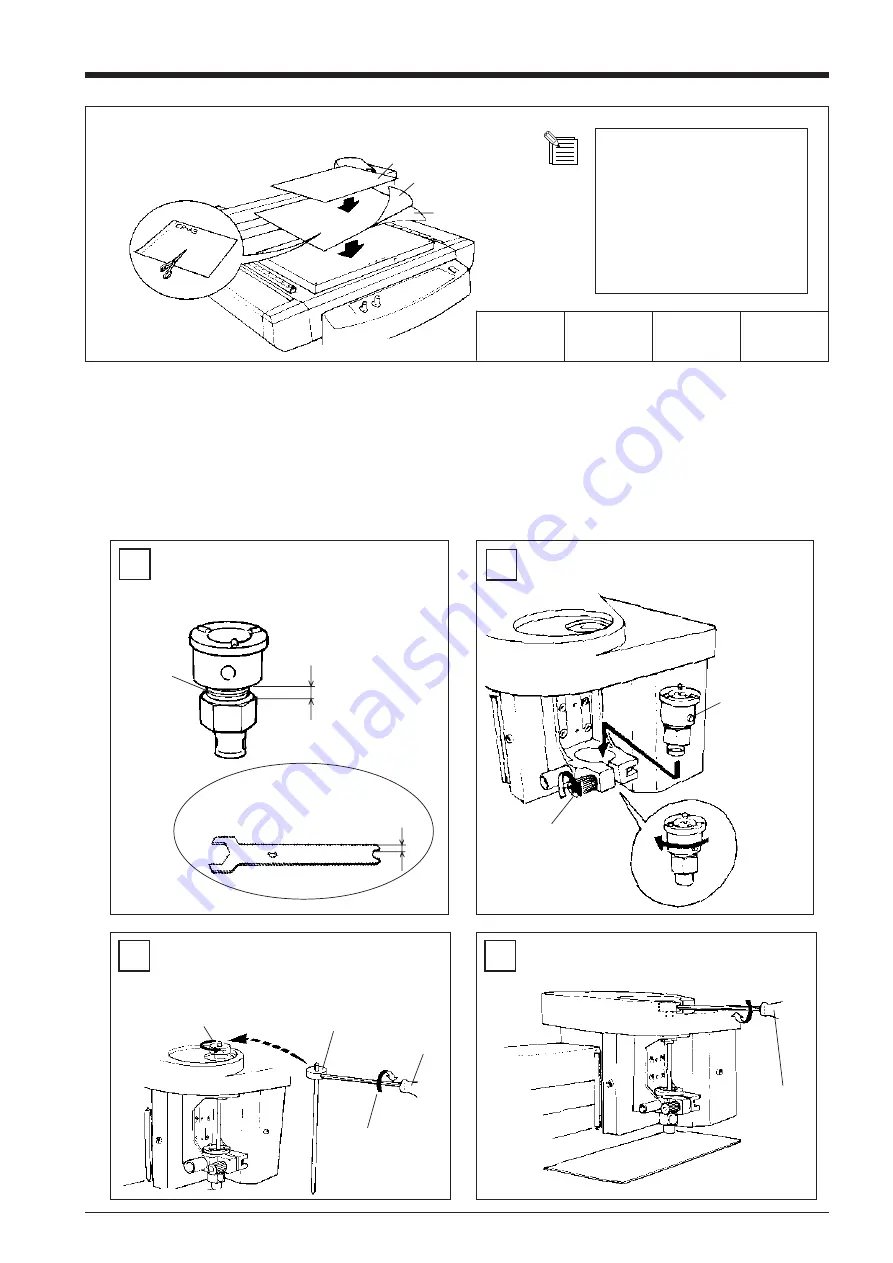
Installing a Tool
The steps for installing a tool are shown below. Follow these steps to install the appropriate tool for the task.
For Engraving (Character Cutter)
* Use SELECT key to choose "ENGRAVER" as the mode.
1
When installing a cutter for engraving, make sure the blade tip protrudes beyond the surface of the material by an amount equal
to the depth of engraving to be performed.
Move the tool carriage to a position over the material surface, then install the cutter.
2
Press the
SET SURFACE
key to lower the tool,
then loosen the screw for the engraving-tool holder.
Provisionally tighten the character cutter in the
engraving-tool holder, and install the engraving-tool
holder on the tool carriage.
Loosen the tool mounting screw and insert the depth
regulator nose in the tool carriage.
Hexagonal
screw driver
Install the depth regulator nose as shown in the
figure.
1. Line up the
protrusion with
the groove on
the front, and fit
it in the groove.
3. Retighten the tool
mounting screw to
secure the nose in
place.
2. Rotate in the
direction of
the arrow.
The spanner included with
the unit is 3 mm (1/8") thick,
and can be used as to check
the width of the space.
Screw
part
3 mm (1/8")
Adjust the screw so to make
this space 3 mm (1/8").
4
Hexagonal
screw driver
2. Rotate in the direction
of the arrow.
1. Turn in the direction
of the arrow to
tighten provisionally.
Engraving-
tool holder
**********
CUTTER
**********
**********
Using the Optional CP-A3 Cutting-use
Protective Pad...
Cut to fit the size
of the table
Peel off the
backing paper
CP-A3
Material
• The peel-off sheets are used
to protect the CP-A3 after
use.
Do not throw them away.
• One CP-A3 can be used
about 100 times. Replace it
once it loses its grip (sticki-
ness).
Summary of Contents for CAMM SCRIBE CS-20
Page 26: ...18 Appendix C Specifications...
Page 28: ...R8 001101 CS 20...


