89
89
www.cel-robox.com
7.0 Calibration and Maintenance
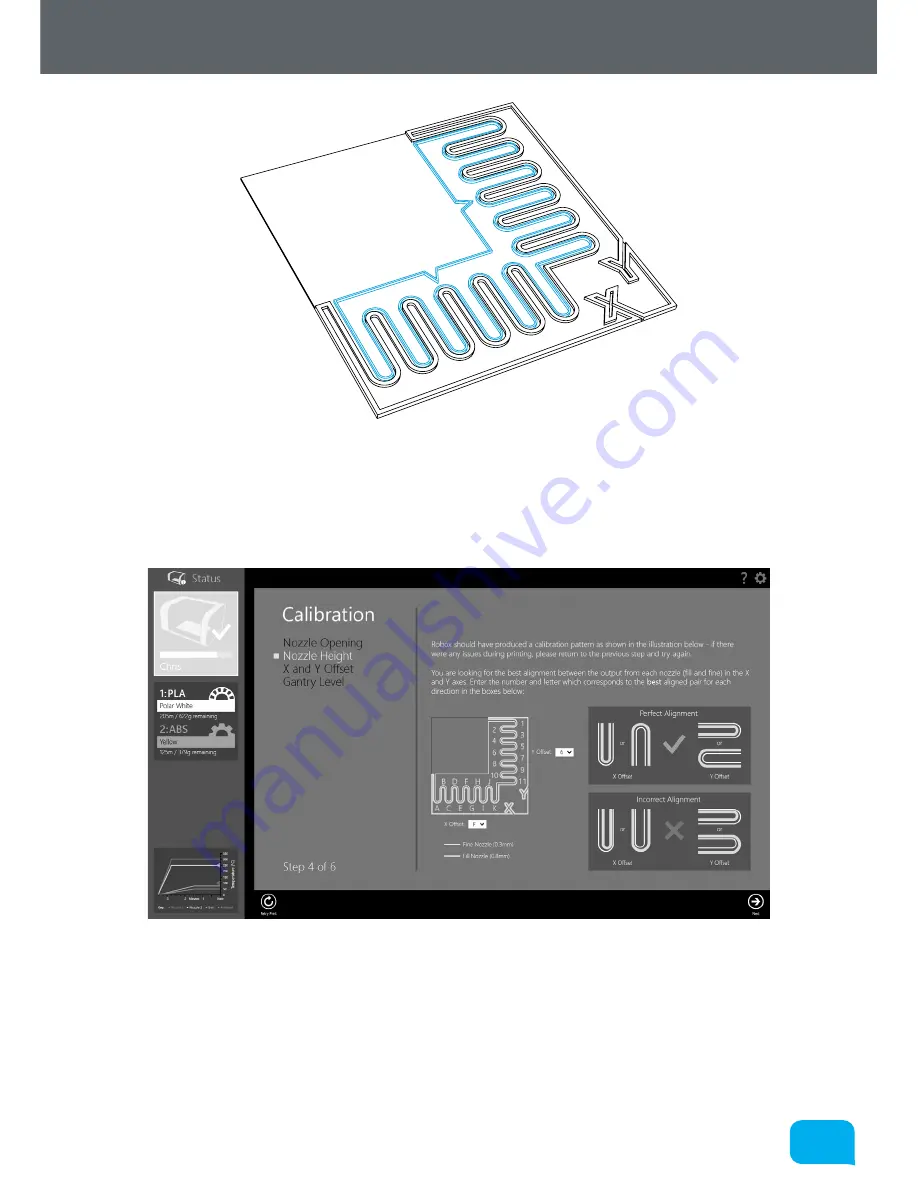
On the illustration above, the output from the fill nozzle is shown in black, with
the fine nozzle shown in blue. Once the print has finished, DO NOT remove the
part, as the process is not yet complete. If the print didn’t complete successfully,
you can click the
Retry Print
button on the toolbar.
Compare the part on the bed to the image on-screen - you are looking for the
best alignment between the output from each nozzle (fill and fine) in the X and
Y axes. There are diagrams on the right which show the points you are looking
for. Then choose the appropriate number and letter for the profiles with the best
alignment and click
Next
to continue.
Summary of Contents for 3d printer
Page 1: ...www cel robox com UserGuide including AutoMaker Version 1 1 ...
Page 6: ...1 0 1 0 Introduction ...
Page 19: ...Overview 2 0 ...
Page 25: ...Getting Started 3 0 ...
Page 34: ...Using Robox 4 0 ...
Page 42: ...AutoMaker Software 5 0 ...
Page 77: ...77 77 www cel robox com 5 0 AutoMaker Software ...
Page 78: ...Finishing Parts 6 0 ...
Page 82: ...Calibration and Maintenance 7 0 ...
Page 99: ...99 99 www cel robox com 7 0 Calibration and Maintenance ...
Page 100: ...Supplementary Information 8 0 ...
Page 122: ... 2014 CEL Technology Ltd All rights reserved RBX01 ACC UM ...


