30
User's Guide Digiface AES
© RME
13. Hardware, Driver and Firmware Installation
13.1 Hardware and Driver Installation
After the Digiface has been connected to the computer and switched on install the drivers match-
ing your current macOS.
RME is constantly improving the drivers. Please download the latest drivers from the RME website
at
. Unzip the downloaded file and start the driver installation by double-
clicking
Fireface USB.pkg
.
During driver installation the programs
Totalmix
(TotalMix FX) and
Fireface USB Settings
are
copied to the Applications folder. They will automatically start into the dock if a Digiface AES is
connected. A reboot of the computer is not required.
Driver Updates
do not require to remove the existing drivers. Simply install the new driver over
the existing one.
13.2 De-installing the Drivers
In case of problems the driver files can be deleted manually by dragging them to the trash bin:
/Applications/Fireface USB Settings
/Applications/Totalmix
/System/Library/Extensions/FirefaceUSB.kext
/Users/username/Library/Preferences/de.rme-audio.TotalmixFX.plist
/Users/username/Library/Preferences/de.rme-audio.Fireface_USB_Settings.plist
/Library/LaunchAgents/de.rme-audio.firefaceUSBAgent.plist
Under the latest Mac OS X the User/Library folder is not visible in the Finder. To unhide it start
Finder, click on the menu item Go. Hold down the option (alt) key, then click on Library.
With the latest DriverKit drivers, the whole driver is the RME Settings app found in Applications.
Deleting this app also removes the driver from the system.
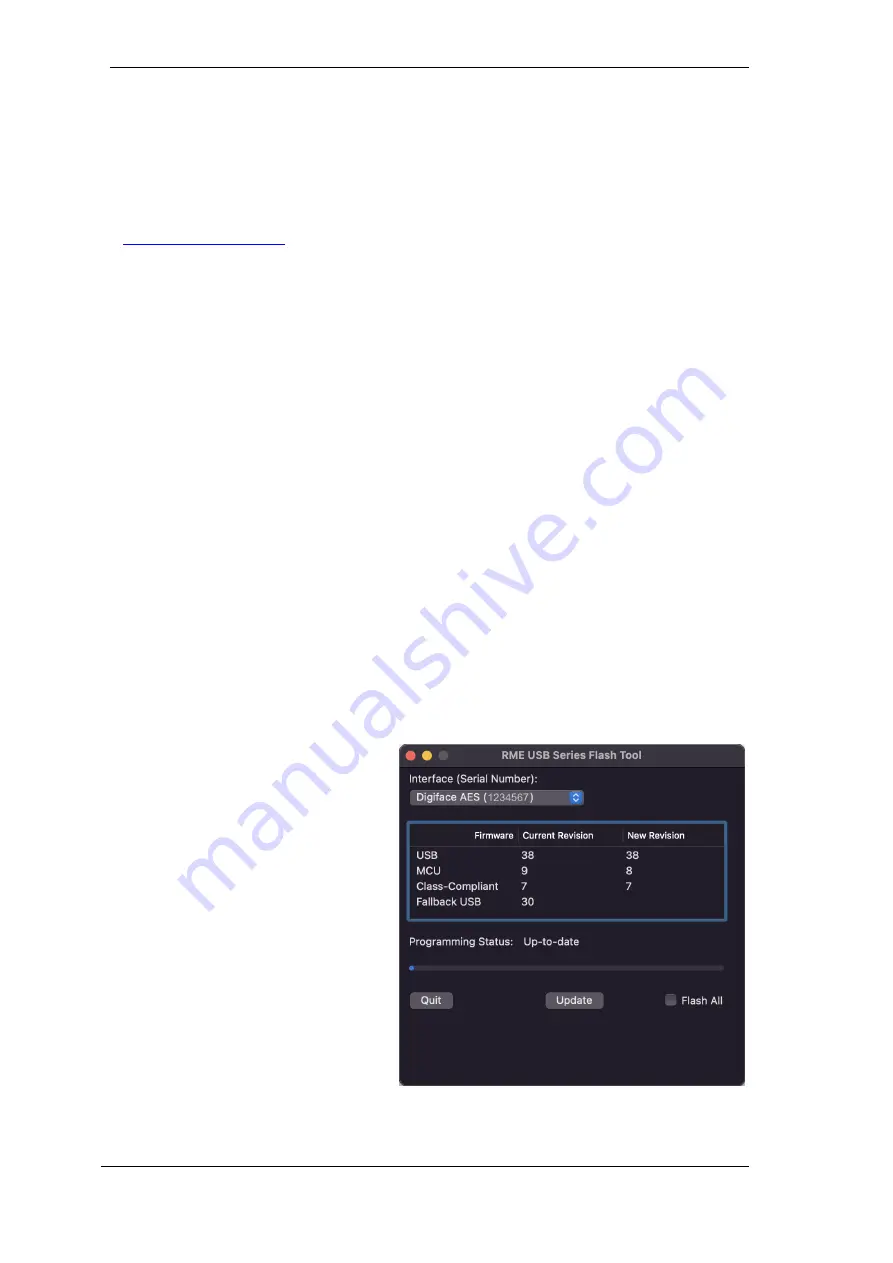
13.3 Firmware Update
The app
RME USB Series Flash Tool
up-
dates the firmware of the Digiface AES to
the latest version. It requires an already in-
stalled Thunderbolt or USB driver.
After start the tool displays the current re-
vision of the Digiface AES firmware, and
whether it needs an update or not. If so,
simply press the 'Update' button. A pro-
gress bar will indicate when the flash pro-
cess is finished (Verify Ok).
After the update the Digiface AES needs to
be reset. This is done by powering down
the Digiface for a few seconds. A reboot of
the computer is not necessary.
Summary of Contents for Digiface AES
Page 7: ...User s Guide Digiface AES RME 7 User s Guide Digiface AES General...
Page 13: ...User s Guide Digiface AES RME 13 5 4 Overview Menu Structure...
Page 15: ...User s Guide Digiface AES RME 15 User s Guide Digiface AES Installation and Operation Windows...
Page 29: ...User s Guide Digiface AES RME 29 User s Guide Digiface AES Installation and Operation Mac OS X...
Page 37: ...User s Guide Digiface AES RME 37 User s Guide Digiface AES Inputs and Outputs...
Page 42: ...42 User s Guide Digiface AES RME...
Page 43: ...User s Guide Digiface AES RME 43 User s Guide Digiface AES Stand Alone Operation...
Page 46: ...46 User s Guide Digiface AES RME...
Page 47: ...User s Guide Digiface AES RME 47 User s Guide Digiface AES TotalMix FX...
Page 49: ...User s Guide Digiface AES RME 49...
Page 82: ...82 User s Guide Digiface AES RME...
Page 83: ...User s Guide Digiface AES RME 83 User s Guide Digiface AES Class Compliant Mode...
Page 89: ...User s Guide Digiface AES RME 89 User s Guide Digiface AES Technical Reference...
Page 98: ...98 User s Guide Digiface AES RME 39 Diagrams 39 1 Block Diagram Digiface AES...
Page 100: ...100 User s Guide Digiface AES RME...
Page 101: ...User s Guide Digiface AES RME 101 User s Guide Digiface AES Miscellaneous...


