


9
Printing the Test Pattern for Adjusting the Print Head Position
This machine uses the inkjet printing system. Because the ink is sensitive to environmental conditions, varia-
tions in temperature or humidity for example can result in blurring or broken vertical lines. Clean the print
heads if blurring occurs or vertical lines appear broken on prints.
⋅
Make sure the envelope lever is raised. If it is not, you will be unable to print. For details about the
envelope lever position, see p. 22, “Names and Locations”.
⋅
Make sure that both the one-sheet bypass tray and the one-sheet output tray are closed. The machine
cannot print if any tray is left open.
⋅
Check that A4
L
or 8
1
/
2
x 11
L
size paper is loaded in Tray 1. If it is not, the test pattern cannot be printed.
⋅
Do not attempt any other operations while the test pattern is printing out.
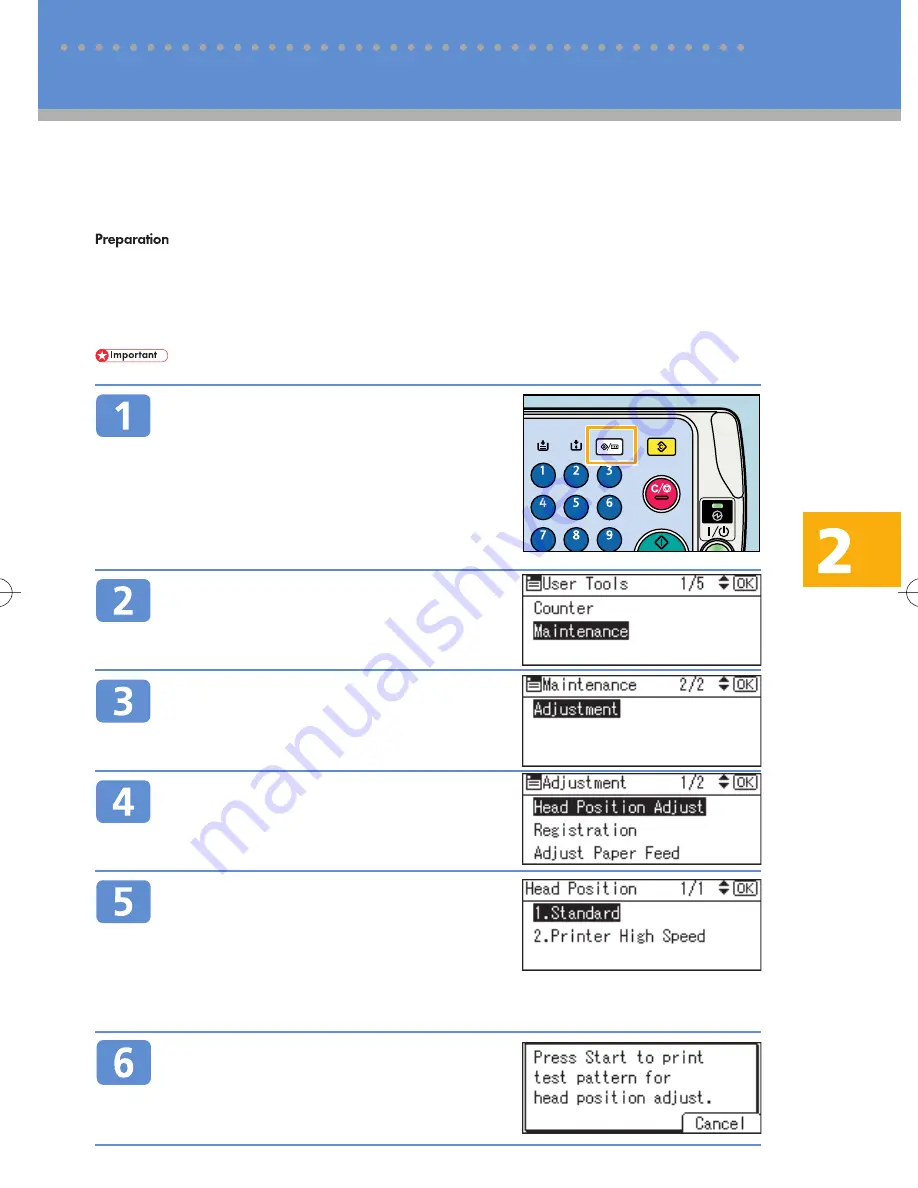
Press the
{
User Tools/Counter
}
key.
Select [Maintenance] using
{U}
or
{T}
, and then press the
{
OK
}
key.
Select [Adjustment] using
{U}
or
{T}
,
and then press the
{
OK
}
key.
Select [Head Position Adjust] using
{U}
or
{T}
, and then press the
{
OK
}
key.
Select the type of print head position
adjustment you require using
{U}
or
{T}
, and then press the
{
OK
}
key.
The type of print head position adjustment you should select depends on the write mode for the
print heads you want to adjust. Select [2.Printer High Speed] to adjust the print heads for printing
on plain paper in fast mode (300 dpi). Otherwise, select [1.Standard].
Press the
{
Start
}
key.
The test pattern for print head position adjustment is
printed. Check the test pattern. For details about check-
ing the test pattern, see p. 10, “Checking the Test Pat-
tern to Adjust the Print Head Position”.
Adjusting the Print Heads
BDZ003S
2 Troubleshooting