


34
Upload Dialog
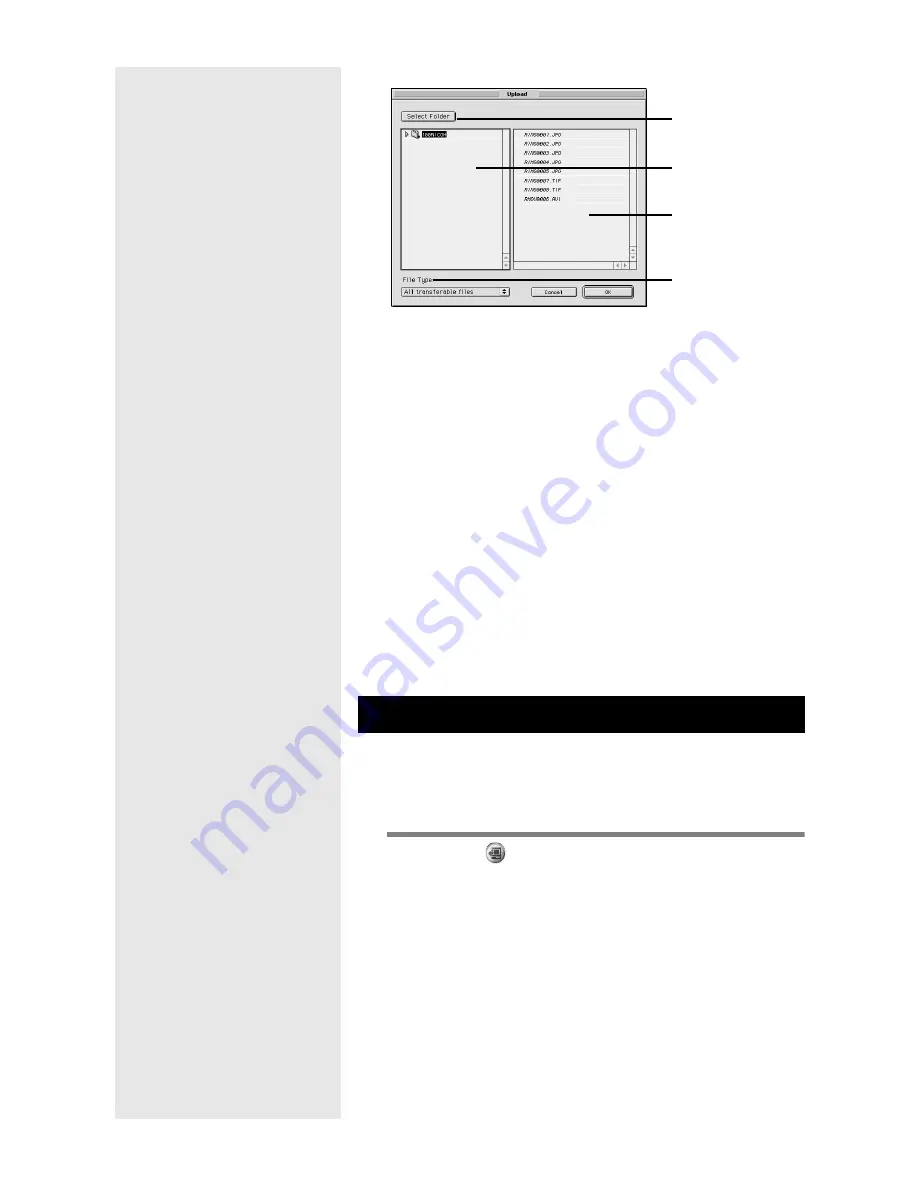
1 [Select Folder]
If you click on this button, the [Choose a Folder] dialog will
be displayed and you can select the drive and folder where the
file to be uploaded is located.
2 Upload Source Folder
The folder to be uploaded will be displayed. The default
setting is the folder selected in [Upload Source Folder] in the
Upload Settings.
3 File List
A list of files of the specified type in the specified folder will
be displayed, enabling you to check the file to be uploaded.
4 File Type
Select the type of file to be uploaded. When you select the file
type, a list of files of the specified type will be displayed on
the right.
You can change the settings registered on the Upload button.
You can specify the type of file you want to send and the
upload source folder in the Macintosh in the upload settings
and save the settings.
1
Click on
in the RICOH Gate window
while pressing Control key.
m
m
m
m
See “Functions of the RICOH Gate Buttons” (p.23).
The [Upload] dialog will be displayed.
Changing the Upload Button Settings
1
2
3
4
Summary of Contents for Caplio RICOH Gate for Macintosh
Page 18: ...16...


