background image


Specifications


PT12


Manual


7/20/2021


Page


47


of


48


SPECIFICATIONS


Specifications:


Thermometer


PT12


Measurement


Ranges


Temperature


Resistance


200

660°C


1

380

 Ω 

Measurement


Performance


Resolution


Accuracy


Temperature


coefficient


For


the


range


of

 ‐

200...+250


°C


0.1


mK


≤ 

±


2


mK


@


23


°C


(95%


confidence


level,


1


year)


0.1


mK


/


°C


Standard


Features


Available


inputs


Input


type


Supported


coefficients


Excitation


current


Reference


resistors


Data


I/O


Control


and


data


acquisition


Logging


intervals


Sampling


rate


Enclosure


type


Power


supply


Operating


instructions


Factory


calibration


certificate


12


Channels


Pt

100


and


Pt

25


Platinum


Resistance


Thermometer


(PRT),


4

wire,


Supports


Smart


4

wire


PRTs


ITS

90,


Callendar

Van


Dusen


0.33,


0.66


and


1mA


resistance,


DC


polarity


reversing


4


internal


Ultra


High


Precision


RS

232,


USB


(serial


port)


RHS


Control


User


programmable


from


5


seconds


to


60


minutes


<1.5


seconds


per


channel


Aluminum


External


12VDC


power


supply


with


1.5


m


cable


(indoor


use


only)


English


Resistance


Calibration


Accessories


Probes


Connectors


Calibrated


and


uncalibrated


PRT’s


available


Lemo


plug


FGG.1B.306


Additional


Information


Digital


I/O


AC


Power


Maximum


operating


conditions


Storage


temperature


Bi

directional


RS

232


and


USB.


Power


supply:


110

230V,


50/60


Hz,


0.3


A


10

30°C,


<


98


%RH,


non

condensing


20...+40°C


Weight


and


Dimensions


Dimension


(W


X


H


X


D)


Weight


Instrument


200


X


72


X


164


mm


1.87


kg


Summary of Contents for PT12

Page 1: ...PT12 RH Systems LLC 1225 W Houston Ave Gilbert AZ 85233 Manual ...

Page 2: ...9 4 3 6 Numeric 2x Display mode 20 4 3 7 Combo Display Mode 21 4 3 8 Probe Status Display Mode 22 4 3 9 Changing Displayed Units of Measurement 23 4 3 10 Changing Number Format 23 4 4 Configuring the Probes 24 4 4 1 Averaging 25 4 4 2 Current Mode 26 4 4 3 Coefficient Mode 27 Callendar Van Dusen CVD 27 ITS90 28 4 4 4 Probe Configuration Management 32 4 5 File Manager 34 4 5 1 Copying Log Files to ...

Page 3: ...21 Page 3 of 48 Channel Sub Commands 41 5 3 3 Probe Commands 43 Calibration 45 Uncertainty 46 Specifications 47 Document History 48 FOR SUPPORT PLEASE EMAIL SUPPORT RHS COM OR CALL 480 926 1955 WITH TECHNICAL OR CALIBRATION QUESTIONS ...

Page 4: ...Introduction PT12 Manual 7 20 2021 Page 4 of 48 ...

Page 5: ...tedly scans all 12 channels Employing a full reversal current source the PT12 eliminates polarity sensitive errors normally inherent to DC measuring techniques Accuracy is further enhanced by referencing all measurements to a series of high accuracy temperature stable internal reference resistors The integrated firmware allows each channel to be individually programmed with ITS 90 or Callendar Van...

Page 6: ...s intended to get you up and running quickly For additional information see section 4 Operation 2 1 CONNECTING A TEMPERATURE PROBE Select any of the supplied probes and connect it to any desired channel the remainder of this section will assume channel 5 When inserting the plug ensure the red dots line up ...

Page 7: ...e system fully boots and the user interface is present probe 5 should indicate a reasonable temperature value All probe coefficients if a smart probe are automatically read from the probe and applied to channel 5 The PT12 has several different display modes It will power up in the previous mode that was displayed on shut down To change display modes swipe with a finger from the left hand side to b...

Page 8: ...a display mode tap the desired icon The menu will hide and the new display mode will appear For this quick start example select the top left display mode icon this is the temperature graph display mode For more information see section 4 3 Navigating the User Interface ...

Page 9: ...h buttons and the Continuous Update button to enable them When enabled they are highlighted in light blue Drag a single finger on the graph to scroll in any direction Use two fingers for pinch zoom operation For additional information on graph functions see section 4 3 1 Temperature Graph Display Mode Note The graph only retains the last 48 hours of data while the log file holds all the data since...

Page 10: ...modes which can be manually or automatically selected The three current modes available are approximately 0 3 mA 0 6 mA and 1 mA The PT12 will attempt to get the most accurate reading possible when utilizing auto current mode 4 1 CONNECTING TEMPERATURE PROBES There are 12 LEMO connectors one per probe on the PT12 and any number of probes between 1 and 12 may be connected in any order at any given ...

Page 11: ...mory and use the channel s configuration for coefficients If you move a basic probe from one channel to another you will have to manually reenter the probe coefficients Pins 1 and 6 are jumpered together inside the LEMO plug to indicate a basic probe Jumper Wire Image 3 1 1 LEMO F66 1B 306 Basic Probe ...

Page 12: ... probe regardless of which channel it s plugged in to 4 1 3 USER SUPPLIED PROBES User supplied probes may be utilized by wiring them to a LEMO connector part FGG 1B 306 To create a basic probe short pin 1 to pin 6 To create a smart probe insert a Maxim Integrated DS28EC20 with pin 1 of the chip to pin 1 of the LEMO and pin 2 of the chip to pin 6 of the LEMO Pin 3 of the chip is unused and should b...

Page 13: ...ace that supports tap pinch zoom swipe and long press They each have different functions and are supported on various display modes The PT12 has several different display modes It will power up in the previous mode that was displayed on shut down To change display modes swipe with a finger from the left hand side This brings up a menu of available display modes To select a display mode tap the des...

Page 14: ...ures on one side a mini graph and a large numeric value temperature and resistance for any single probe selected Probe Status Shows the probe connection status of each channel of the PT12 4 3 1 TEMPERATURE GRAPH DISPLAY MODE To add a probe to the graph tap on its numeric value The numeric value will be outlined in a unique color and the temperature plot will appear on the graph in that same color ...

Page 15: ...Operation PT12 Manual 7 20 2021 Page 15 of 48 SCROLLING THE GRAPH To scroll the graph drag a finger in any direction Alternatively to scroll a single axis drag within the axis area ...

Page 16: ...axis semi auto While the button is selected the y axis is fixed If the data goes out of bounds the y axis automatically adjusts to fit the data Locked y axis While the button is selected the y axis remains exactly as shown without any auto adjustment X axis Width Fixes the width of the x axis to the specified period of time Scrolling does not affect this value however zooming overrides this value ...

Page 17: ... display numerical statistics of any currently graphed data long press and drag the box to highlight the graph data you wish to analyze After releasing the statistics will be shown above the graph Scroll the statistical data left or right to display more information ...

Page 18: ...ph of section 4 3 1 Temperature Graph Display Mode with the exception that values shown and graphed are probe resistances rather than temperatures 4 3 3 ALL TEMPERATURE DISPLAY MODE The All Temperature Display Mode simultaneously shows all twelve temperatures in the largest font possible Unconnected channels appear with blank values ...

Page 19: ... resistances in the largest font possible Unconnected channels appear with blank values 4 3 5 NUMERIC 4X DISPLAY MODE The Numeric 4x Display Mode shows any combination of four individually selectable channels Each of the four channels may be selected to show temperature or resistance in a large font while showing the opposite in a smaller font ...

Page 20: ...tance back to temperature tap the button again Tap the drop down menu on any of the four channels to select a different channel 4 3 6 NUMERIC 2X DISPLAY MODE The 2x Numeric Display Mode shows any combination of two individually selectable channels Each of the two channels may be selected to show temperature or resistance in the largest possible font Operation is identical to section 4 3 5 Numeric ...

Page 21: ...mini graph operate identical to the graph in section 4 3 1 Temperature Graph Display Mode Although the graph is physically smaller it is the same graph as on the other display modes To add a channel to the graph tap the channel value The large numeric value above the graph operates identical to a single item from section 4 3 5 Numeric 4x Display Mode This display only shows up to 10 of the connect...

Page 22: ...Operation PT12 Manual 7 20 2021 Page 22 of 48 4 3 8 PROBE STATUS DISPLAY MODE The Probe Status Display Mode shows the current probe status of each of the twelve channels ...

Page 23: ...mmon to all probes meaning all temperatures will be displayed in the new units However for uniformity and consistency temperature is always logged to file in C and the serial port interface will always respond in C regardless of displayed unit selection Resistance is always in Ω 4 3 10 CHANGING NUMBER FORMAT To change the number format of displayed values long press on a numeric value to bring up ...

Page 24: ...er format and tap OK for the single item or Apply to All to apply the format to all PT12 displayed values 4 4 CONFIGURING THE PROBES To configure the probes open the settings menu by swiping in from the left then tap the settings button on the lower section of the menu ...

Page 25: ...dividually 4 4 1 AVERAGING Probe averaging uses a weighted response low pass filter To change averaging tap on the text box The on screen keyboard will appear and allow entry of a new value You must press enter to confirm the change Reasonable averaging range is 0 to 100 0 no averaging every reading is new 100 slower reaction longer stabilization time but with significant noise reduction Tap the s...

Page 26: ...ors while preventing over under range of the A D converter When in manual current mode it is possible to over range the A D converter if the probes exceed the resistances identified in the table above This causes no harm to the system other than temporary errant readings If the resistance of the probe is outside the range of the PT12 internal reference resistors the probe readings may be less accu...

Page 27: ...e itself Only one coefficient type may be used at a time to measure temperature but both coefficient types may be stored on the probe if a smart probe or in the system if a basic probe CALLENDAR VAN DUSEN CVD To select CVD mode tap the coefficient mode drop down and select CVD In CVD mode the PT12 calculates temperature from resistance by solving the following CVD equation for temperature T When T...

Page 28: ...given in the other form as alpha delta beta the following may be used to convert to the A B and C coefficients needed by the PT12 A 100 100 B 100 2 C 100 4 It is also possible to convert A B and C to alpha delta beta that may be required by other temperature measurement systems A 100B B 100 2 A 100B C 100 4 A 100B Note that C 0 and 0 when T 0 C Tap the save button to ensure the values persist afte...

Page 29: ...4 189 3442 0 01 A4 B4 Below zero 5 38 8344 29 7646 A5 B5 Subrange 5 only 7 0 01 660 323 A7 B7 C7 A A7 B B7 C C7 8 0 01 419 527 A8 B8 A A8 B B8 C 0 9 0 01 231 928 A9 B9 A A9 B B9 C 0 10 0 01 156 5985 A10 A A10 B 0 C 0 11 0 01 29 7646 A11 A A11 B 0 C 0 To select ITS90 mode tap the coefficient mode drop down and select ITS90 Depending on the sub range selected the appropriate coefficients will appear...

Page 30: ...on to ensure the values persist after a power cycle If using a smart probe coefficients are stored on the probe If using a basic probe coefficients are stored on the PT12 channel In the PT12 temperatures are determined per ITS90 in terms of the ratio 𝑊 of the resistance of a probe 𝑅 at a given temperature and the resistance of that same probe at the triple point of water RTPW where the temperature...

Page 31: ... water where Wr 1 and T 273 16K is 𝑇 𝐷 𝐷 𝑊 2 64 1 64 273 15 7 where 𝑇 is the temperature in Kelvin 𝑊 is the reference resistance ratio and 𝐴 and 𝐶 are constants given in the ITS 90 standard See the ITS 90 standard for a more complete definition as well as the full table of constants for 𝐴 𝐵 𝐶 and 𝐷 No probe is ideal of course Each exhibit small deviations that make their temperature vs resistance ...

Page 32: ...GEMENT Each probe s configuration may be imported exported defaulted and saved The averaging and current mode selection are always saved to the channel If using a basic probe the coefficients will also be saved to the channel However if using a smart probe the coefficients will be saved to the memory chip within the probe Import Configuration Imports a previously stored configuration file from the...

Page 33: ...t Return a probe s configuration to default This sets the coefficient mode to CVD with default coefficients See section 4 4 3 1 Callendar Van Dusen CVD for more information on defaults Save Save the probe s configuration For a smart probe the configuration is stored within the probe itself For a basic probe the configuration is stored on the channel Averaging and current mode are stored only on th...

Page 34: ... logs from the system and setting the preferred logging location 4 5 1 COPYING LOG FILES TO USB DRIVE Attach a USB flash drive must be pre formatted to FAT 32 EXFAT NTFS or EXT4 and select which logs you would like to copy to your USB drive 4 5 2 DELETING LOG FILES Delete old log files from this menu by selecting the unwanted files and tapping the delete button Export selected log s to USB Select ...

Page 35: ...rop down menu This will create a new log file on the attached USB drive and start logging directly to that drive The files do not appear on the system only on the USB drive If the USB drive is removed logging will automatically revert back to the local system To log to the PT12 local internal memory select Local from the logging location drop down menu Files will not log to the USB drive ...

Page 36: ...number of digits displayed when clicking on plotted points Graph statistics resolution The number of digits to display in the graph statistics System unit control Another location to change system units Serial communication and logged data always occur in C and ohms regardless of the units selected for display Time zone UTC time zone set for log file or graph If the time zone is changed while logg...

Page 37: ...standard RS 232 9 pin extender cable The extender cable has a male connector on one end and a female connector on the other end It is wired straight through with pins 1 through 9 on one end wired to pins 1 through 9 on the other end The PT12 ignores the DSR and CTS handshaking signals While there is no harm in connecting all 9 pins the PT12 only requires connection of three of the pins TxD RxD Gnd...

Page 38: ...ATION To communicate with the PT12 the computer should be set to the following parameters Baud Rate 115200 Data Bits 8 Stop Bits 1 Handshaking None 5 1 2 USB TO SERIAL PORT The USB type B host port is used for connecting the PT12 to a PC without the need of an external RS 232 to USB converter The device will show up on a PC as a serial port and will need to be configured with the same serial setti...

Page 39: ...eturn line feed combination 5 2 2 CASE SENSITIVITY All commands are insensitive to case In other words it does not matter if the command is sent in upper case letters lower case letters or as some combination of the two For example the commands T1 and t1 appear identical to the PT12 However with two commands save RHS and default RHS the RHS needs to be capitalized This is to prevent an accidental ...

Page 40: ...a Numeric SN I I 0 Read set global current mode 0 0 333 mA 1 0 666 mA 2 1 mA Setting global current mode disables probe specific current mode for each channel and sets the manual current R Comma separated list of each resistance in Ω If a probe is not connected it will appear as NaN not a number T 25 38095 25 26928 25 53783 25 27834 25 38860 25 23795 NaN 25 41134 25 48914 NaN 25 34643 25 37140 Com...

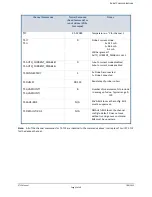
Page 41: ...nd list below T4 25 123 See sub command list below T5 25 123 See sub command list below T6 25 123 See sub command list below T7 25 123 See sub command list below T8 25 123 See sub command list below T9 25 123 See sub command list below T10 25 123 See sub command list below T11 25 123 See sub command list below T12 25 123 See sub command list below CHANNEL SUB COMMANDS These are associated with T1 ...

Page 42: ...isabled 0 Auto current mode enabled T1 CONNECTED 1 0 Probe Disconnected 1 Probe Connected T1 OHMS 99 123 Resistance of probe in ohms T1 AVGCOUNT T1 AVGCOUNT 8 Number of measurements to include in average of value Typical range 0 100 T1 SAVE RHS N A SAVE RHS to save the config RHS must be uppercase T1 DEFAULT RHS N A DEFAULT RHS to set the channel config to default Does not save without running a s...

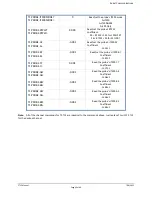
Page 43: ... F sent by the PT12 back to the computer Probe Sub Commands Typical Response Read Command or Input Values Write Command Notes T1 PROBE SN T1 PROBE SN 0123456789 Read set probe s ten digit alpha numeric serial number T1 PROBE CALDATE T1 PROBE CALDATE 210525 Read set probe s calibration date Format is YYMMDD T1 PROBE CORTYPE T1 PROBE CORTYPE 10 Read set the probe s coefficient type 10 CVD 9 ITS90 T1...

Page 44: ...T1 PROBE B 0 001 Read set the probe s ITS90 B7 Coefficient 1 B7 1 T1 PROBE C T1 PROBE C 0 001 Read the probe s ITS90 C7 Coefficient 1 C7 1 T1 PROBE A4 T1 PROBE A4 0 001 Read the probe s ITS90 A4 Coefficient 1 A4 1 T1 PROBE B4 T1 PROBE B4 0 001 Read the probe s ITS90 B4 Coefficient 1 B4 1 T1 PROBE A5 T1 PROBE A5 0 001 Read the probe s ITS90 A5 Coefficient 1 A5 1 T1 PROBE B5 T1 PROBE B5 0 001 Read t...

Page 45: ...Calibration PT12 Manual 7 20 2021 Page 45 of 48 CALIBRATION Contact RH Systems for calibration options Contact information is located at the end of the table of contents ...

Page 46: ...erage indicated value from the characterized reference value applied σ is the standard deviation of the indicated values and Ru is the uncertainty of the reference resistances applied during the characterization The following table contains the mean and maximum channel uncertainties observed Resistance Ω Maximum Channel Uncertainty Ω Average Channel Uncertainty Ω 5 00015752 0 000316876 0 0002589 2...

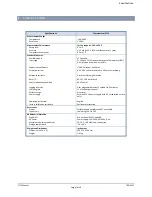
Page 47: ...Pt 100 and Pt 25 Platinum Resistance Thermometer PRT 4 wire Supports Smart 4 wire PRTs ITS 90 Callendar Van Dusen 0 33 0 66 and 1mA resistance DC polarity reversing 4 internal Ultra High Precision RS 232 USB serial port RHS Control User programmable from 5 seconds to 60 minutes 1 5 seconds per channel Aluminum External 12VDC power supply with 1 5 m cable indoor use only English Resistance Calibrat...

Page 48: ...Document History PT12 Manual 7 20 2021 Page 48 of 48 DOCUMENT HISTORY REVISION HISTORY Version Revision Date Summary of Changes Author A June 21 2021 Bob Hardy B June 29 2021 Bre Lee ...

Reviews: