G E T T I N G S T A R T E D
Initial Setup
350-11751-01 – updated October 2018
MediaWall V User’s Guide
19
RGB
2.3.4 Routing Inputs to Windows
The next step is to route your source inputs to windows on the wall. To do this, click the
Routing
tab. Then:
1.
In the
Outputs
group, click the
Wall 1
tab (
2.
In the
Inputs
group, click the move cursor ( ) next to the input you want to display
on the wall.
3.
While holding down the mouse button, drag the cursor to the
Outputs
area, over the window in which you want the input to
appear. When you do, that window’s border color changes to
red.
4.
Release the mouse button.
5.
Repeat Steps 2 through 4 for the other inputs, as needed.
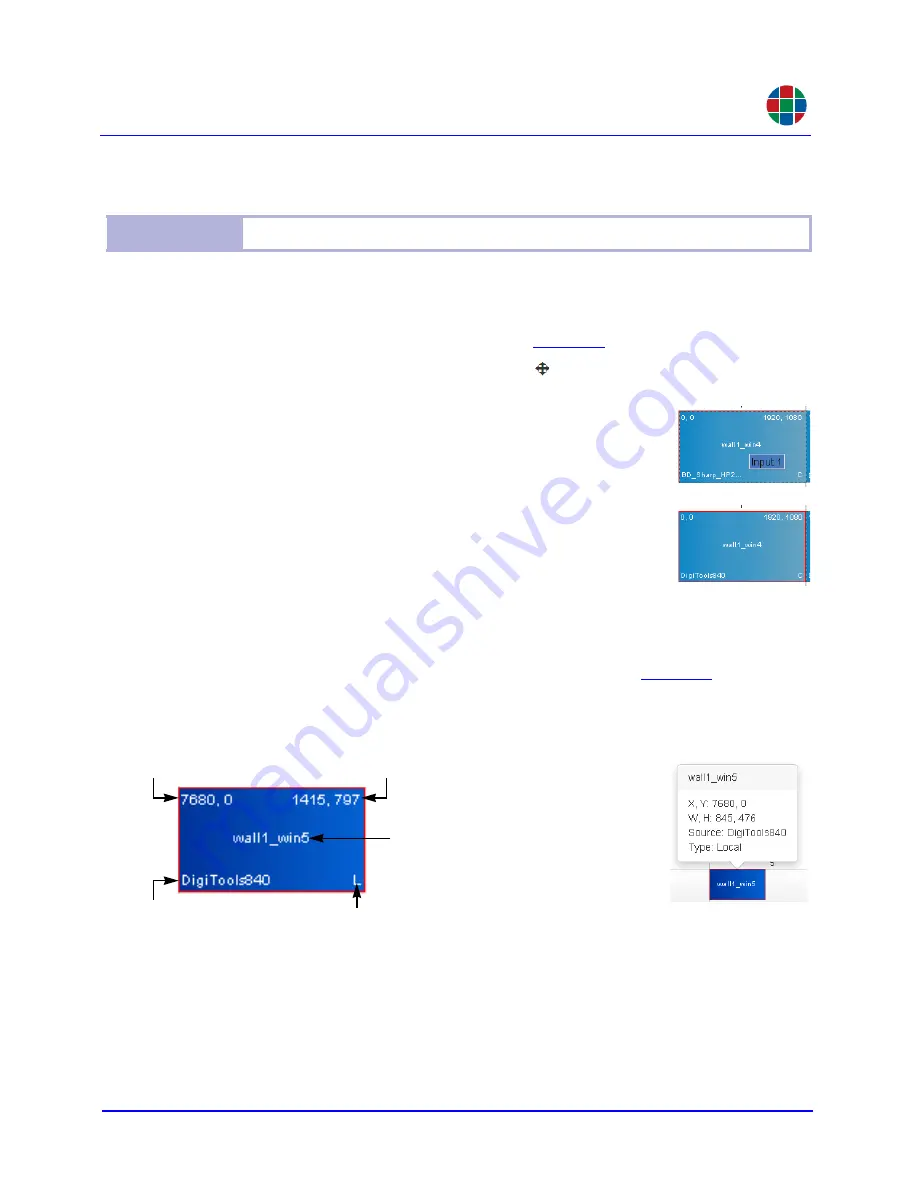
W I N D O W I N F O R M A T I O N
The
Routing > Wall [n]
tab displays the information shown in
inside each
window. If the window is too small to contain the information, only the window label
appears. To see information for such a window, position the mouse pointer over the
window.
Figure 2-6 Window Information
Note
You must route UHD sources to UHD windows.
Origin (x, y)
Size (W, H)
Locale (Note):
L = Window is confined to a single locale
C = Window can occupy more than one locale
Input Label
Window Label
Note:
A
locale
, in most cases, is a row on a wall. On a so-called "long" wall – seven (7) or more columns wide at
2K/HD output timing, four (4) or more columns wide at 4K/UHD @30 Hz output timing, or two (2) or more col-
umns wide at 4K/UHD @60 Hz output timing – a locale refers to an area of a wall fed by a single output card.
For example, in a 2 × 8 wall, outputs 1 through 6 and outputs 7 and 8 are two separate "locales".


