Revision 2.6
Page 53 of 53
Intuitive Mercury 6-5M Controller with TDB
www.resourcedm.com
Warning
Please Note
The specifications of the product detailed on this
Set-Up Guide may change without notice. RDM
Ltd. shall not be liable for errors or for incidental
or consequential damages, directly and indirectly,
in connection with the furnishing, performance or
misuse of this product or document.
Ensure that all power is
switched off before
installing or maintaining
this product
Appendix 3 Uploading a TDB program from the Data Manager
It is possible to upload and download the tdb program to and from the controller when it is logged on to a Data Manager. The two methods,
detailed for logging the controller on within the Network configuration section, are by using the Data Manager’s dhcp capabilities or manually
assign a static IP address and add it from within the DM’s menus.
With no tdb application loaded, the controller automatically logs on using the dhcp server showing the device name as per the rotary switch ID
(e.g. 222
) it has associated to it. It will show in the device list with the alias; “Mercury 2 TDB: No Program” and the corresponding control state
will show “No Program”.
Note
– Only software version 1.9 and above will allow the controller to log on to a Data Manager without a tdb app.
Uploading via the Data Manager
Once the device is listed within the Data Manager it can now have the tdb program sent to it.
To send the program, through the Data Manager, the plc program written for the Mercury TDB must be saved as a binary TDB program
(.btdb).
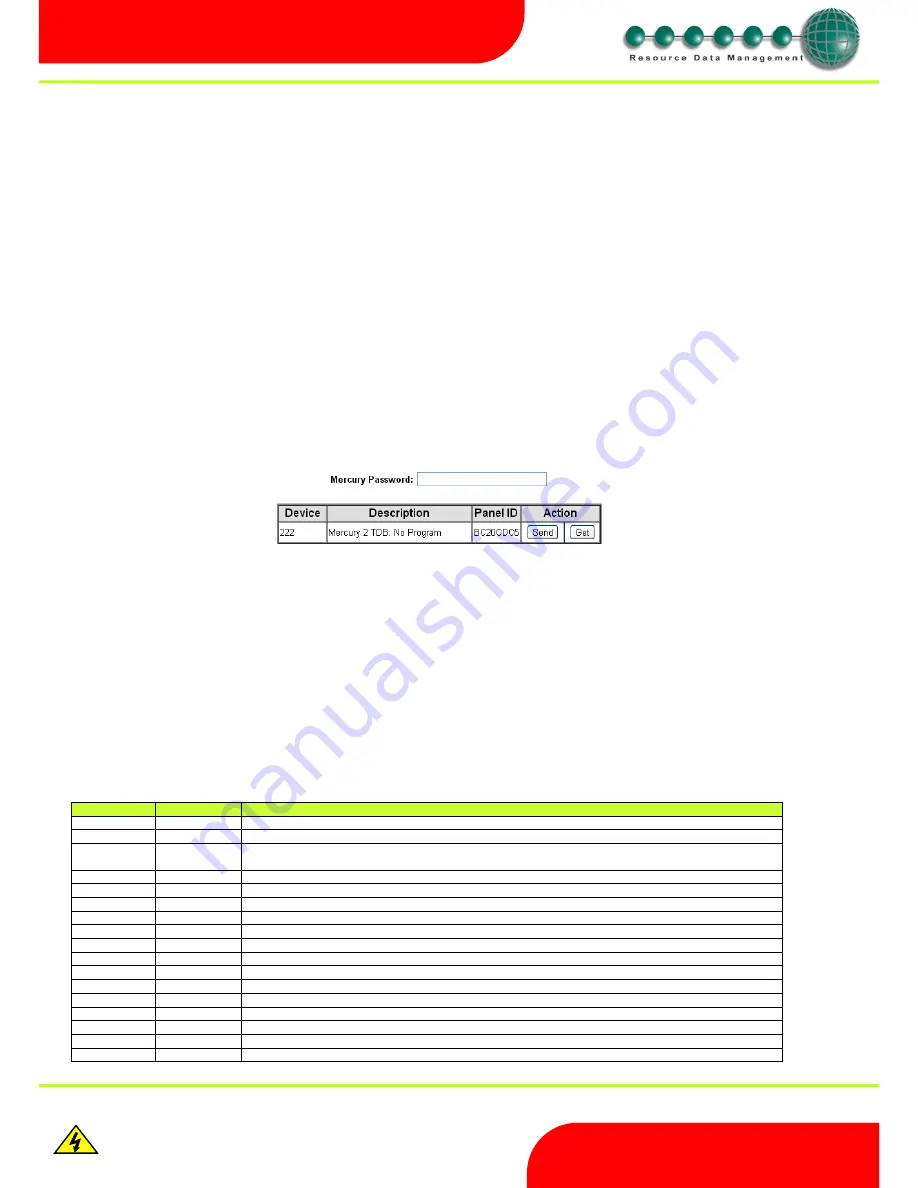
Within the Data Manager’s web pages, navigate to; Service, Devices, Mercury TDB.
This page will show you a list of all Mercury TDB controllers logged on to the Data Manager;
Ensure the correct device is recognised as the one you wish the program to be sent. Within the ‘Mercury Password’ field enter the password for
the controller (default is 1234)
, then click on the ‘Send’ button. From here you can select ‘choose file’, then navigate to the location of your saved
tdb program and select it to be sent. Then click ‘Upload’. The program will be sent to the controller.
Note
– when uploading a new/ amended program it is always advisable to ‘Default’ all parameters. This will take out all values previously
entered into the program from the Data Manager or Controller web pages.
Downloading via the Data Manager
Similarly to the uploading of the program, from the same menu, pict
ured above, select the ‘Get’ button. This will allow the current program to be
saved to your local machine.
Revision
Revision
Date
Changes
1.0
29/11/2011
First Release
1.5
21/06/2012
4 pulse input counter daughter card added, split wire shortcut names changed to be more sensible,
change to a
nalogue input if “Raw” is selected
1.6
03/09/2012
Digital Input added, now has 64 visible Parameters and up to 2048 Blocks can be used
1.7
10/09/2012
Limit of 20 external I/O, 20 alarm blocks, R410A gas type added
1.7a
14/12/2012
Note added concerning uploading software
1.9
15/10/2013
Added feature to log controller on to a Data Manager without an application installed
1.9a
22/04/2014
Using digital inputs on probes clarified, twilight output on daylight block clarified.
2.0
24/06/2014
Added support for 3 new daughter boards, 1PAi, 2xVo , 2xAo.
2.0a
05/01/2015
Operating temperature range updated.
2.2
26/08/2015
Detail on SSR added, part numbers added to include SSR versions, pulse block description clarified.
2.2a
17/11/2015
Wireless Network Card support added
2.2b
24/04/2015
Ordering Information tables updated
2.3
09/06/2016
Number of logging days updated.
2.4
10/10/2016
New parameter menu
2.5
30/01/2017
Support added for new humidity display. Improvement in handling of standalone time zone operation.
2.6
09/05/2017
Added note about BST sync when not connected to a network


