See last page for copyright and document info, File: Reeve_GpsNtp-Pi_Setup.doc, Page 10
4. Install a Secure Shell Terminal Program
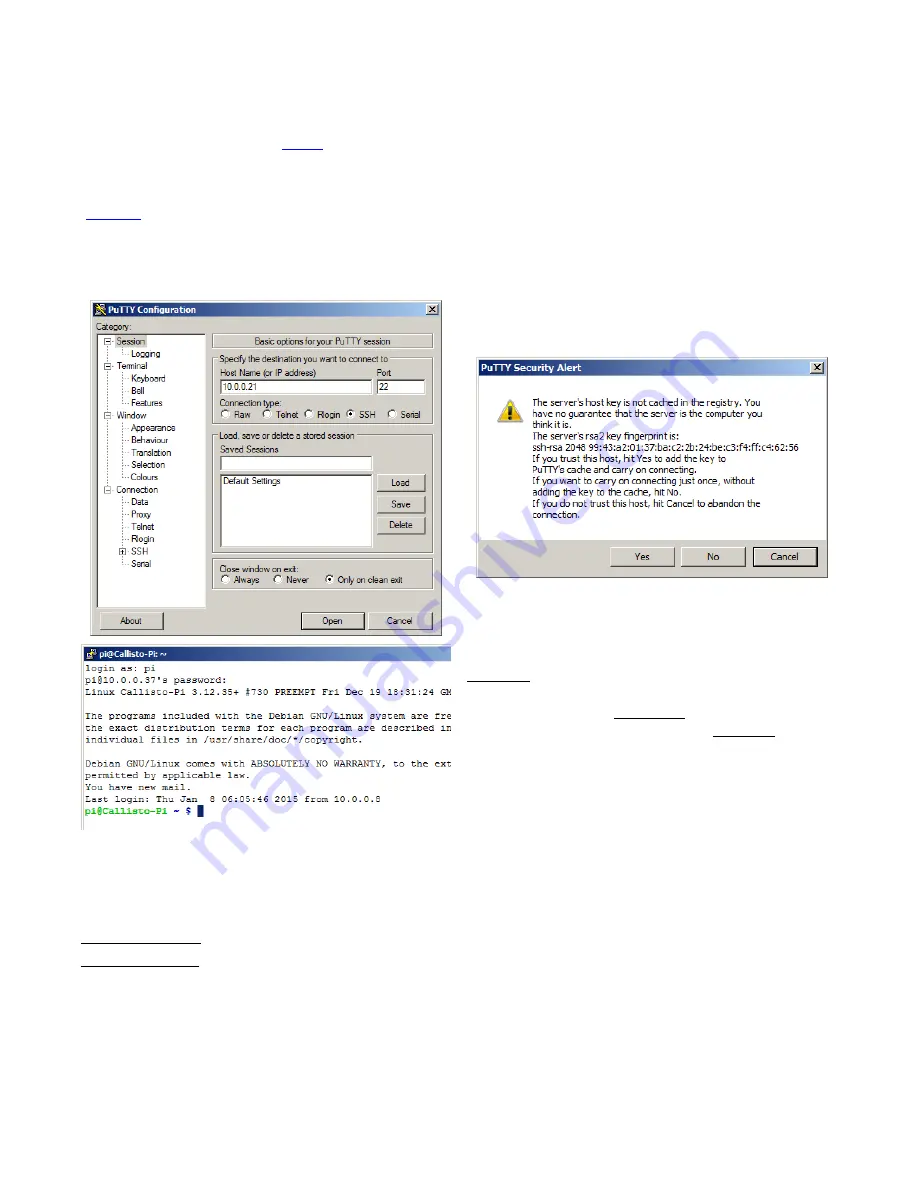
This guide is based on PuTTY {
PuTTY
}, which should be downloaded and installed now. Open PuTTY and enter
the RPi IP address into the Host
Name or IP address
field. Do not change the port (22) or Connection type (SSH).
You can determine the RPi’s IP address from your router LAN status screen or by using a program like Netscan
{
Netscan
}. Enter a name for the session (example, GpsNtp-Pi) in the Saved Sessions field. You also can customize
the user interface by clicking on the various entries in the Category window but you can do this later. Click the
Save button to save the session settings.
Upper-left: Screenshot of PuTTY configuration window with
the IP address for a test setup. Your installation will have
use a different address. Upper-right: Upon first connection,
PuTTY asks for authentication; click Yes. Lower-left: When
PuTTY is connected, the window changes to a simple
command line interface. After login, you can make changes
to the RPi as described in this guide. (Images © 2014 W.
Reeve)
Click Open. After authentication you will see the RPi login prompt in the command line interface. Enter the
username and then the password. You will not see characters on the console as you enter the password.
Default username: pi
Default password: raspberry
After logging into RPi, you will see the prompt
pi@raspberry - $
At any time you can right-click the bar at the top of the PuTTY window to see the PuTTY menu. Click Change
Settings ... if you would like to revise the user interface and session settings.


