www.altronics.com.au
Redback® Proudly Made In Australia
22
Redback® A 4480B
8 In to 8 Out Audio Switcher
Setup Guide
4.4 PRESETS
The configurations of the input/output matrix can be saved into memory as presets which can be called up at any time.
There are 4 user defined presets, a default preset and last setting preset. Before commencing preset programming, ensure
the A 4480B is unlocked. To unlock, press “confirm” and “cancel” buttons at the same time.
4.4.1 User defined presets (1-4)
The A 4480B has 4 user defined presets which the user programs to save frequently used configurations. The user de-
fined presets can be labelled via the use of a USB keyboard. This is covered in section 4.2. For instance you may set up the
matrix for a wedding. Labelling a preset as “Wedding” would provide an easily recognisable label to be recalled for any
wedding functions. Presets numbered 1-4 can be labelled but preset 5 which is the default preset cannot.
4.4.2 Default preset
The default preset is designed to be used as the “fall back” setting. For example, if the staff have been making changes
to the unit and you need to return it to its standard setting, then the default setting could be used. This might be used
as your everyday setup eg: the unit may be setup in a bar which caters to functions. The 4 presets may be all used for 1-
“Tues Bingo”, 2- “Sat Night”, 3- “Weddings”, 4- “Band night” and a preset is required for the usual everyday setting of
the venue. The default setting could be set to this everyday configuration.
4.4.3 Last setting preset
The “last setting” preset or “previous” preset is an automatically saved preset which saves the current configuration be-
fore loading a preset i.e. any time a preset is loaded, the settings before it was loaded will be saved into the “last setting”
preset. This is particularly useful if the user wants to return to the setup before a preset was loaded, eg: maybe Tuesday
night is Bingo night and this has been saved into one of the 4 user defined presets. Before the bingo begins the venue
could be setup in any sort of configuration, which is not necessarily going to be known.
Tuesday night comes around and the Bingo preset would be loaded for the bingo. Without the “last setting” preset the
previous setup would be lost. The bingo night comes and goes and the previous setup can now be loaded by selecting the
“previous” preset in the preset screen.
4.4.4 Setting up a user defined preset
To set up a user defined preset, configure the audio sources and output zones as per section 2.5. Once you are satisfied
with your selections, press the “preset” button. The “preset save and retrieve” screen will be displayed. To save the preset,
hold down one of the buttons numbered 1 to 5 for 2-3 seconds until the unit confirms your selection. Remember, presets
1-4 are user defined (these can be custom labelled), whilst preset 5 is the initial default setting.
4.4.4 Retrieving/loading a preset
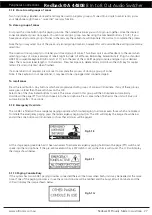
To retrieve a preset from the main screen. Press the preset button and then one of the buttons numbered 1 to 6. Presets 1
to 4 being “user defined”, 5 being “default” and 6 being “last setting”. Once the preset is loaded the label will appear on
the LCD in the lower left corner.
Presets may also be loaded remotely via the A 4476 wall plate. For more details see section 5.4.
4.4.5 Modifying a preset
If you wish to change the configuration of a preset, firstly load the preset you wish to change (as per 4.3.4). Modify any
source & output zone selections you require. Once you are satisfied with your selections, press the “preset” button. The
“preset save and retrieve” screen will be displayed. To save the new settings, hold down one of the preset buttons (1 to 5)
for 2-3 seconds until the unit confirms your selection. Any settings previously stored in the selected preset will be overwrit-
ten with the new settings.
4.5 BUTTON LOCKOUT FEATURE
The buttons on the front of the unit can be locked out to stop tampering. To activate or de-activate this feature hold down
the “confirm” and “cancel” buttons simultaneously. Please note: When a preset is selected the unit will automatically
enable the button lockout feature. Preset button is not affected by the button lockout feature.
4.6 MASTER RESET FUNCTION
To reset all settings to factory default plug in a USB keyboard. Press “R” on the keyboard, this will navigate to the “reset”
screen. The screen will prompt you with “Are you sure you wish to erase ALL settings?”. Select “Y” for Yes, “N” for No.
This will erase all settings, including input labels, zone labels, input source settings and presets.

