www.altronics.com.au
Redback® Proudly Made In Australia 17
Redback® A 4480B
8 In to 8 Out Audio Switcher
Setup Guide
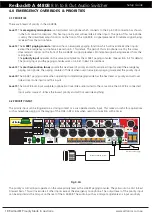
3.2 PAGING CONSOLE CONFIGURATION
The paging console configuration on the LCD is used to display which zones are currently accessible by the paging con-
soles. All output zones can be programmed to be “locked out” from paging. If a zone is locked out, general paging will
not be routed to that zone. However emergency paging will override locked out zones and page all output zones. An
example may be an output zone such as a carpark. General paging may not be required but emergency paging would still
be required.
3.3 CONFIGURING THE PAGING CONSOLE LOCKOUT ON THE LCD
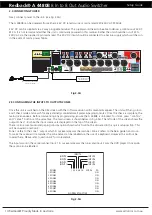
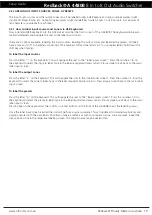
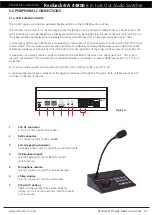
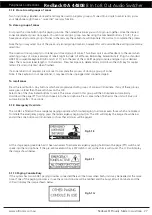
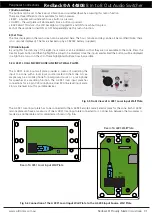
To configure a zone to be locked out from general paging return to the main screen, if not already there. Press the PA on/
off button. The screen shown below in fig 3.1B should appear.
Fig 3.1A
Fig 3.1B
To lock a zone out from the general paging, use the buttons labelled 1-8 left of the LCD. Pressing button 1 will toggle
zone 1 ON or OFF depending on its current status. Pressing button 2 will toggle zone 2 ON or OFF etc. If the zone is left in
the OFF state, paging to this zone will now be locked out. Note: this lock out will be overriden by emergency paging.
3.4 CONFIGURING THE PROGRAM ISOLATE ON THE LCD
The A 4480B can be setup to isolate selected input sources from a zone, so these inputs are isolated or BLOCKED for that
zone. Examples might include music being isolated or blocked to the “car park” or common areas.
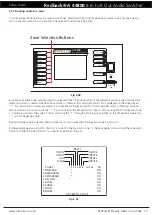
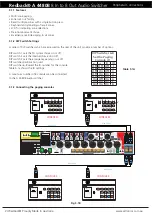
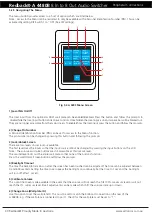
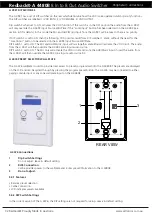
To isolate an input from a zone, press the isolate button on the front of the A 4480B. The screen shown in Fig3.1C will ap-
pear. In this example input 1 is isolated from zone1 as indicated by the letter “
I
”. To isolate the inputs use the buttons 1-8
on the left of the screen to select the zone and then continue to press the selected number to scroll through the inputs. A
circle on the screen indicates the cursor position. Once in position, press the isolate button and the cursor will change to
an “
I
”. The corresponding input is now isolated from that zone. Pressing the isolate button again will turn off the isolate.
ZONES
1. ZONE1
2. ZONE2
1 2 3 4 5 6 7 8 LOCAL
PA
3. ZONE3
4. ZONE4
5. ZONE5
6. ZONE6
7. ZONE7
8. ZONE8
*
INPUT1
INPUT2
INPUT3
INPUT4
INPUT8
INPUT7
INPUT6
INPUT5
INPUTS
NO PRESETS ACTIVE
ON
ON
ON
ON
ON
ON
ON
ON
ZONES
1 ZONE1 (ON)
PA MIC TO ZONE SCREEN
Use 1 to 8 to turn ZONES ON or OFF
CONFIRM or CANCEL button will EXIT
1 ZONE2 (ON)
1 ZONE3 (ON)
1 ZONE4 (ON)
1 ZONE5 (ON)
1 ZONE6 (ON)
1 ZONE7 (ON)
1 ZONE8 (ON)
ZONES
1. ZONE1
2. ZONE2
1 2 3 4 5 6 7 8
3. ZONE3
4. ZONE4
5. ZONE5
6. ZONE6
7. ZONE7
8. ZONE8
INPUT1
INPUT2
INPUT3
INPUT4
INPUT8
INPUT7
INPUT6
INPUT5
INPUTS
I = ISOLATED (NO ACCESS)
ISOLATE
SCREEN
I
Fig 3.1C


