


7
2 Changing the IP Address of the VoIP
Interface
2.1 How to Change the Network Settings
1.
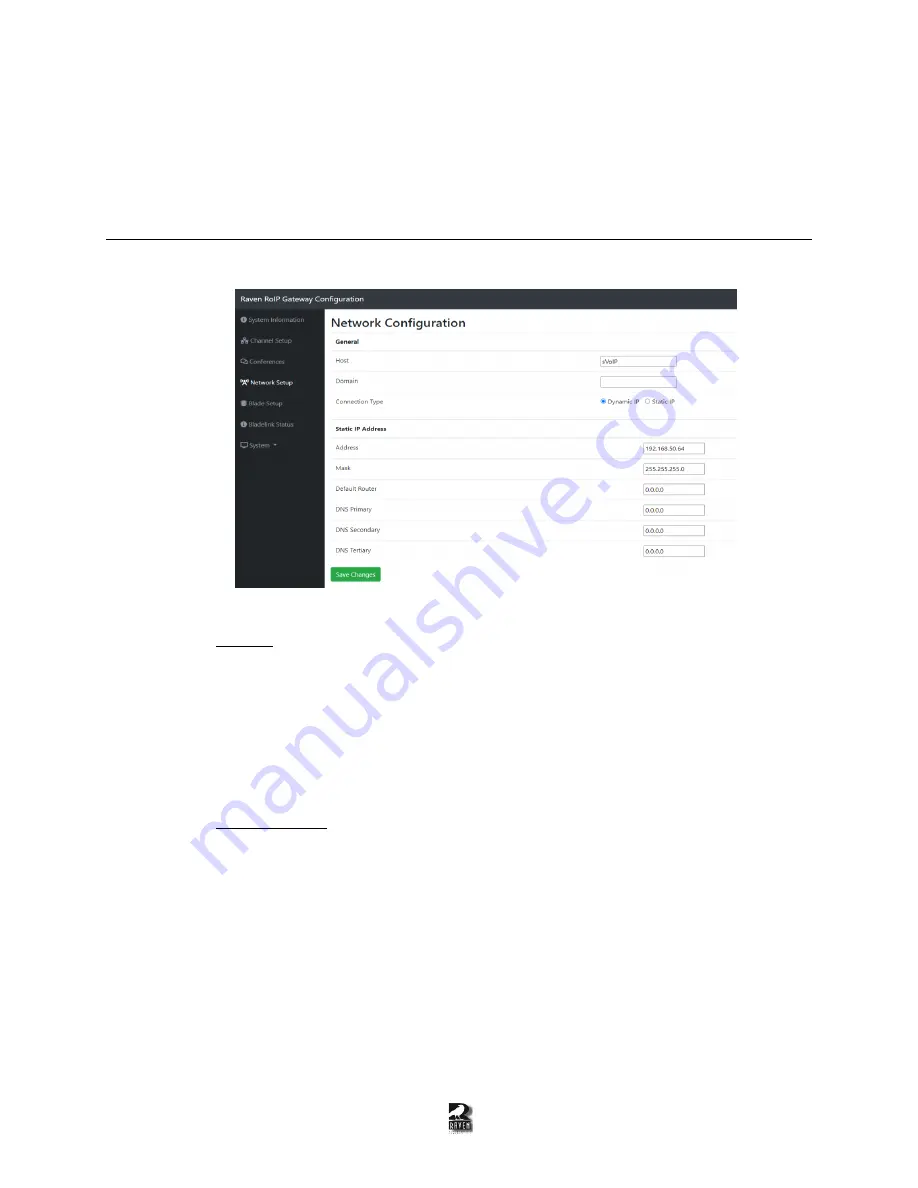
Navigate to the
“Network Setup” page on the left side panel and
it will look like Figure 2-1.
Figure 2-
1: “Network Setup” web interface.
2.
Enter in the network settings:
General:
Host:
The host name can be changed to whatever you want. This name will be used
when configuring VoIP interfaces with Blade-Link that will be described later in the
document.
Domain:
This field is not required. If you have a registered domain name that you want
to link to this VoIP interface, enter it here.
Connection Type:
By default, it is set to the Static IP so you can choose the IP address on
your own. If you want the DHCP to find an address for you, choose Dynamic IP and click
the
“Save Changes” button.
Static IP Address
Address:
The new
IP Address desired for the VoIP interface
Mask:
Subnet mask
Default Router:
The main Router/Gateway of your network
DNS Primary:
The primary DNS server for you network if needed
DNS Secondary:
The secondary DNS server for you network if needed
DNS Tertiary:
The tertiary DNS server for you network if needed
3.
Click the “Save Changes” Button at the bottom of the page once done. A pop
-up will appear
asking if you want to restart the blade. Click “Yes”.
4.
Once the Blade is restarted, wait 10-30 seconds for it to reboot, and enter the new IP into your
browser to make sure you are able to reach the webpage again.


