


25
INSTALLATION
Check the appliance is electrically safe and gas sound when you have finished.
Conversion
All models are supplied set for use on group H natural gas.
A conversion kit for LP gas is included with the appliance.
See the instructions that are supplied with the conversion
kit. After converting the appliance please attach the Gas
Conversion sticker over the appropriate area of the data
badge, this will identify the gas type the appliance is now
set for.
This appliance is designed for domestic cooking
only. Use for any other purpose could invalidate any
warranty or liability claim.
You will need the following equipment to
complete the cooker installation satisfactorily
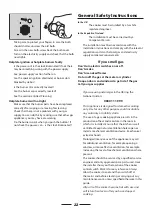
STABILITY BRACKET
If the cooker is to be supplied
with gas through a flexible hose,
a stability bracket or chain must
be fitted.
These are not supplied by with the cooker
but
are available at most builders’ merchants.
GAS PRESSURE TESTER
FLEXIBLE GAS HOSE
Must be in accordance with
the relevant standards.
MULTIMETER
(for electrical checks)
You will also need the following tools:
1. Electric drill
2. Masonry drill bit (only required if fitting the cooker
on a stone or concrete floor)
3. Rawlplugs
(only required if fitting the cooker on a stone or
concrete floor)
4. Steel tape measure
5. Cross head screwdriver
6. Flat head screwdriver
7. 4mm & 3mm Allen keys
8. Spirit level
9. Pencil
10. Adjustable spanner
11. Screws for fittingstability bracket
Checking the parts
4 pan supports
Griddle plate
Wok Ring
Allen key
4 flat oven shelves and 1 drop
shelf
Levelling tool
Handygrill pan / Meat tin
Handygrill rack
Plinth Trim
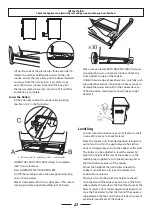
Positioning the Cooker
The diagrams below show the minimum
recommended distance from the cooker to nearby
surfaces.
The cooker should not be placed on a base.
Summary of Contents for Elite SE
Page 1: ...Elite SE 110 Dual Fuel FSD Users Guide Installation Service Instructions U103980 07A...
Page 2: ...2...
Page 38: ...38...
Page 39: ...39...