Rain Bird LXME2 Installation, Programming & Operation Manual Download Page 82

Current Section:

 Installation  82


Navigation:

17.  INSTALLATION

17.1  Install the Controller

This section explains how to mount the LXME2 controller on a wall (or mounting surface) and 
connect the wiring.

• 

An optional metal cabinet (LXMM) and pedestal (LXMMPED) or stainless steel cabinet (LXMM-SS) and 

pedestal (LXMMPED-SS) are also available for the LXME2 controller. If you intend to purchase those options 

then follow the installation instructions included with those items and proceed to the Install Modules section 

below.

WARNING

This controller must be installed in compliance with local electrical codes.

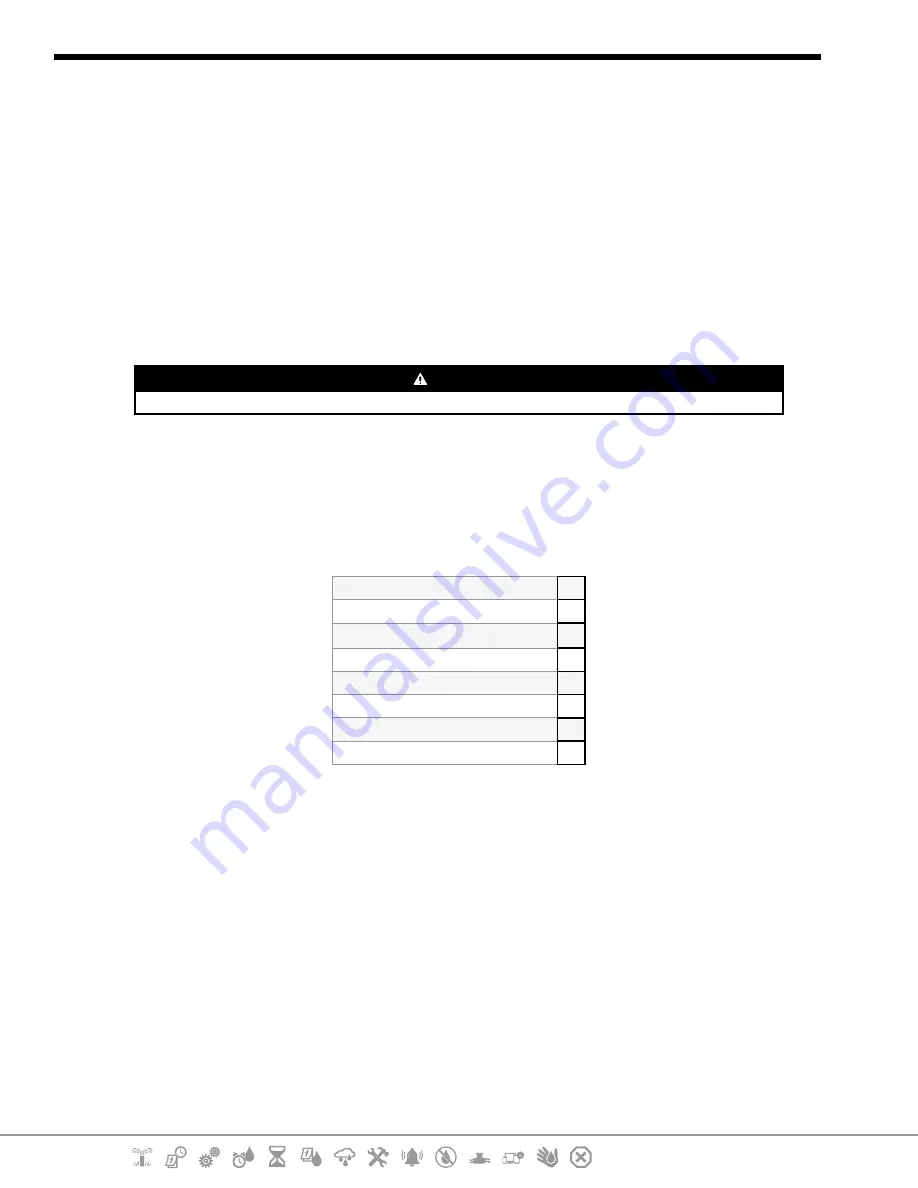
17.1.1  Installation Checklist

When installing the LXME2 controller for the first time, it is recommended that you complete the 
following steps in order.

For your convenience a check-off box is provided for each step. 

Check box contents
Select a location
Gather installation tools
Mount the controller
Connect source power
Install base and station module[s]
Connect field wiring
Complete the installation

17.1.2  Check Box Contents

All components below are included with your LXME2 controller and are required for installation. If 
anything is missing, please contact your distributor before proceeding.

•  LXME2 controller

•  Controller cabinet keys

•  Mounting hardware (5 screws, 5 plastic wall anchors)

•  Quick Start Guide/ Programming Guide

•  Controller mounting template

•  Station Numbering Labels 

Summary of Contents for LXME2

Page 1: ...d Doing so can help prevent damage to the controller and irrigation system and also significantly reduce troubleshooting repair time and expense Failure to do so could result in failure of your contro...

Page 2: ...8 5 Additional Advanced Programming Optional 10 2 AUTO 11 2 1 Alarms 12 3 Set Date Time 13 4 Setup 14 4 1 Master Valves 14 4 2 Weather Sensors 20 4 3 Station Setup 21 4 3 1 Station Priority 21 4 3 2 M...

Page 3: ...47 10 Alarms History 48 10 4 1 Flow History 48 10 4 2 Clear Flow History 48 10 4 3 Flow Alarms 49 11 Seasonal Adjust 51 11 4 1 Individual Program 51 11 4 2 By Month 51 12 Delay Watering 54 12 4 1 Rai...

Page 4: ...gram 78 15 1 4 MV Master Valve Water Window 78 15 1 5 Manual MV Open 80 16 OFF 81 16 1 1 Adjust Display Contrast 81 16 1 2 Close Master Valves 81 17 Installation 82 17 1 Install the Controller 82 17 1...

Page 5: ...asy to navigate softkey user interface Hot swappable modules no need to power down the controller to add remove modules Dynamic station numbering eliminates station numbering gaps Weather Sensor input...

Page 6: ...ule 12 station module Mounting hardware 5 screws 5 plastic wall anchors Controller cabinet keys Controller mounting template Quick Start including Programming Guide Station Numbering Labels Wire nuts...

Page 7: ...ce See Set Start Times for more details Station Run Times The length of time in hours and minutes that each individual station is programmed to run See Run Times for more details Watering Days The day...

Page 8: ...show you the currently selected program and allow you to select another using the programming buttons Always begin programming by selecting the desired Program 1 40 Multiple programs allow you to set...

Page 9: ...ar program information Select language Set the current date and time Set up master valves pumps optional Set up weather sensors optional Set up stations Set up a flow sensor optional 1 8 2 Set Up Prog...

Page 10: ...Check installed modules 1 8 5 Additional Advanced Programming Optional Check weather sensor status Schedule calendar days off Create a MV manual water window Set Cycle SoakTM Set flow units Activate...

Page 11: ...TO Mon 12 01 07 Mar 2021 All Watering Off 12 01 Contrast 6 MV Close 1 Turn the controller dial to AUTO 2 The Auto screen is displayed with the current day and time shown 3 When a program is running in...

Page 12: ...n When all alarms have been addressed the alarm light on the front panel will no longer be illuminated Alarm Condition No Water Days There are no water days set in any program No Run Times There are n...

Page 13: ...s 4 Press the or keys to set AM or PM then press The time will automatically updated once the current day month and year entered 5 Press the and keys to set the current date then press 6 Press the and...

Page 14: ...he LXME2 controller if a Master Valve MV or pump or both is used by your irrigation system The Master Valve can be configured either as a Normally Open Master Valve NOMV or as a Normally Closed Master...

Page 15: ...ns operate Master Valve Setup NCMV Done MV 01 Number of Valves Master Valve Setup 1 Station Setup SETUP Next Master Valves Weather Sensors Station Setup Flow Sensors Advanced Station Settings Station...

Page 16: ...up MV P Next 02 Done MV P 02 only on when stations operate Master Valve Setup Pump Done MV P 02 Number of Valves Master Valve Setup 1 Station Setup SETUP Next Master Valves Weather Sensors Station Set...

Page 17: ...stations operate Master Valve Setup NCMV Done MV 01 Number of Valves Master Valve Setup 1 Master Valve Setup MV P Next 02 Done MV P 02 only on when stations operate Master Valve Setup Pump Done MV P...

Page 18: ...sors Advanced Station Settings Master Valve Setup MV Next 01 Master Valve Setup MV P Next 02 MV01 NCMV or NOMV Setup 1 Use the buttons to choose between a normally open NOMV or normally closed NCMV ma...

Page 19: ...s from the Master Valves Setup screen then press Next If your system does not have a master valve then select Unused and press Next 2 Select the number of pumps master valves that the MV P 02 will con...

Page 20: ...tation Setup Flow Sensors Advanced Station Settings Weather Sensor Setup Done WS Local Type Settling Time Custom Prevent MM SS 00 30 1 Turn the controller dial to Setup 2 At the SETUP screen with Weat...

Page 21: ...t the SETUP screen with Station Setup selected press Next 3 At the first Station Setup screen press the and keys to set the Station you wish to setup 1 12 up to 48 if expansion modules are installed 4...

Page 22: ...Priority Master Valve Pumps Weather Sensors Valves Per Station Master Valve Pump Setup Done MV1 MV2 NCMV PUMP Yes No STA 001 1 On the Second Station Setup screen navigate to Master Valves Pumps then...

Page 23: ...l be prevented for the Station 4 With No selected the current station will ignore the state of a connected weather sensor 4 3 4 Valves Per Station 1 On the Second Station Setup screen navigate to Valv...

Page 24: ...e Dual Flow Sensor Installation Example Flow Sensor 1 Flow Sensor 2 Optional see note below To measure flow from 2 water sources a device that scales the signals from two flow sensors and combines the...

Page 25: ...up 2 On the SETUP screen navigate to Flow Sensors using the up and down arrows then press Next 3 On the Flow Sensor Setup screen use the buttons to select the flow sensor model that you are using then...

Page 26: ...Next 3 On the Flow Sensor Setup screen use the buttons to navigate to Custom then press Next 4 Use the arrow buttons to navigate between number settings fields of the K Factor and Offset and use the...

Page 27: ...en waterings Cycle Soak settings apply to stations no matter which programs they may be used in Next Advanced Station Settings Cycle Soak Inter Station Delay SimulStations Station Sequencing Module St...

Page 28: ...g from one station to other stations Cycle 10 Mins Soak 05 Mins 001 003 to all stations between Copy Cycle 10 Mins Soak 05 Mins Sta 001 through Sta 003 Copied 1 At the Cycle Soak screen press the Copy...

Page 29: ...er Window Use the Program Select button and repeat this process to set Inter station Delay for other programs as desired 4 4 4 SimulStations Advanced Station Settings The LXME2 controller can be set t...

Page 30: ...as non irrigating to control lighting for instance 3 At the SimulStations screen press the and buttons to set the number of Global Irrigation stations from 1 5 4 Press the key to continue to the Progr...

Page 31: ...dvanced Station Settings Cycle Soak Inter Station Delay SimulStations Station Sequencing Module Station Numbering Done Station Sequencing Sequence by Station Numbers 1 Turn the controller dial to Setu...

Page 32: ...dvanced Station Settings on this screen Use the key to navigate to Module Station Numbering then press Next Press Next again on the dialog screen Next Advanced Station Settings Cycle Soak Inter Statio...

Page 33: ...2 At the Set Start Times screen press the or key to select the program you wish to create Start Times for 3 Press the and keys to set the hour then press the key Press the and keys to set the minutes...

Page 34: ...controller dial to Run Times 2 At the Set Run Times screen press the first set of and keys to set the station to you wish to create programs for If the desired program is not selected press the Progra...

Page 35: ...s between PGM 01 Copied 01 20 PGM 01 Sta 001 through Sta 003 1 At the Set Run Times screen press Copy 2 At the Copy screen use the key to navigate between the number setting fields Press the and keys...

Page 36: ...e 2nd 4th 6th etc Odd Dates irrigation starts on all odd numbered calendar days such as the 1st 3rd 5th etc Odd Dates no 31st irrigation starts on all odd numbered calendar days such as the 1st 3rd 5t...

Page 37: ...Day Cycle screen press the and key to set the watering day cycle from 1 to 30 days For example set to the day cycle to 03 if you want to water every third day then press the key 4 Press the and keys t...

Page 38: ...Wed Thu Fri Sat Sun Yes No No No Yes Yes Yes PGM01 Odd days not 31st Allow watering 1 Turn the controller dial to Water Days 2 At the Watering Cycle screen press the Mode key to navigate to the Even...

Page 39: ...ensors 2 At the Weather Sensors screen press the On key to activate the local Weather Sensor or else press Off to bypass NOTICE Follow the sensor manufacturer s instructions to correctly install and m...

Page 40: ...r Status Test All Stations 10 Test Time Run Minutes 1 Turn the controller dial to Diagnostics 2 At the Diagnostics screen with Test All Stations selected press Next 3 At the Test All Stations screen p...

Page 41: ...alled And the total number of Stations 4 Press the Run button to begin the wiring test The Raster Wiring Test will take up to a few minutes Each installed station will be displayed on the screen in se...

Page 42: ...Next 3 At the CONFIRM PROGRAMS screen with Program Summary selected press Next 4 The Program Summary screen appears providing a summary of Run Times Start Times and Water Days for all programs In the...

Page 43: ...e a complete summary of the LXME2 s programming Pressing the Next button will allow you to progress from screen to screen while pressing the Back button take you back to the previous screen Some of th...

Page 44: ...t MV Assignment Next STA 001 002 003 004 Loc N Y Y Y 12 Water Window PGM 01 Next Open Closed Duration OFF OFF N A HH MM Water Window 13 Program SimulStations PGM 01 Next Program SimulStations Maximum...

Page 45: ...o select Program Run Times then press Next 4 The Total Run Time screen appears and total Run Time is shown for the currently selected program If the desired program is not selected press the Program S...

Page 46: ...n press Next 3 At the CONFIRM PROGRAMS screen press the key to select Station Run Times then press Next 4 At the Station Run Time screen press the and keys to select the desired Station Station Run Ti...

Page 47: ...alves screen appears showing installed master valves their type Normally Closed or Normally Open their current status open or closed and if they are included in the MV Water Window MVWW Yes or No 9 4...

Page 48: ...ate and last month water consumption Press the Days key to change the view to the last 30 days and previous 30 days ALARMS AND HISTORY Next Flow History Flow Alarms Flow History Done Clear Months Last...

Page 49: ...arm conditions will be created Station Flow Alarms Flow Alarms Next Station Flow Alarms FloZone Flow Alarms Clear Flow Alarms 1 Turn the controller dial to Alarms History 2 At the ALARMS AND HISTORY s...

Page 50: ...4 At the FloZone Alarms screen press the and keys to view other FloZone flow alarms Clear Flow Alarms Flow Alarms Done Station Flow Alarms FloZone Flow Alarms Clear Flow Alarms 1 Turn the controller...

Page 51: ...only one type of Seasonal Adjustment setting Setting a small number for the Seasonal Adjustment percentage will greatly reduce watering and setting to 0 will cancel irrigation entirely Use caution wh...

Page 52: ...n 20 Done Seasonal Adjust by Month Jul 120 4 Press the and keys to select the month you would like to adjust 5 Press to select the percentage field Then press the and keys to set the percentage from 0...

Page 53: ...al Adjust by Month screen press the key to choose Select PGMs then press Next 4 Press the Yes or No keys to set Monthly Adjust for the current selected program Seasonal Adjust by Month Next Adjust Sel...

Page 54: ...the Rain Delay screen press the and keys to set the number of days from 0 to 30 days Press the Clear key if you want to cancel the Rain Delay Confirmation of Rain Delay will display in the AUTO dial...

Page 55: ...e if any of your programs include essential functions such as door locks or sports field lighting 12 4 3 Program Water Window You can specify certain times of the day night when irrigation is allowed...

Page 56: ...Next 3 At the Water Window screen press the and keys to set the time when the Watering Window opens then press the key Press and HOLD keys to accelerate settings 4 Press the and keys to set the time...

Page 57: ...flow features can be divided into two different functional groups Flo Manager and FloWatch Flo Manager Flo Manager adds basic hydraulic management features to your system to ensure that sufficient wa...

Page 58: ...Automatically Models only To ensure accurate recording of flow rates do not create any manually generated flow such as flow created with manually operated quick coupling valves while a Learn Flow is t...

Page 59: ...setting fields You can choose to run the exercise Now 00 00 or choose a timed delay of up to 24 hours 8 A confirmation screen appears confirming the Learn Flow will overwrite the existing flow rates...

Page 60: ...ss Next again 7 An information screen appears press Next again 8 Press the and to navigate the list of stations Press the Yes and No keys to set which stations you want to include in the Learn Flow ex...

Page 61: ...en with Set Flow Rates selected press Next 3 At the Set Flow Rates screen press the key to select Set Station Rates then press Next 4 At the Set Station Rates screen press the and keys to set the desi...

Page 62: ...and to navigate between the number setting fields Press and HOLD keys to accelerate settings NOTICE Maximum FloZone flow rates are used only by Flo Manager FloWatch is unaffected by user entered FloZo...

Page 63: ...Sensor 2 At the FLOW SENSOR screen with Set Flow Rates selected press Next 3 At the Set Flow Rates screen press the key to select View Flow Rates then press Next 4 The View Flow Rates screen appears...

Page 64: ...d FloZone number The MVs and sensors associated with that flow zone are shown below it The maximum flow rate for that FloZone will show to the right FloZone rates are used by FloManager The zone rate...

Page 65: ...one See Master Valves or more details It s not necessary to install or set up flow sensors to use Flo Manager but if you do have this hardware present it s usually helpful to set it up prior to activa...

Page 66: ...turn off FloWatch 13 1 11 FloWatch Set Up The LXME2 controller lets you set the flow rates you expect or to automatically Learn Flow rates based on real usage Once flow is learned or manually entered...

Page 67: ...gh Flow and Low Flow settings 13 1 13 Set Flow Limits SEEF seek and eliminate excessive flow High Flow SELF seek and eliminate excessive flow Low Flow To most effectively use FloWatch you will want to...

Page 68: ...Next 4 At the High Flow Settings screen press the and keys to set the desired High Flow Threshold percentage Max 200 Then press the key 5 Press the and keys to set the desired High Flow settling time...

Page 69: ...to set the desired number for hours from 0 to 23 Press the Arrow keys to navigate between the number setting fields Set the minutes from 0 to 59 13 1 16 Current Flow Reading Occasionally it may be us...

Page 70: ...key to select Set Flow Units then press Next 3 At the Set Flow Units screen press the and keys to set the desired flow rate M3 Hr Auto GPM LPS or LPM Then navigate to the Pipe size selection by pressi...

Page 71: ...turns the controller programming to the normal irrigation schedule NOTICE The Backup Programs feature saves and restores ALL irrigation programming in ALL programs Store Programs IQ ADVANCED Next Stor...

Page 72: ...ons screen press the key to select Recall Programs then press Next 4 At the confirmation screen press and HOLD the Yes key for 4 seconds to Recall All Programs If you re not sure press No 5 A confirma...

Page 73: ...ed For example set it to 7 days if you want your original programs to be restored in one week To clear a Delayed Recall set the number of days to 0 Clear Program Information The LXME2 controller allow...

Page 74: ...s the key to select Clear Programs then press Next If the desired program is not selected press the Program Select button to choose the desired program See Program Select Button for more details 4 At...

Page 75: ...elect Button for more details 4 At the Clear Programs screen press the key to select All Programs then press Next 5 A confirmation screen shows the process is complete 14 1 2 Factory Defaults Restore...

Page 76: ...LXME2 then press Next 3 The ABOUT LXME2 screen appears with an overview of your LXME2 including the information of the version front panel and cartridge 4 Press the More button for an overview of the...

Page 77: ...o Manual Watering 2 At the Manual Watering screen with Start Station selected press Next 3 At the Run Time Station screen press the and key to select the desired station from 1 to 240 to run manually...

Page 78: ...rrigation 4 A confirmation screen shows that irrigation has started Repeat this process to manually start other Programs Programs will run sequentially in the order in which they were selected 15 1 4...

Page 79: ...o set the MV Water Window Start time 5 Press the Arrow keys to navigate between the number setting fields 6 Press the and keys to set the time when the End time The duration of your MV Water Window ca...

Page 80: ...Manual MV Open Start Manual MV Open MV Open Duration 00 30 HH MM 1 Turn the controller dial to Manual Watering 2 At the Manual Watering screen press the key to select MV Water Window then press Next...

Page 81: ...es Closes all master valves disabling irrigation NOTICE Using the MV Close function will disable all irrigation functions The Close Master Valves function closes Normally Open Master Valves Normally C...

Page 82: ...al codes 17 1 1 Installation Checklist When installing the LXME2 controller for the first time it is recommended that you complete the following steps in order For your convenience a check off box is...

Page 83: ...the range of operating sprinklers 17 2 1 Gather Installation Tools Before beginning installation gather the following tools and materials Slotted Head Screwdriver Philips Head Screwdriver Thin Blade S...

Page 84: ...n the door swinging it to the left 3 Open or Remove Controller Front Panel Grasp the handle on the right hand side of the controller front panel and pull it towards you to open the cabinet swinging it...

Page 85: ...abinet mounting holes with the remaining pilot holes and drive the four remaining screws through the cabinet back plane into the mounting surface 6 Connect Power to the Controller 7 Surge Protection a...

Page 86: ...ler backplane 3 Carefully fasten the module onto the controller backplane pressing firmly until it snaps into place The red light on the module will flash on and off once if the module is installed co...

Page 87: ...ers With the Module Labels screen displayed Locate the Module Station Numbering Labels that are provided on a separate foldout sheet The Module Station Numbering Screen displays a pair of letters exam...

Page 88: ...terminal using a Philips screw driver 6 Insert the wire Then tighten the screw to clamp the wire in place 7 Connect the common wire s to any one of the COM terminals on the controller Wires used to c...

Page 89: ...wires to make sure the connections are tight Ensure that the configuration for your controller and irrigation programs are set up correctly for your sensor For example if one of your programs is set...

Page 90: ...orn or damaged insulation should be replaced 6 Route the flow sensor wire through the knockout on the bottom of the controller 7 Connect the flow sensor wire to the Flow and Flow inputs When finished...

Page 91: ...eer Park VIC 3023 Tel 1800 724 624 info rainbird com au www rainbird com au Rain Bird International 1000 W Sierra Madre Ave Azusa CA 91702 USA Tel 1 626 963 9311 Rain Bird Ib rica S A C Valent n Beato...

Reviews: