


QSA Global, Inc.
40 North Avenue Burlington, MA 01803
888.272.2242
781.272.2000
qsa-global.com
Operations Manual
MAN-038 March 2019
Page 44 of 100
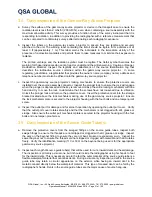
Trained and qualified personnel who wish to perform this work should use the following procedure:
Perform a daily inspection of the system and transfer the radioactive source assembly into an approved
storage container. Disengage remote controls and source guide tubes.
WARNING
The gamma-ray source projector must be empty for the following steps.
a. Projector
Body
Maintenance
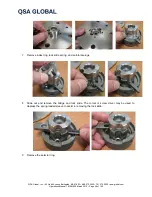
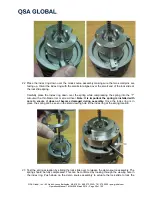
1 Remove the plastic dust cover from the lock mechanism (rear plate).
2 Remove the four ½-13 x 1½ inch long hex head bolts (BLT015) and the one 5/16 x 1½ long
security screw (SCR154) that retain the locking mechanism from the
empty
SENTINEL SENTRY
330 or SENTINEL SENTRY 110 projector. Remove the locking mechanism by rotating the rear
plate 90 degrees in either direction.
3 Remove the four ½-13 x 1½ inch long hex head bolts (BLT015) and the one 5/16 x 1½ long
security screw (SCR154) that retain the outlet port (front plate) from the
empty
SENTINEL
SENTRY 330 or SENTINEL SENTRY 110 projector.
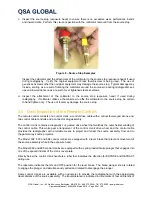
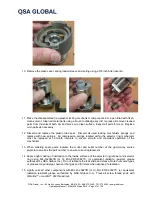
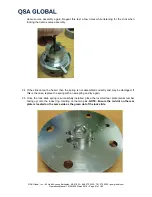
4 After removing the outlet port, clean the ‘S’ tube of the gamma-ray source projector by pushing
cloth swabs wetted with solvent through the ‘S’ tube until they come out clean. Use a dry cloth
swab to remove any residual solvent from the ‘S’ tube after cleaning.
5 Clean the exterior of the projector using a mild detergent solution to remove all dirt and grime.
Visually inspect the projector’s stainless steel body for weld failures (cracks, etc.) especially
around the locking mechanism and outlet port attachment areas. If damage, such as deep dents
and crevices, are found on the body of the projector, these repairs must be performed at a QSA
Global, Inc. service center. Ensure the handling rib assembly components (on the standard
configuration projectors) are intact and are not damaged.
6 Ensure that all of the information contained on the device label is legible. The trefoil and the
warning, ‘Caution or Danger, Radioactive Material’, must be legible at a distance of 3 ft
(approximately 1 m). The model number, serial number and Type B(U) certification number must
also be legible. For label replacement, contact QSA Global, Inc. for components and further
assistance.
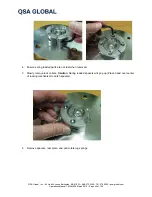
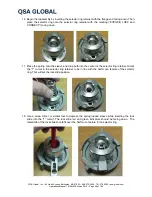
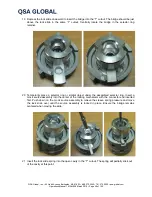
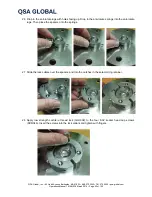
b. Locking Mechanism (Rear Plate) Maintenance
1 Remove the four hex head bolts (BLT015) and the one security screw (SCR154) that attach the
locking mechanism to the (empty) projector body.
2 Invert the locking mechanism with back (Serial number side) of rear plate facing up.
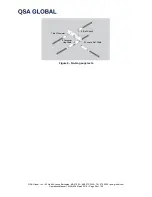
3 Remove the two ¼-20 x 5/8 inch long socket head screws (SCR347) and the four 8-32 x 1¼ inch
long socket head screws (SCR346) attaching the lock collars to the selector ring retainer.


