


63
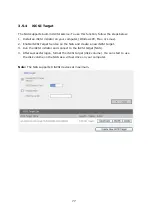
3.4.11
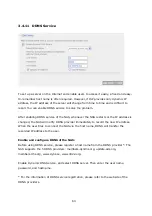
DDNS Service
To set up a server on the Internet and enable users to access it easily, a fixed and easy-
to-remember host name is often required. However, if ISP provides only dynamic IP
address, the IP address of the server will change from time to time and is difficult to
recall. You can enable DDNS service to solve the problem.
After enabling DDNS service of the NAS, whenever the NAS restarts or the IP address is
changed, the NAS will notify DDNS provider immediately to record the new IP address.
When the user tries to connect the NAS via the host name, DDNS will transfer the
recorded IP address to the user.
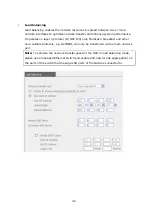
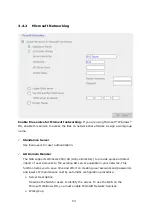
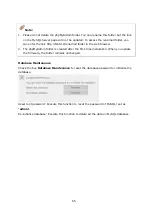
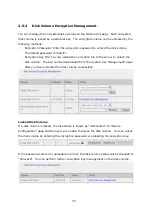
Enable and configure DDNS of the NAS:
Before using DDNS service, please register a host name from the DDNS provider*. The
NAS supports the 5 DDNS providers: members.dyndns.org, update.ods.org,
members.dhs.org, www.dyns.cx, www.3322.org.
Enable Dynamic DNS Service, and select DDNS server. Then enter the user name,
password, and hostname.
* For the information of DDNS service registration, please refer to the website of the
DDNS providers.
Summary of Contents for TS-639 Pro Turbo NAS
Page 21: ...21 2 The following menu is shown Select Install QNAP Finder to continue ...
Page 25: ...25 7 Click Start installation to execute the quick configuration ...
Page 36: ...36 3 1 Server Administration There are 8 main sections in server administration ...
Page 69: ...69 ...
Page 82: ...82 3 5 6 2 Mac Users 1 On the toolbar click Go Utilities 2 Click Printer Setup Utility ...
Page 96: ...96 iv The user names will appear on the list on Create User page ...
Page 105: ...105 3 7 1 4 Delete Select a share and click Delete Click OK to confirm ...
Page 184: ...184 Backup Select files and folders for backup ...


