&RQILJXUDWLRQ
3ULQWHU&RQILJXUDWLRQ
&KDQJLQJ&KDUDFWHU,QIRUPDWLRQ
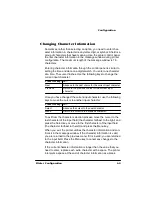
Sometimes, rather than selecting an option, you need to enter char-
acter information. A character is any letter, digit, or symbol. A field is a
group of characters that have meaning. Use the printer control panel
to enter character information in the message window during printer
configuration. The maximum length of the message window is 16
characters.
Entering character information through the control panel is similar to
setting the time and date on a digital watch. You enter one character
at a time. The cursor flashes. Use the following keys to change the
current input character:
Once you have changed the current input character, use the following
keys to move the cursor to another input character:
To exit from the character selection process, move the cursor to the
last character of the input field (the character farthest to the right) and
press the Select key, or move to the first character of the input field
(the character farthest to the left) and press the Menu key.
When you exit, the printer verifies the character information and con-
firms it in the message window. If the character information is valid,
you are returned to the previous menu; if it is invalid, you are returned
to the input field. Press the Menu key to cancel any changes to the
character information.
If the current character information is longer than the value that you
need to enter, replace each extra character with a space. The printer
interprets a space at the end of character information as a blank.
Press this key... to...
Next
Advance to the next choice for the current input character.
Previous
Return to the previous choice for the current input
character.
Press this key... to...
Select
Advance the cursor to the next character.
Menu
Return the cursor to the previous character.
Summary of Contents for 2060
Page 1: ...QMS 2060 Print System Reference 1800450 001B...
Page 12: ......
Page 13: ...QWURGXFWLRQ Q 7KLV KDSWHU About This Manual on page 1 2 Typographic Conventions on page 1 3...
Page 36: ......
Page 108: ......
Page 164: ......
Page 185: ...RFXPHQW 2SWLRQ RPPDQGV Q 7KLV SSHQGL Supported QMS DOCs on page C 2...
Page 190: ......
Page 195: ...RQILJXUDWLRQ 0HQX Q 7KLV SSHQGL Configuration menu charts...
Page 200: ......

