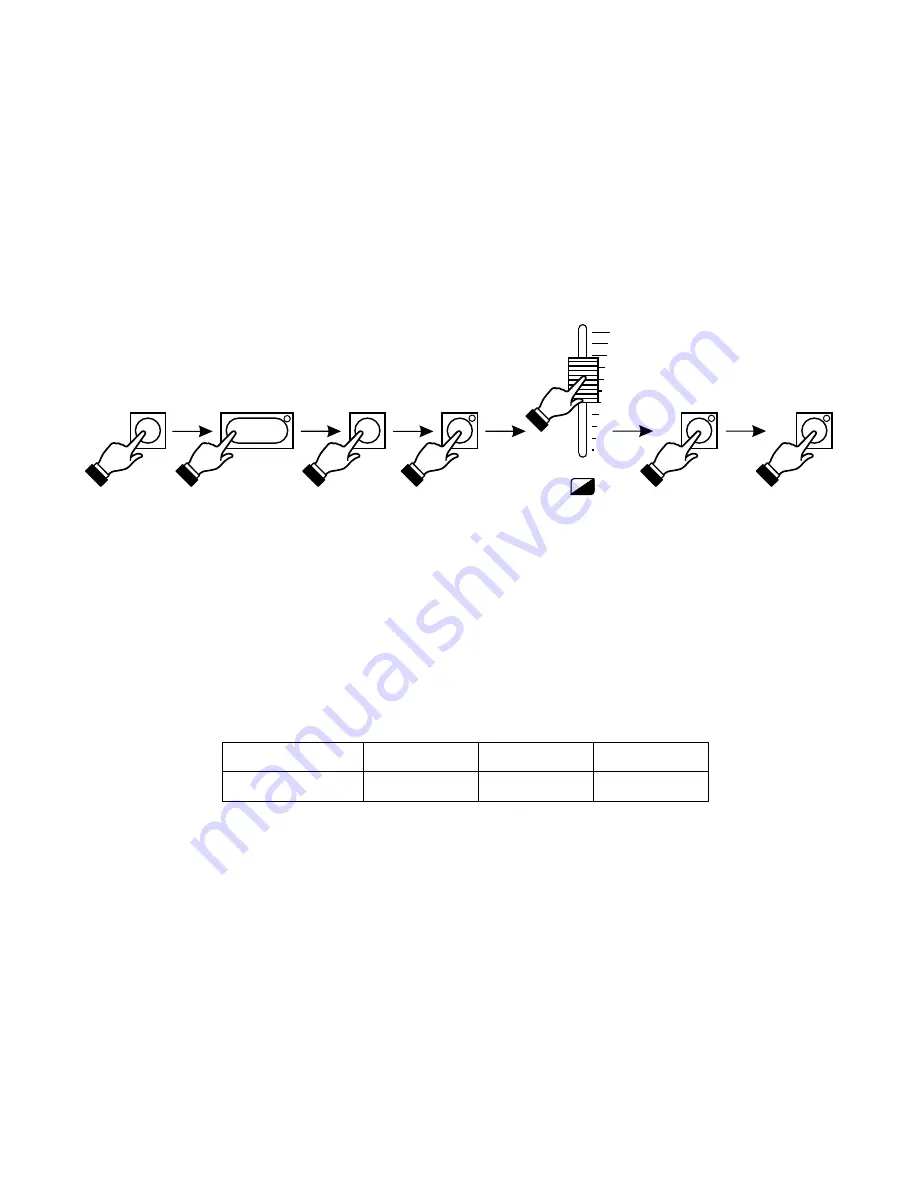
1. With the left pair of the "+" and "-" keys set the number of program you want to edit.
2. Press the "LOAD PROGRAM" key.
3. If any LEDs in the TRIGGERING block are lit, turn them off by pressing the corresponding keys.
4. With the right "+" and "-" keys set the number of scene you want to edit. The selected scene will
be rendered with the last saved settings.
5. In the FIXTURE SELECTION block select the scanners you want to be modified.
6. Adjust all the selected scanners according to new settings with the sliders.
7. Press the "SAVE" key in the PROGRAMMING block twice - the modified scene will be saved in
the controller's memory.
5.2. SCENE EDITION
6. PROGRAMS DEFINING
The controller's memory allows to create and save 48 programs consisting of different number of
steps. Each step corresponds with a single scene - during program rendering particular scenes
are rendered according to the programmed order. The memory is divided in such a way, as it
assigns a different numbers of steps to the programs, but you can merge a few successive
programs in one longer sequence.
number of steps
program number
32
1 - 16
16
17 - 47
14
48
Each program is rendered until it reaches the "END" marked step (description below). If the
"END" marker is not saved in the program, the successive program will be rendered
automatically, what allows to merge programs into the longer sequences. When the "END"
marker is found, the selected program will be rendered from the beginning.
In practice the short programs are mostly used. That is why the program "END" markers should
be applied.
6.1. PROGRAM END MARKER
5
-
+
SAVE
SAVE
LOAD PROGRAM
3
3
11
1. If any LEDs in the TRIGGERING block are lit, turn them off by pressing the corresponding keys.
2. With the right "+" and "-" keys set the scene, you want to end the program. This scene will be
rendered as the last one.


