Page 26 of 52
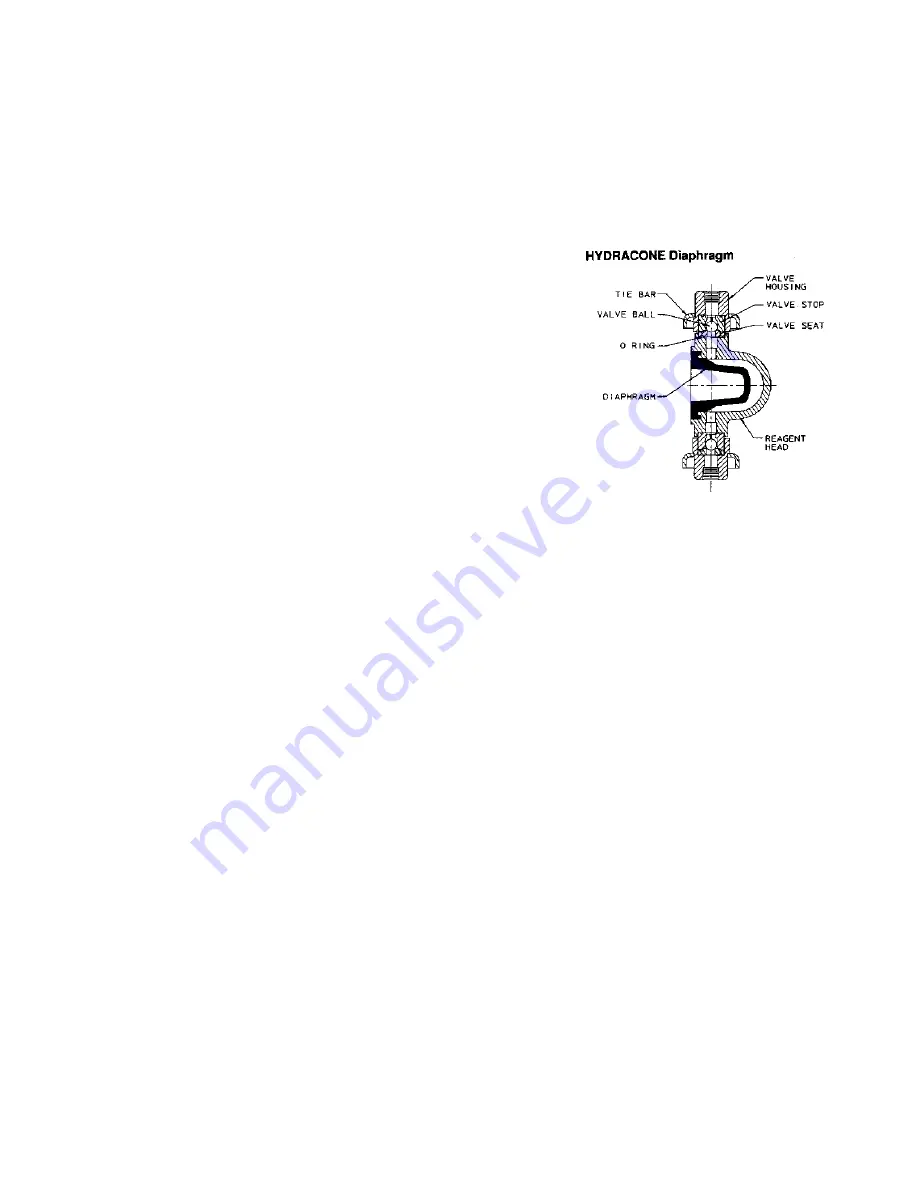
HYDRAcone Replacement
Like the HYDRAtube diaphragm, the HYDRAcone is not subject to stress fatigue and will not fail
from repeated flexure. However, failure may occur as a result of improper prime, over-
pressurization or chemical attack.
Follow these steps to replace the HYDRAcone diaphragm:
1. Close the inlet and outlet shut-off valves.
Adequately flush the reagent head, and associated
piping with a suitable fluid to remove toxic or
hazardous product. Vent off the reagent head
pressure.
2. Disconnect the union or flange on the piping.
3. Place a pan under the pump head to catch oil
leakage.
4. Remove the four reagent head bolts from the pump
head.
5. Rotate the reagent head and pour the product
pumped into a suitable receptacle.
6. Rinse the reagent head in water or a compatible
liquid.
7. Remove the HYDRAcone from the reagent head. It
may be necessary to use a sharp object to pry the
HYDRAcone from the O-ring groove.
8. Insert the new HYDRAcone diaphragm and reassemble the reagent head in the reverse
order of disassembly. Tighten all bolts securely and evenly.
9. On plastic reagent head designs, check the HYDRAcone adaptor O-ring to ensure it is
intact.
10. Replacement of the HYDRAcone diaphragm will lose hydraulic prime in the pump.
11. Re-prime the hydraulics.
12. Pump is ready for service.
8.5 Priming
Flat Diaphragm Priming
1. Disconnect the power source to the drive motor.
2. Relieve all pressure from the piping system.
3. For the 680/880 models, remove the sight glass on the intermediate head and pour the
appropriate amount of Pulsalube 6HGS. Replace the sight glass.
4. For the 7120 model, remove the fill cap in the intermediate head and fill to the appropriate
level with Pulsalube 6HGS. Replace the fill cap.
5. Remove the fill cap on the gearbox and fill the gearbox with Pulsalube 6HGS hydraulic oil
to the proper level. Replace the fill cap after complete.
6. Turn on the pump and adjust the stroke length to the maximum setting of one hundred
percent stroke. Fully depress and hold the PTP valve. Oil should begin to flow out of the
center diagnostic port. Depress the PTP valve down for three to five seconds then release
and repeat until the oil is clear of bubbles. The pump is now primed. If oil fails to flow out of
the diagnostic port, re-check the oil levels.
7. If you continue to have issues, you can try to speed up the process. Set he stroke to Zero
and isolate the power from the pump.
8. Remove the PTP valve from the pump head. Using a plastic funnel, slowly pour oil into the
pump head through the PTP valve port until full.
9. Replace the PTP valve in the pump head, ensuring that the flat copper gasket and O-ring
are properly in place.
10. Restore power to the pump. Increase the stroke slowly to 100% depressing and holding
the PTP valve periodically. Oil should begin to flow out of the center diagnostic port.


