10
Replace the Heating Element
Warning:
Before checking the inside of the SS-956 or replacing parts, be sure to disconnect the power plug.
Failure to do so may result in electric shock.
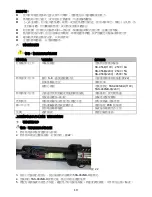
1. Dissemble hot air gun and air tube
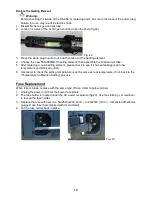
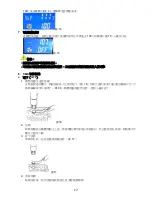
2. Loosen 3 screws of the hot air gun shell and open the shell (fig.22)
Fig. 22
3. Press the white plug to pull it out, and then take out the heating element.
4. Change the new 5SS-989NB-H heating element, then assemble the shell and air tube .
5. After replacing a new heating element, please check to see if it has air leakage (set in low
temperature and block air outlet).
6. Use meter to check the setting temperature is as the same as real temperature; if not, back to the
“Temperature Calibration Setting" process.
Fuse Replacement
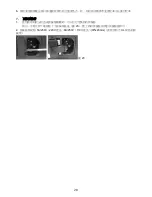
When fuse is blown, replace with the same type of fuse. (refer to below picture)
1. Unplug the power cord from the power receptacle.
2. The fuse holder is located under the AC power receptacle (fig.23). Use the slotted (
–) screwdriver
to loosen the fuse holder.
3. Replace the fuse with new one, 5A/250V(220V-240V~
)
or 8A/250V (110V~
)
, dimension Φ5x20mm.
(suggest use fuse that complied with UL standard)
4. Put the fuse holder back in place.
Fig. 23
Summary of Contents for SS-956
Page 12: ...11 SS 956 SS 956 LCD 480 C 896 F SS 956 SS 956 SS 956 600W SMD CPU...
Page 15: ...14 LCD 1 1 3 1 2 2 LCD 3...
Page 18: ...17 100 3 14 7 100 15 15 1 2 8 SMD QFP 1 16 PLCC 16 2 3 17 17 4...
Page 19: ...18 QFP 1 2 18 18 3 19 19 4 1 100g 20 20 2 21 3 21 4 20 100...
Page 21: ...20 6 1 23 2 5A 250V 220V 8A 250V 110V 5x20mm UL 23...
Page 22: ...21 SS 956 SS 956 LCD 480 C 896 F SS 956 SS 956 SS 956 600W SMD CPU...
Page 25: ...24 LCD 1 1 3 1 2 2 LCD 3...
Page 28: ...27 15 1 2 8 SMD QFP 1 16 PLCC 16 2 3 17 17 4 QFP 1 2 18 18...


