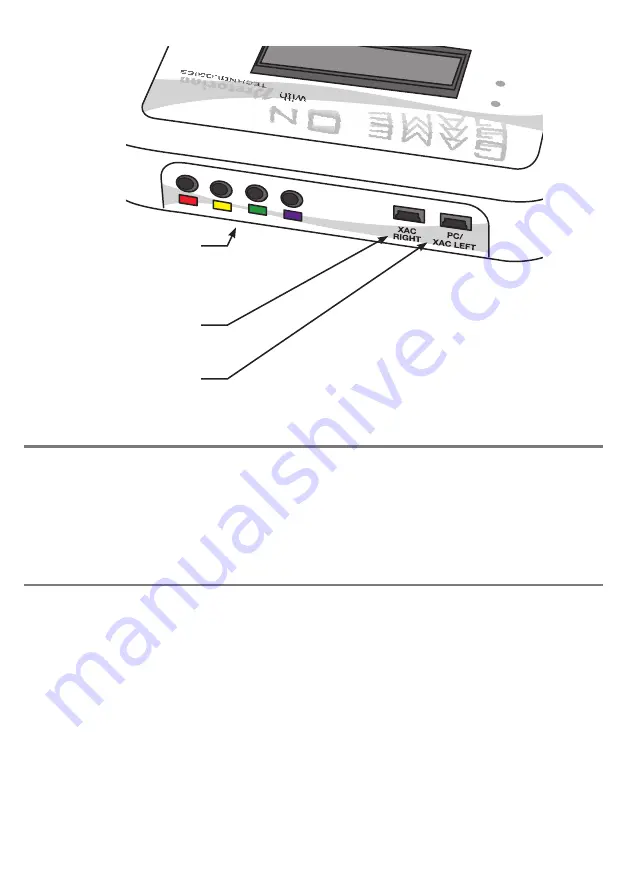
Connecting your Game On
Connecting to a gaming PC
Game On may be connected to a gaming PC or to an Xbox via an Xbox Adaptive Controller. The connection
method differs substantially between the two types of host, so please refer to the relevant section below for
full connection details.
Because Xbox Adaptive Controller has been adopted as the de facto standard adaptive device for gaming by
most gaming console providers, it is expected that there will be more connection options available as time
goes by. We recommend you refer to Pretorian Technologies’ website for the most up to date information.
Connection to a gaming PC is achieved using a single USB cable but it is important to make sure it is plugged
into the socket marked PC/ XAC LEFT [9]. Then plug it into a spare USB socket on the PC. You do not need
to turn off the PC when doing this. The first time Game On is plugged in, the computer will install a driver, a
process which takes a few seconds. The computer will tell you once the driver has successfully been installed.
Nothing should be connected to the USB socket marked XAC RIGHT [10], nor to the D-Pad connection sockets [11].
Game On
appears to the computer as a generic game controller, whereas some games (for example Forza)
will only respond to proprietary game controllers. If you are intending to play a game of this kind, there are
two options open to you:
• Install
Game On
via an Xbox Adaptive Controller, by reference to the section below and then connecting
the Xbox Adaptive Controller to the PC via a USB-C to USB-A cable. Your computer must be running
Windows 10 or later.
• Use an Xbox Controller Emulator such as X360CE. This will make
Game On
appear to the computer as a
standard Xbox game controller. Please refer to the Knowledge Base on our website for further details
by following the QR code at the back of these instructions.
Games and gaming platforms change very quickly, so when using Game On to play games on a platform such
as Steam, please refer to the Knowledge Base on our website for details of how to connect by following the
QR code at the back of these instructions.
IR IN
BUSY
9 Left USB
Socket
10 Right USB
Socket
11 D-Pad
Connection
Sockets


