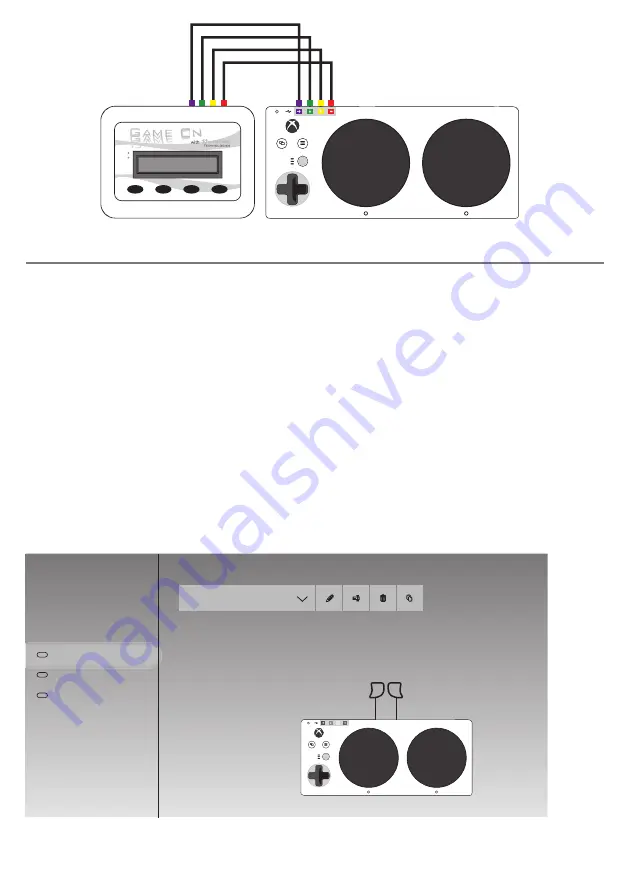
Trigger Emulation with Xbox Adaptive Controller
Because neither of the USB sockets on Xbox Adaptative Controller support Left and Right Trigger (LT and
RT), if you need these for gaming, you will need to re-assign X1 and X2 to be LT and RT by following these
steps:
1. On your Xbox, select Accessories, then when the XAC screen appears, select Configure.
2. Select New Profile and give it a name, e.g. Game On.
3. Navigate to X1 and select (by default it is set to Left Stick Up). Select Primary and then pick Left
Trigger from the list. Then dismiss this menu by pressing B (by default, the large black button on the
right).
4. Navigate to X2 and select (by default it is set to Left Stick Down). Select Primary and then pick Right
Trigger from the list. Then dismiss this menu by pressing B.
5. Now press B to get back to the Profiles menu, navigate to the slot number drop-down and assign your
new Game On profile to a slot number. Figure 4 shows how the summary screen should look.
6. Make sure your Xbox Adaptive Controller is set to the corresponding Slot number whenever you are
using
Game On
. For example if you are using Slot 1, ensure that the top LED is lit. If not, press the
adjacent button until it is.
Figure 3
Figure 4
A
B
L
R
SELECT
IR IN
MODIFY
PROFILE
PLAYER
BUSY
A
B
L
R
Profiles
Game on
New profile
Profile 2
Default
Profile 1
+
2
3
Game on
1
Slot 1
LT RT
Because most games make use of the Trigger controls, we recommend you always make this modification to
the Xbox Adaptative Controller configuration on your Xbox console. A video has been produced illustrating
these steps- please refer to our Knowledge Base using the QR code at the back of these instructions.


