


99
99
Owner’s Manual
Quick S
tar
t:
Lev
el
Setting
Ov
er
view
Hook
up
Con
trols
Connec
ting
to
a
Comput
er
Tut
orials
Technic
al
Inf
orma
tion
Trouble
-
shooting
and W
arr
an
ty
Sc
enes
, P
resets
, S
yst
em Menu
,
and MIDI C
on
trol
Software: Universal Control, SL Remote, Capture, and Studio One Artist 7
Sof
tw
ar
e: Univ
ersal C
on
trol
,
SL Remot
e, C
aptur
e,
and S
tudio O
ne A
rtist
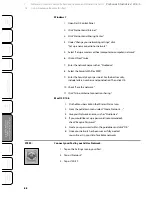
Using StudioLive Remote for iPad 7.3
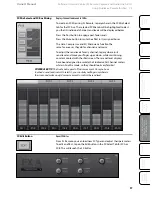
GEQ Select Tab
Brings a Pair of Graphic EQs into View (StudioLive 16.4.2 and 24.4.2 Only).
To begin making changes to a particular GEQ, you must first select it. To
do this, simply tap on the GEQ pair you’d like to edit.
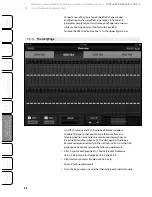
GEQ On/Off Button
Turns a Graphic EQ On or Off.
By default, each Graphic EQ is turned off. To enable a Graphic EQ, tap the
GEQ On button in StudioLive Remote and VSL, or use the GEQ menu on
your StudioLive.
POWER USER TIP: If you are making adjustments to a Graphic EQ, and you can’t hear your changes, make sure it
is on!
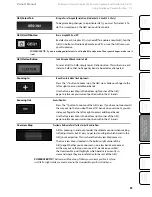
GEQ Flatten Button
Sets All Graphic EQ Band Levels to 0 dB.
To reset a GEQ to 0 dB, simply tap its Flatten button. This will return each
slider to 0 dB so that no frequency band is boosted or attenuated.
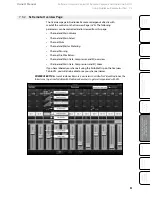
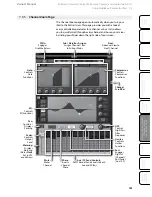
Zooming In
Zooms View In to Make Fine Adjustments.
Press the “+” button to zoom in on the GEQ view. Slide your finger to the
left or right to access additional bands.
Use the Overview Map in the bottom right corner of the GEQ
page to reference your current position within the 31-bands.
Zooming Out
Zooms View Out.
Press the “-” button to zoom out the GEQ view. If you have not zoomed all
the way out (so that you don’t have all 31 bands on your screen), you can
slide your finger to the left or right to access additional bands.
Use the Overview Map in the bottom right corner of the GEQ
page to reference your current position within the 31 bands.
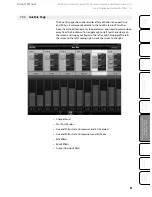
Overview Map
Provides a Reference Point for the Current Bands in View.
All this zooming in and out provides the ultimate control when making
GEQ adjustments but it’s easy to get lost and forget which bands in the
GEQ you’re adjusting. This is where the Overview Map comes in.
The Overview Map is located in the bottom right corner of the
GEQ page. Whether you’ve zoomed in on a few bands or zoomed
all the way out so that you can see all 31 bands on your iPad,
the Overview Map will highlight which bands are currently in
view and where they are in reference to the rest of the GEQ.
POWER USER TIP:
The Overview Map always follows your current position. So if you
scroll left or right while you are zoomed in, the Overview Map will scroll with you.