9.45, 9.45i Treadmill
Page 41
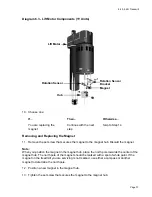
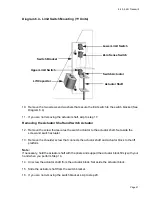
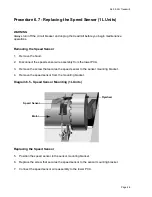
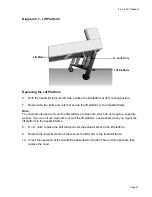
Diagram 6.4 - Limit Switch Mounting (1Y Units)
10. Remove the two screws and washers that secure the limit switch to the switch bracket (See
Diagram 6.4).
11. If you are not removing the actuator shaft, skip to step 17.
Removing the Actuator Shaft and Switch Actuator
12. Remove the screw that secures the switch actuator to the actuator shaft. Set aside the
screw and switch actuator.
13. Remove the shoulder screw that connects the actuator shaft and actuator block to the lift
platform.
Note:
If necessary, hold the actuator shaft with the pliers and support the actuator block firmly with your
hand when you perform Step 14.
14. Unscrew the actuator shaft from the actuator block. Set aside the actuator block.
15. Slide the actuator shaft from the switch bracket.
16. If you are not removing the switch bracket, skip to step 20.
Lower Limit Switch
Zero Sense Switch
Switch Actuator
Actuator Shaft
Switch Bracket
Upper Limit Switch
Lift Capacitor
Summary of Contents for 9.45
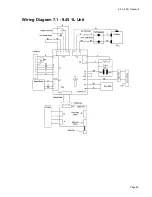
Page 55: ...9 45 9 45i Treadmill Page 55 Wiring Diagram 7 1 9 45 1L Unit...
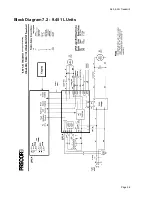
Page 56: ...9 45 9 45i Treadmill Page 56 Block Diagram 7 2 9 45 1L Units...
Page 57: ...9 45 9 45i Treadmill Page 57 Wiring Diagram 7 3 9 45 2P 3Y Units...
Page 58: ...9 45 9 45i Treadmill Page 58 Block Diagram 7 4 9 45 2P 3Y Units...


