9.45, 9.45i Treadmill
Page 21
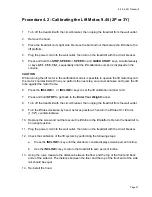
Procedure 4.2 - Calibrating the Lift Motor, 9.45 (2P or 3Y)
1.
Turn off the treadmill with the circuit breaker, then unplug the treadmill from the wall outlet.
2.
Remove the hood.
3.
Place the treadmill on its right side. Remove the bolt and nut that secure the lift tube to the
lift platform.
4.
Plug the power cord into the wall outlet, then turn on the treadmill with the circuit breaker.
5.
Press and hold the
STOP, SPEED
▲
,
SPEED
▼
and
QUICK START
keys, simultameously
or keys
4,5,1,7,6,5,7,6,1,
sequentially until the lift calibration number is displayed on the
console.
CAUTION
While running the lift motor in the calibration mode it is possible to operate the lift motor beyond
the motor's normal limits. When you perform the next step, care must be taken not to jam the lift
tube against the motor frame.
6.
Press the
INCLINE
▲
or
INCLINE
▼
keys to set the lift calibration number to 19.
7.
Press and hold
STOP
to get back to the
Enter Your Weight
banner.
8.
Turn off the treadmill with the circuit breaker, then unplug the treadmill from the wall outlet.
9.
Turn the lift tube clockwise, by hand, as far as possible. Then turn the lift tube 10 -1/2 turns
(1-1/2") counterclockwise.
10. Replace the screw and nut that secure the lift tube to the lift platform. Return the treadmill to
an upright position.
11. Plug the power cord into the wall outlet, then turn on the treadmill with the circuit breaker.
12. Check the calibration of the lift system by performing the following steps:
a
Press the
INCLINE
▲
key until the electronic console displays twelve percent incline;
b
Use the I
NCLINE
▼
key to return the treadmill to zero percent incline.
13. Using the ruler, measure the distance between the floor and the top of the front and back
ends of the side rail. The distance between the floor and the top of the front end of the side
rail should be equal.
14. Re-install the hood.
Summary of Contents for 9.45
Page 55: ...9 45 9 45i Treadmill Page 55 Wiring Diagram 7 1 9 45 1L Unit...
Page 56: ...9 45 9 45i Treadmill Page 56 Block Diagram 7 2 9 45 1L Units...
Page 57: ...9 45 9 45i Treadmill Page 57 Wiring Diagram 7 3 9 45 2P 3Y Units...
Page 58: ...9 45 9 45i Treadmill Page 58 Block Diagram 7 4 9 45 2P 3Y Units...

