background image

40


2.7. STARTUP TEST

After the bathtub installation, ensure it is clean. Then, fill it with water of temperature (40 ± 5)

0

C to the level 

higher than the highest jet, which will make it possible for the system to work. Then, activate the system and 

maintain its operation for at least 10 min.

In case the pump is equipped with two-speed pumps (information included in the pump specification) start the 

first and second pump speed at least once during the test duration.

Moreover, without emptying the bathtub, disable the hydromassage system and after at least 10 minutes 

check all connections, pipes, connectors for possible leaks.

It is recommended to repeat the procedure above after each required regulation which is meant to ensure 

system integrity or after replacement of any bathtub’s device or element.

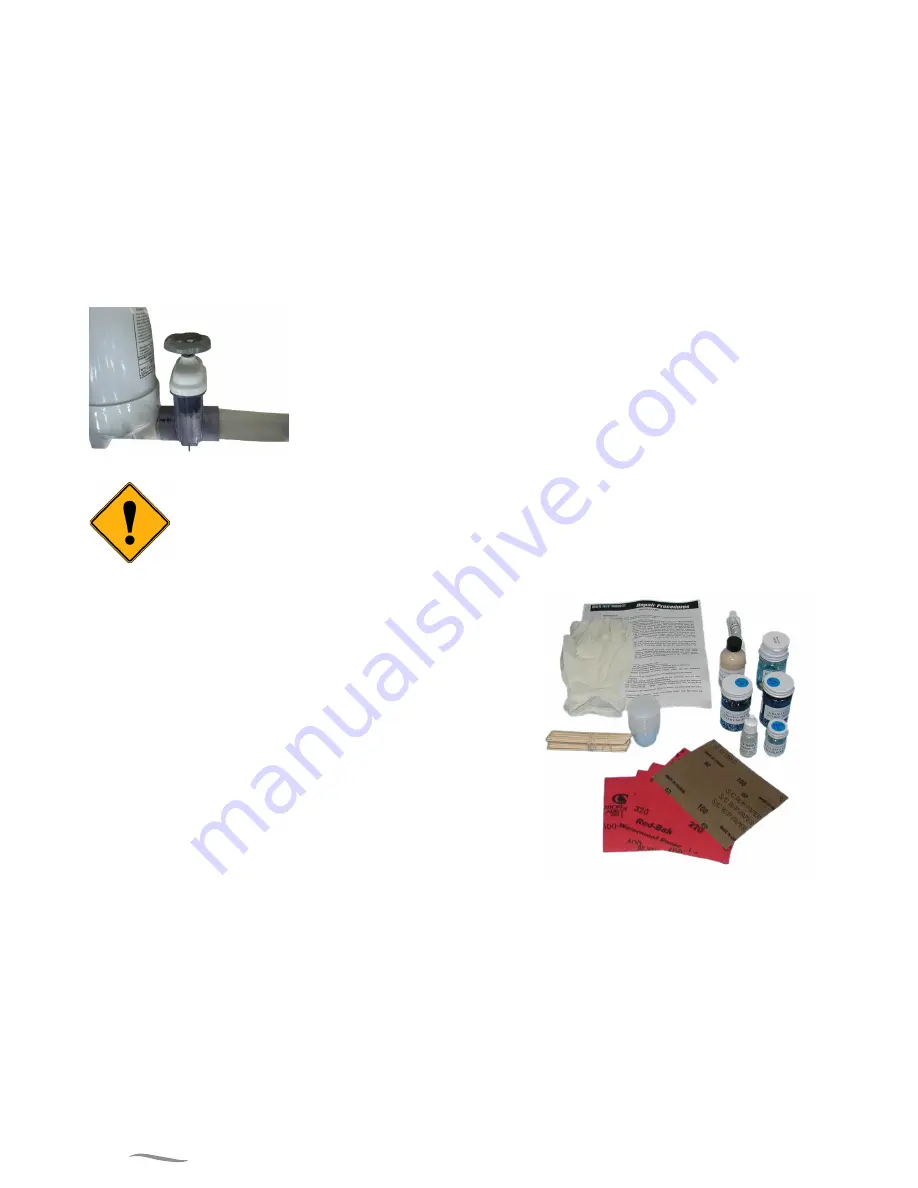
2.8. SERVICE VALVES

In the Genesis SPA bathtub there are 

5

 slide valves that disconnect the water 

flow to the pump and the heater. Closed valves make it possible to inspect, 

repair or replace devices with a filled bathtub.

Before the first startup of the bathtub make sure that the valves are open.

2.9. ACRYLIC PRESERVATION

Use only mild detergents to clean the bathtub (not including 

acetone, abrasives or corrosive substances). The acrylic 

structure and its bad adhesion properties makes it easy to 

maintain cleanliness.

Mechanic damage (shallow scratches) of glossy acrylic can be 

easily fixed. In case of very minor scratches use a minimum 

amount of waxless car polish product. Deeper scratches or 

gouges can be removed first by using an abrasive paper with 

granularity 800, 1200, 2000 and then the product mentioned 

above. To maintain smoothness of the bathtub, polish it with 

circular motions and then use a wax-based car polish product 

(to achieve high gloss). Repairs can be made using a repair set 

available at dealers, but in such cases we 

recommend using 

the services of authorised services of ROCA POOL-SPA 

company..

Repair set for SPA bathtubs

Summary of Contents for GENESIS SPA 213 x 213

Page 1: ...Multi person bathtub GENESIS SPA 213 x 213 Operation and installation manual Guarantee...

Page 2: ...y For many years we ve been offering products of best quality on international level We pay particular attention to make our products robust reliable and safe to use The highest quality of materials w...

Page 3: ...32 1 10 Disinfection 33 1 11 Water measurement and treatment preparation set 33 1 12 Thermal cover option 36 1 13 Cover disassembly assembly option 36 PART 2 INSTALLATION MANUAL 2 1 Transport 37 2 2 P...

Page 4: ...wledge of the equipment unless it takes place under the supervision or according to the equipment operation manual transferred by people who are responsible for their safety Mind that children must ne...

Page 5: ...sage 3 kW electric heater additional electric heater 3 kW option 2 hydromassage pumps power 1 3 kW each filtration pump 0 75 kW ozoniser UV lamp option no ozone jet the anti freeze system makes it pos...

Page 6: ...10 A L2 12 5 A L3 6 A version 3N 400VAC 9 5 kW L1 15 5 A L2 12 5 A L3 12 A version 3N 400VAC option Maximum number of people bathing 4 Water type Use water intended for domestic properly purified and...

Page 7: ...171ZPD1000249 mini pulsating jets B 6 pcs 171ZPD1000251 mini directional jets C 2 pcs 171ZPD1000252 mini rotating jets D 8 pcs 171ZPD1000255 mini fixed jets E 4 pcs 171ZPD1000257 large rotating jets F...

Page 8: ...e contamination Clean the middle of the jet put the insert to gether and screw it into the jet body 1 3 TREATMENT SUBSTANCES Acrylic bathtub surface is coated with a thin wax layer which is a remainde...

Page 9: ...he right can be selected and the screen will change to show more detailed controls or programming functions Set 104 F 8 32 PM Ozone Filter 1 Spa Shortcuts Settings High Range 102 F Ready in Rest Mode...

Page 10: ...the navigation buttons The feature currently selected is marked with a white frame around the icon and white text below it Once selected the feature can be activated configured by pressing the select...

Page 11: ...ng a ready to use setting vs a va cation setting Each range maintains its own set temperature as programmed by the user This way when a range is chosen the spa will heat to the set temperature associa...

Page 12: ...completed without the possibility of energizing the heater under low flow or no flow conditions Nothing comes on automatically but the pump s can be energized by se lecting the Jet buttons If the spa...

Page 13: ...e Pump 1 low may also activate for at least 1 minute every 30 minutes to detect the spa temper ature polling and then to heat to the set temperature if needed When the low speed turns on automatically...

Page 14: ...ter Cycle 2 line by pressing the Right Navigation Button and when NO is highlight ed press Up or Down to toggle Filter Cycle 2 on and off When Filter Cycle 2 is ON it can be adjusted in the same manne...

Page 15: ...in the following order Utilities The Utilities Menu contains the following A B Temps Once this option is activated the sensor A temperature and the heater sensor B temperature are dis played on the sc...

Page 16: ...r that item is displayed at the bottom of the screen 1 5 11 GENERAL MESSAGES Clean the filter Most messages and alerts will appear at the bottom of the normally used screens Several alerts and message...

Page 17: ...You must clear the message when water is below 42 2 C 108 F See Flow Related Checks below Flow Related Checks Check for low water level suction flow restrictions closed valves trapped air too many clo...

Page 18: ...y using the Preferences Menu Reminder Messages can be chosen individually by the Manufacturer They may be disabled entirely or there may be a limited number of reminders on a specific model The freque...

Page 19: ...ctrician and all grounding connections must be properly installed 1 5 18 MUSIC SYSTEM OPTION To work correctly with the music system the source device must have the following characteristics Communica...

Page 20: ...o record some information for your records and to help troubleshoot your setup if needed Before the next step write down the name of your wireless network password and the encryption type If you do no...

Page 21: ...standing at your tub if you can connect your smart device to the Internet through your home network then the tub bwa Wi Fi module should be able to connect to your home network also If you cannot conn...

Page 22: ...ter it in the SSID box You will also need to choose the type of password en cryption you are using Open WEP or WPA Now select the Wi Fi Set tings button to select your home network and enter your pass...

Page 23: ...ntrolling your tub via your local home network Then select the Key text box to enter your password if you have one Type it in us ing the keyboard If you have your home net work setup to automatically...

Page 24: ...u want to control your tub away from your local home network make sure you have an Internet con nection on your device 3G 4G Hotspot Start the app and press the Connect button Now you can control your...

Page 25: ...Tub is set in high range and the temperature can be set between 26 5 C 80 F and 40 C 104 F Low Range Temperature can be set between 10 C 50 F and 26 5 C 99 F Used to save energy Check your tub s owner...

Page 26: ...CTIONS CONTROLS CONTROL SCREEN AN DROID When you are at home using your local Wi Fi con nected to the tub or a direct connection your screen will look like this On Android use the back return key to r...

Page 27: ...S CHANGE PICTURES ETC AS AN INDICATION OF THE EQUIPMENT BEING ON OFF LOW HIGH SPEEDS HEATING ETC YOU CAN TURN THE DEVICES ON OFF BY PRESSING THE BUTTONS OF THE EQUIPMENT YOU WANT TO CONTROL Depending...

Page 28: ...the tem perature you want the water to heat to The Set Temper ature will adjust accordingly as you move the slider Toggle the buttons to change the temperature be tween F C Heat mode Ready Rest and th...

Page 29: ...urn to the main app screen Press Done when finished Press Save when finished Touch the indicated field TIME OF DAY YOU CAN SET 12 OR 24 HOUR TIME To set the time of day on your tub press the Time of D...

Page 30: ...ge of the bathtub used to regulate massage intensity water aspirators Water massage power regulation takes place using aeration regulators present at the edge of the bathtub by adding air to the water...

Page 31: ...ulti point light settings 6 brilliant colours and 4 colour transition programs Tidal fade Cool colour mix slow transitions between green and blue tones Afterburner Fade Warm colour mix slow transition...

Page 32: ...he valve in the right position various service actions are performed at the filter such as filter flushing cleaning sand deposits and circulation water movement skipping the filter tank in order to fo...

Page 33: ...pply fresh water to the bathtub from time to time approx 15 l person Maintenance of the filtration pump The filtration pump should be cleaned depending on its usage Contamination gathers in the pump b...

Page 34: ...to lower the pH value by 0 1 add approx 10 g 1 m3 of water in case of Genesis 10 g With operating filtration pump add the granulate directly to the bathtub and spread it evenly across the entire bath...

Page 35: ...35 A set of measurement and treatment preparations to be purchased in salons...

Page 36: ...hen the bathtub will be used often in a closed room the cover prevents increased water evaporation 2 times a year open the thermal cover case to remove possible water deposits 1 13 ENCLOSURE DISASSEMB...

Page 37: ...rface Setting the bathtub must provide access to the devices that are underneath it devices placed on the control panel s side The bathtub legs should contact with any hard base surface Total weight o...

Page 38: ...kes it possible to empty the bathtub via a connected garden hose ended with a valve with a Gardena socket It is recommended to connect the bathtub permanently to the sewage system due to the possibili...

Page 39: ...eas Discharge valve 50 Connector with valve GARDEN Filtration pump Additional heater Controller with a heater main Electrical terminal with capacity of 6 5 AC kW 3N 400V 5x4 mm 2 Slide valve Massage p...

Page 40: ...that disconnect the water flow to the pump and the heater Closed valves make it possible to inspect repair or replace devices with a filled bathtub Before the first startup of the bathtub make sure th...

Page 41: ...ge of the bathtub surface c performing unauthorised repairs or modifications of the electronic control system d locating the bathtub in a way that prevents ventilation and free access to all devices i...

Page 42: ...42...

Page 43: ...3 MODEL FITTINGS FACTORY NUMBER DATE OF PRODUCTION AND TESTING TECHNICAL PRODUCT SHEET NOMINAL POWER REQUIREMENTS FUSING REQUIREMENTS VOLTAGE FREQUENCY F Genesis SPA THERMAL PROTECTION QUALITY CONTROL...

Page 44: ...and colour of the product without prior notification Nevertheless ROCA POOL SPA makes an effort so that the specifications are as up to date as possible as for the day the publication is prepared 19 1...

Reviews: