background image

Portable Game Console

PoGa-4DGL Reference Manual

Appendix C: Software/Driver Installation Guide 

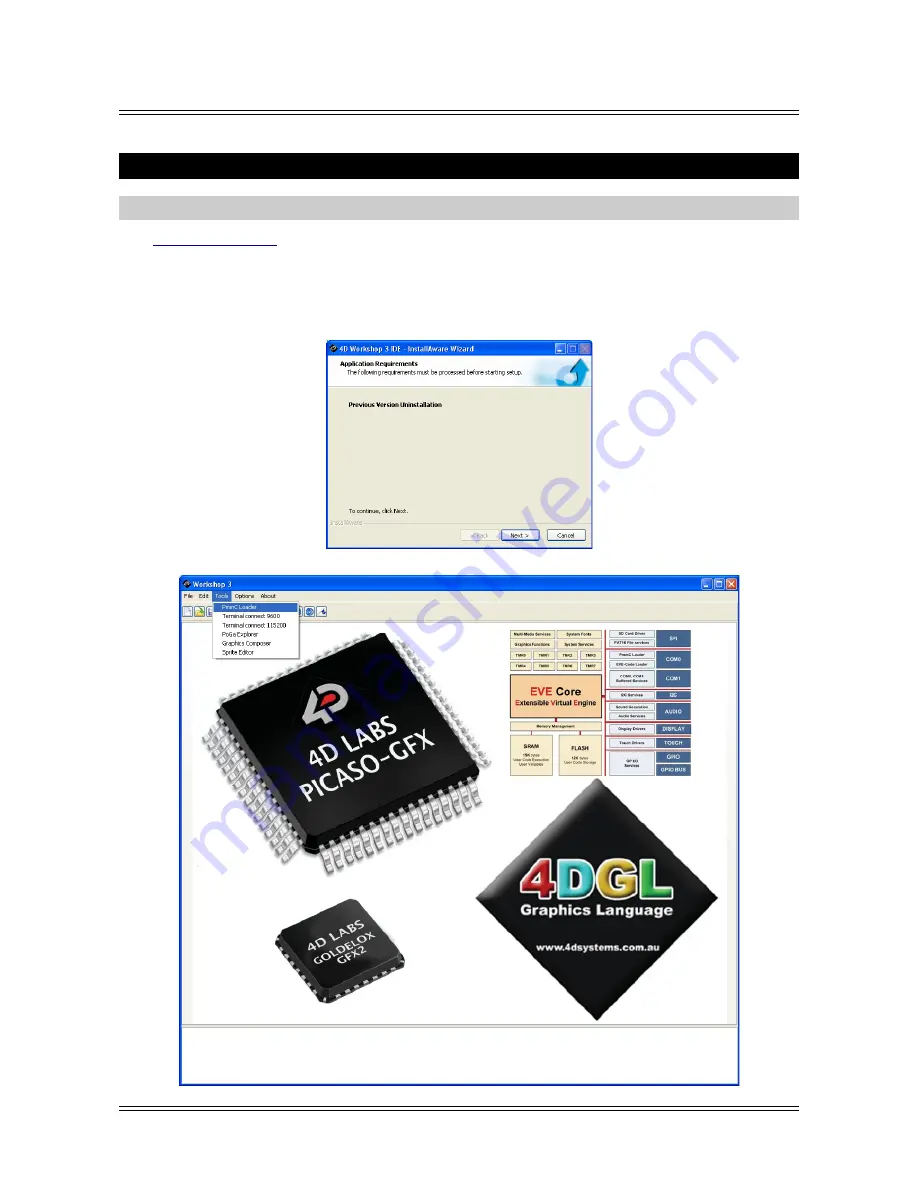
4D Workshop

Visit  

4D Workshop3 IDE

  Product page to download the latest 4D Workshop. It is a complete and free 

development platform that include Aid tools like, Graphics Composer, Sprite Editor and PmmC Loader. 
Double click  

“Workshop3 installer.exe”

  file to begin installation. If  you already have an older version 

installed, you will be asked to uninstall the existing version. Clicl Next. Follow the instruction to complete 

installation.

© 2011 4D Systems

www.4dsystems.com.au

Page 81 of 87

Summary of Contents for 4DGL

Page 1: ...PoGa 4DGL Portable Game Console Reference Manual Document Date 18th January 2011 Document Revision 2 0 2011 4D Systems www 4dsystems com au Page 1 of 87 ...

Page 2: ...Ga Explorer 39 5 1 PoGa Screenshot 39 5 2 Formatting the SD card to PoGa Format 40 5 3 Adding Folders 42 5 4 Copying programs to the DISK 43 5 5 Deleting programs from the DISK 43 6 Including your game into the PoGa File System 44 6 1 Setting PoGa Disk 44 6 2 Testing the files on the PoGa Disk 51 7 PoGa Sprite Editor 52 7 1 Making your First Sprite 53 7 2 Making few more Sprites 63 8 Creating and ...

Page 3: ...It is driven by the tiny yet powerful GOLDELOX PoGa custom graphics processor from 4D Labs Graphics text image animation and countless more features are built right inside the chip For portability the PoGa can be powered for many hours on standard 3xAAA batteries The 4D Graphics language provides enough power and flexibility to make some really cool games and learn the art of programming with a le...

Page 4: ... and Assembly Guide revXX pdf PoGa 4DGL Portable Game Console Reference Manual revXX pdf GOLDELOX PoGa 4DGL Internal Functions revXX pdf 4DGL Programmers Reference Manual revXX pdf Note Refer to Appendix C for Installation Guide Note mico SD card is also referred as uSD card Note You will need a separate USB A to miniB cable to use with the uUSB MB5 module Note The minimum size memory card you wil...

Page 5: ...ion can be found at All Users Shared Documents 4D Labs PoGa Intro folder XP or Users Public Documents 4D Labs PoGa Intro folder Vista and Windows 7 3 1 Your first PoGa Program Fire up WorkShop Click Start Programs 4D Workshop 3 IDE Workshop Start a new Program 2011 4D Systems www 4dsystems com au Page 5 of 87 New Icon in the Tool bar ...

Page 6: ...ly need a main function and end function func main endfunc Add the code func main print Hello world n repeat forever endfunc Notice that print uses standard C escape characters it doesn t really do anything here it s just to show that it can be used The repeat and forever is just to keep the program running in an endless loop rather than exit back to the PmmC or menu program Run it If you haven t ...

Page 7: ...y clicking with the mouse Keep typing until your code looks like the following func main txt_Height 2 txt_Bold ON txt_Italic ON txt_MoveCursor 3 3 txt_FGcolour WHITE print Hello world n repeat forever endfunc Since you have used WHITE as a color you need to tell the compiler where to locate the definition of WHITE so insert the following line after the platform statement inherit 4DGL_16bitColours ...

Page 8: ...ts to be displayed when the target is hit a sequence to show that we hit the target func kaboom var i for i 1 i Indent i gfx_CircleFilled xtgt ytgt i RAND beep i 210 BoomPause 2 beep as we go pause BoomPause next endfunc A routine to move the crosshairs around the screen func writescreen erase old crosshairs gfx_Line xcrosso TgtSize LineLen ycrosso xcrosso TgtSize ycrosso BLACK gfx_Line xcrosso Tg...

Page 9: ... target xcrosso xcross save current crosshair needed so we can erase old position ycrosso ycross while i joystick 0 read the joystick value pause 50 pause a little bit so we get autorepeat if i UP ycross Indent move crosshair if within bounds ycross ycross 1 else if i DOWN ycross 128 Indent 1 ycross ycross 1 else if i RIGHT xcross 128 Indent 1 xcross xcross 1 else if i LEFT xcross Indent xcross xc...

Page 10: ...on of the classic 15 puzzle so lets start by including the color definitions and adding some constants inherit 4DGL_16bitColours fnc constant TileSX 32 pixel width of each Slider constant TileSY 32 pixel height of each Slider constant TileNX 4 Number of Tiles in X direction constant TileNY 4 Number of Tiles in Y direction And some initialised global variables var chars 16 A B C D E F G H I J K L M...

Page 11: ... UP yp 0 move slider if within bounds yn yp 1 else if i DOWN yp TileNY 1 yn yp 1 else if i RIGHT xp TileNX 1 xn xp 1 else if i LEFT xp 0 xn xp 1 endif if yn yp xn xp if sucessful move reorder board gfx_RectangleFilled xn TileSX yn TileSY xn 1 TileSX 1 yn 1 TileSY 1 BLACK gfx_MoveTo xp TileSX yp TileSY pokeB TEXT_XMAG 3 pokeB TEXT_YMAG 3 print CHR chars posn yn TileNY xn SWAP posn yn TileNY xn posn...

Page 12: ...Composer will start and begin a new graphics project Note If you get a User Account Control message when starting Graphics composer please refer to Appendix D Add a graphic Click Add on the bottom left Navigate to C Documents and Settings All Users Documents 4D Labs PoGa Intro Target Vid Images and add Explode 02 june gif 2011 4D Systems www 4dsystems com au Page 12 of 87 ...

Page 13: ...hip icon Save the GCS as EXPLODE Select 4DGL uSD Raw GCI at Specified offset as the build type Select the drive you inserted the uSD card into and a sector offset of 0 Click OK this will convert the Explode 02 june gif file into a video and save it to the uSD card 2011 4D Systems www 4dsystems com au Page 13 of 87 Click the Chip icon ...

Page 14: ...gfx_Cls if media_Init break initialise and test the uSD card putstr No Disk forever Change the KaBoom function as follows func kaboom beep 200 2000 gfx_Set CLIPPING ON media_SetSector 0 0 media_Video xtgt 39 ytgt 60 endfunc Remove the uSD card from your computer and insert it into your PoGa Save this as TARGET VID and compile and download Note For an in depth treatment of Graphics composer See sec...

Page 15: ...s to the TextTiler Click on the New Icon in Graphics composer Add a graphic Click Add on the bottom left Navigate to C Documents and Settings All Users Documents 4D Labs PoGa Intro 15Puzzle GFX Images and add PoGaDog bmp 2011 4D Systems www 4dsystems com au Page 15 of 87 ...

Page 16: ...computer Click on the chip icon Save the GCS as POGADOGTILED Select 4DGL uSD Raw GCI at Specified offset as the build type Select the drive you inserted the uSD card into and a sector offset of 0 Click OK this will convert the PoGaDog bmp file into a video of the bitmap cut up into 32x32 tiles and save it to the uSD card 2011 4D Systems www 4dsystems com au Page 16 of 87 Check the Tiled check box ...

Page 17: ...leNX j media_VideoFrame j TileSX i TileSY i TileNY j next next pause 2000 This shows the puzzle as it will look when complete just in case it looks too messed up to understand when it is randomised Replace the Initial tile writing at line 46 if using the sample code or approximately line 37 if cutting and pasting from this doc pokeB TEXT_XMAG 3 pokeB TEXT_YMAG 3 gfx_MoveTo j TileSX i TileSY print ...

Page 18: ...okeB TEXT_YMAG 3 print CHR chars posn yn TileNY xn With media_VideoFrame xp TileSX yp TileSY posn yn TileNY xn Replace the final tile writing at line 78 if using the sample code or approximately line 68 if cutting and pasting from this doc Maybe shorten here gfx_MoveTo xp TileSX yp TileSY pokeB TEXT_XMAG 3 pokeB TEXT_YMAG 3 print CHR chars 15 With media_VideoFrame j TileSX i TileSY posn i TileNY j...

Page 19: ...ave this as GFXTiler and compile and download Note You can cut and paste the programs from the test boxes in this chapter or find them in the All Users Shared Documents 4D Labs PoGa Intro folder XP or Users Public Documents 4D Labs PoGa Intro folder Vista and Windows 7 2011 4D Systems www 4dsystems com au Page 19 of 87 ...

Page 20: ... Composer as a WYSIWYG format The information here is a description of how this can be achieved by taking you through the steps that were taken to create the GCI file for the GCI_Demo 4 1 Building GCI DEMO Note The GCI_Demo 4DG example demonstrates the use of the media_SelectGCIimage function From the Workshop toolbar select the Graphics composer tool When the graphics Composer opens select New fr...

Page 21: ...all been dumped into the top left corner Note that our Screen Size is still left at 240x320 and also that the 10gear gif will obviously be too big to fit the 128x128 screen First we will resize the 10gear gif image 2011 4D Systems www 4dsystems com au Page 21 of 87 Files should now be high lighted Now click Open to load these files ...

Page 22: ... resize it Now adjust the width and height settings 2011 4D Systems www 4dsystems com au Page 22 of 87 Notice that the image is brought to the front and high lighted with the red dashed line Single click on 10 gear gif to select it TIPYou can also resize the image by dragging the red rectangle ...

Page 23: ...the object to select it object is selected when you see the red rectangle around it then press and hold down the mouse button to drag the object to the required position You can also select objects by clicking on the required entry in the Items list box which will high light the object then drag it 2011 4D Systems www 4dsystems com au Page 23 of 87 ...

Page 24: ...ing the adjustment arrows at the right hand side of each entry box Once you are happy with the layout we can now save the GC project info It is best to save project files in a common place the GC FILES folder within the Workshops Resources folder Now click the Chip icon on the toolbar so we can build the output file 2011 4D Systems www 4dsystems com au Page 24 of 87 Click on the chip button to ope...

Page 25: ...Click the second radio button and navigate to the project folder 2011 4D Systems www 4dsystems com au Page 25 of 87 First navigate to the Workshop folder where we will keep all our GC housekeeping files Then name the file GCI_Demo1 Finally click Save ...

Page 26: ...Ga 4DGL Reference Manual Now browse for the 4DGL project folder Click Ok to save the file then close the Graphics Composer 2011 4D Systems www 4dsystems com au Page 26 of 87 Click Ok to save files Destination folder now shown ...

Page 27: ...7C 0000 14 11 info bmp 017E 0000 50 11 warn bmp 0180 0000 86 12 Each line contains 5 entries relating to the GCI file The name of the entry Low word of sector offset of the image HEX format High word of sector offset of the image HEX format X position of the image decimal format Y position if the image decimal format Note The GCI_Demo1 dat and GCI_Demo1 gci files will be used for the GCI_Demo1 4DG...

Page 28: ...sh to change this image so here is a description of how this can be achieved by taking you through the steps that were taken to create the tile map From the Workshop toolbar select the Graphics composer tool When the graphics Composer opens select New from the File menu Now add the required bitmap file to the project Now add the required bitmap file to the project 2011 4D Systems www 4dsystems com...

Page 29: ...Game Console PoGa 4DGL Reference Manual 2011 4D Systems www 4dsystems com au Page 29 of 87 Navigate to the project folder and select the required image Click the Add button to add a new image Then Open the file ...

Page 30: ...reen should now look like this 2011 4D Systems www 4dsystems com au Page 30 of 87 Set the Tile Width and Tile Heigh to 32 Click on Tiled checkbox to select tiled mode Change screen size to 128 x 128 Entries list shows the file we have added Image is now 128 x 128 and has been cut into 16 tiles ...

Page 31: ...It is best to save project files in a common place the GC FILES folder within the Workshops Resources folder 2011 4D Systems www 4dsystems com au Page 31 of 87 First navigate to the Workshop folder where we will keep all our GC housekeeping files Then name the file GFXtiler Finally save the GCS file as GFXtiler ...

Page 32: ...be requiring them later for another demo so click the second radio button and navigate to the project folder After we do this we will then use the raw mode and load the GCI file directly to a uSD card and test the project 2011 4D Systems www 4dsystems com au Page 32 of 87 Click on the chip button to open the Build Output window Select the elipses button so we can navigate to the destination folder...

Page 33: ...folder Then click Ok to save the GCI and DAT files in the 4DGL project folder 2011 4D Systems www 4dsystems com au Page 33 of 87 Then click Ok to select the folder Destination folder now shown Click Ok to save files Navigate to the GFXtiler folder where our 4DGLsource code is stored ...

Page 34: ...files stored on a PoGa disk but for now we will download the GCI file as raw binary to a uSD card at sector 0 so we can test out the GFXTiler 4DG program Place a uSD card in a SD card slot on the PC Click on the Chip button again Select the required format and the correct drive letter 2011 4D Systems www 4dsystems com au Page 34 of 87 Select uSD RAW mode Select the correct drive letter Set the Sec...

Page 35: ...tting remember we are just saving raw data to the card for this test which will over write any previous file system You may briefly see a progress bar while the uSD card is being written We are now finished with the Graphics composer so you may now close it 2011 4D Systems www 4dsystems com au Page 35 of 87 Answer Yes if you agree to over write the uSD card ...

Page 36: ...me Console PoGa 4DGL Reference Manual Lets test our work so far it s time to open the Workshop Navigate the the GFXTiler 4DG program and open it 2011 4D Systems www 4dsystems com au Page 36 of 87 Select File Open ...

Page 37: ...ort that PoGa is connected to Now click on the RED traffic light to establish the connection with the PoGa It should turn BLUE Move the mouse cursor away for a moment then hover back over the BLUE traffic light You should see the platform information and the capacity of the uSD card you are using If all is ok we are ready to program the PoGa 2011 4D Systems www 4dsystems com au Page 37 of 87 ...

Page 38: ...al Click the Comp n Load button Compile and Load The information panel should now show the compiler information info and the download successful message Also the PoGa should be running the program 2011 4D Systems www 4dsystems com au Page 38 of 87 ...

Page 39: ...p into 4 distinct areas Top Left PoGa Drives Top Right PoGa File contents and description within current category a category is a PoGa Folder Bottom Left PC s folder navigation Note not the same as explorer you need to click on folder to see if it has sub folders Bottom Right PoGa Files Panel files applicable to PoGa Explorer may be dragged from this panel from here you can drag various items into...

Page 40: ...nsert graphics into PoGa file Drag and drop to PoGa files panel to restore PoGa Image files Drag and drop to PoGa drives panel to insert graphics into Common Storage Area CSA Drag and drop to PoGa drives panel to create replace PoGa drive with contents of PoGa Image file 5 2 Formatting the SD card to PoGa Format Plug in the uSD card in to your PC Select the required drive by right clicking on the ...

Page 41: ...k on format to format the drive erasing any previous formats or data If the drive already has eg a FAT format you will get the following warning message Click OK to continue and the formatting will start 2011 4D Systems www 4dsystems com au Page 41 of 87 ...

Page 42: ...te the the drive icon changes to the PoGa Icon indicating success 5 3 Adding Folders You can make folders in the PoGa formatted Disk Right click on the PoGa Disk extension and click New PoGa category Write the folder name and press OK 2011 4D Systems www 4dsystems com au Page 42 of 87 ...

Page 43: ...opying programs to the DISK Browse for the 4XE files Drag it from the bottom right window and drop it in to the top right space 5 5 Deleting programs from the DISK Right click on the file and click Delete 2011 4D Systems www 4dsystems com au Page 43 of 87 ...

Page 44: ...ile format when completed the drive icon will change to the PoGa Icon indicating success Note PoGa Disk structure details are in Appendix A Now right click on the PoGa drive to activate the file menu then right or left click on New Poga Entry to create a PoGa folder Now enter the Category name for the folder as Demo s 2011 4D Systems www 4dsystems com au Page 44 of 87 ...

Page 45: ...vigate to the 4D Labs project folder using the directory tree in the left pane Open the GCI_Demo1 folder by double clicking on it then click and hold down the left mouse button over the GCI_Demo1 4XE file and drag it to the top pane finally releasing the mouse button 2011 4D Systems www 4dsystems com au Page 45 of 87 ...

Page 46: ...o1 4XE file so double click on the Images folder to open it and drag the GCI_Demo1 GCI file the same way as you dragged the GCI_Demo1 4XE file and drop it on top of the GCI_Demo1 4XE file A progress bar will be shown while the graphics data is loading to the card 2011 4D Systems www 4dsystems com au Page 46 of 87 ...

Page 47: ...Right click on the GCI_Demo1 project and select Properties Notice that our executable program and the graphics data is visible in the properties window they are now together in the PoGa file entry Don t worry about the other blank fields at the moment they will be explained later 2011 4D Systems www 4dsystems com au Page 47 of 87 ...

Page 48: ...pane should look like this Now just to check right click on GFXTiler PoGaSlot and Target Vid and check the properties to make sure that the associated GCI files are indeed present So that s it the PoGa uSD card is now loaded It contains 1 folder named Demo s which contains 11 demo programs Before we exit we will now make a backup of the PoGa drive In the bottom left hand pane navigate back up to t...

Page 49: ...lder When the mouse button is released you will be asked for a filename name the backup then click the Save button 2011 4D Systems www 4dsystems com au Page 49 of 87 Click and hold while dragging Drag down to here below the other folders then release mouse button ...

Page 50: ...e future if you wish to restore a drive or email it to a friend etc simply format another card and drag the backup from wherever it is stored onto the drive letter in the top left pane its that easy We have now finished with the PoGa Explorer so close it 2011 4D Systems www 4dsystems com au Page 50 of 87 ...

Page 51: ...d to Ensure that a connection has been established the traffic light should be BLUE Then click on the Comp n Download button The menu program should now be running Now navigate with the PoGa up and down buttons to select the GCI_Tiler demo And press the fire button You should see the program running Press FIRE again to exit the program and return to the main menu Now you can go through and check t...

Page 52: ...th and txt_Height shared functions may be used to magnify the sprite Although sprite bitmaps can be generated by manually entering data into the program a tool is provided PoGa Sprite Editor that allows you to easily draw sprites and create the required data statements in a file that may be included in your main program file as a resource This file can then be loaded up into the Sprite Editor at a...

Page 53: ...awn so only the red green and white pixels will be written to the screen allowing it to overlay other images Another thing to note the cherry is centred allowing rotation or mirroring without the image shifting from its central position We will now jump right in the deep end and create the cherry sprite using the Sprite Editor and write a simple program in 4DGL to display it The explanation of how...

Page 54: ...name the palette entry and select the required colours Note that the default colours are already almost what we need we only have to change BLUE to WHITE for this entry 2011 4D Systems www 4dsystems com au Page 54 of 87 Click Insert to create a new palette entry New palette entry now in list 2 select the last entry we need to change its colour 1 change the palette entry name 3 select WHITE for the...

Page 55: ...tate fast drawing with both mouse buttons Start drawing the image note that RED is selected for the left button and GREEN is selected for the right button to make it easier to draw If yo make a mistake and put a pixel in the wrong place just select BLACK for the left button colour click on it to make it BLACK then switch back to the required colour Note also that our GREEN is not all that bright w...

Page 56: ...bit dull so we will change it to LIME Click in the GREEN radio button scroll down in the Standard colors list and select LIME That looks a lot better Now name the sprite entry call it Cherry same as the palette name which is quite ok 2011 4D Systems www 4dsystems com au Page 56 of 87 Type the new name here for the sprite Cherry ...

Page 57: ...rite text editor Note that the PoGa Sprite Editor has created all the components we need and formatted them into data statements It has also created some handy constants that we can use to refer to the various parts by name Note that the 3 parts of the sprite set have been automatically pre pended with the name of the file demo inc demo_sprites the bitmap pixel pairs for the sprites demo_colours t...

Page 58: ...12111 0x4750 0x0155 line 11 1131 111111 0x4540 0x0157 line 12 111 131111 0x4000 0x015D line 13 113111 0x0000 0x0055 line 14 1111 0x0000 0x0000 line 15 0x0000 0x0000 line 16 END CONST S_Cherry END DATA word demo_colors BLACK RED LIME WHITE END DATA byte demo_palette 0 1 2 3 BLACK RED LIME WHITE Cherry END CONST P_Cherry END 32 words defining the sprite image pixel pairs for the Cherry image A const...

Page 59: ...wing code into the editor inherit 4DGL_16bitColours fnc we need the colour list for the sprites CLUT inherit Demo inc inherit the demo sprite bitmaps func main first set the pointers for the sprite generator gfx_SpriteSet demo_sprites demo_colors demo_palette display the cherry sprite at 50 50 gfx_BlitSprite S_Cherry P_Cherry 56 10 NORTH repeat forever stop endfunc 2011 4D Systems www 4dsystems co...

Page 60: ...rence Manual Now navigate to the folder where we put the sprite file and save it as Sprite_Demo0 4dg Connect the PoGa to the PC and establish a connection with the com port selection box 2011 4D Systems www 4dsystems com au Page 60 of 87 ...

Page 61: ...n 2011 4D Systems www 4dsystems com au Page 61 of 87 platform PoGa GOLDELOX inherit 4DGL_16bitColours fnc we need to colour list for the sprites CLUT inherit Demo inc inherit the demo sprite bitmaps func main gfx_RectangleFilled 0 0 127 40 DARKGRAY set a background colour gfx_SpriteSet demo_sprites demo_colors demo_palette pointers for the sprite generator gfx_BlitSprite S_Cherry P_Cherry 56 10 NO...

Page 62: ...t the demo sprite bitmaps func main gfx_RectangleFilled 0 0 127 40 DARKGRAY set a background colour gfx_SpriteSet demo_sprites demo_colors demo_palette pointers for the sprite generator gfx_BlitSprite S_Cherry P_Cherry 56 10 NORTH display the cherry sprite at 56 50 gfx_TransparentColour BLACK gfx_Transparency ON gfx_BlitSprite S_Cherry P_Cherry 86 10 NORTH display at 86 50 transparently var n x y ...

Page 63: ...and show how to animate them First we will make a copy of the work we last did The easiest way to do this is to open the Sprite Editor open the last file we made demo inc then save a copy with a different name then close it First from the Workshop tool bar open the Sprite Editor Load up the last demo we did demo inc Now save the first demo with a different name Name it AnimationDemo 2011 4D System...

Page 64: ...ect into the AnimationDemo inc file Open the Workshop open the file 4DLabs PoGa Intro Sprite_Demo0 demoAnimation inc the file we just saved We are going to cheat a little here and copy and paste a few sprite entries from another file into our new demoAnimation inc then feed it back to the Sprite Editor so we don t have to bother entering all the pixel information manually 2011 4D Systems www 4dsys...

Page 65: ...Intro Sprite_Demo2 Demo2 inc Now from the Demo2 inc file copy lines 190 to 223 to the clipboard Drag mouse with left button down over the area we wish to copy releasing left button at end of copy region then right click and select copy 2011 4D Systems www 4dsystems com au Page 65 of 87 ...

Page 66: ...emoAnimation inc file by clicking its tab Here is our current file showing the position we are going to paste to Left click at this point Now right click and select Paste to paste the code 2011 4D Systems www 4dsystems com au Page 66 of 87 We are going to paste HERE ...

Page 67: ...ce Manual Make sure that the END statement ended up on a line by itself should be on line 54 Now save the file Now its time to open the Sprite Editor again and make some final modifications 2011 4D Systems www 4dsystems com au Page 67 of 87 ...

Page 68: ...file 4DLabs PoGa Intro Sprite_Demo2 Demo2 inc again Now we have the extra 2 sprites that we copied Note that we only have the single palette which was intended for the cherry Let s make the ghost look a bit different then we will make some code to animate him 2011 4D Systems www 4dsystems com au Page 68 of 87 ...

Page 69: ...ck up or the Ghost palette down so things are in a logical order Also change the palette colours you can have any colours you want but keep the background BLACK The window should now be looking a bit like this 2011 4D Systems www 4dsystems com au Page 69 of 87 Click insert to create a new palette Name the palette Ghost1 Move new palette down Change the colours ...

Page 70: ... and open the old example Sprite_Demo0 4dg We are going to use this as a bit of a template as its easier than starting from scratch so save it as Sprite_Ghost The Workshop should now look a bit like this Change the prefix names for the gfx_SpriteSet arguments from demo_xxx to demoanimation_xxx Its a good time to mention that the sprite bitmap file is best having a short descriptive name demoanimat...

Page 71: ...nal touch we will make a ghost walk Add the following code then download it The method used for the demo is not a particularly efficient way of doing this but its done this way so it s easy to understand what s going on Note Please refer to the other Sprite demo s and games for further ideas on sprite manipulation Note The code for this demo is also saved as SpriteGhostDemo 4DG 2011 4D Systems www...

Page 72: ...ng right gfx_BlitSprite S_12_ghost_rightleft_2 P_Ghost1 30 100 NORTH display the ghost looking right gfx_BlitSprite S_11_ghost_rightleft_1 P_Ghost1 50 100 NORTH_MIRRORED display the ghost looking left gfx_BlitSprite S_12_ghost_rightleft_2 P_Ghost1 70 100 NORTH_MIRRORED display the ghost looking left var x y gfx_Transparency OFF transparency off so the black surround of the spright blanks its trail...

Page 73: ... data only 2 entry shown for clarity 128 max available Each sprite is 32 words long The first word and subsequend even words are pixel 1 8 of the line The second word and subsequent odd words are pixels 9 16 of the line The most significant pixel pair is the leftmost pixel The least significant pixel pair is the rightmost pixel Each pixel pair selects 1 of 4 colours from the selected pallette Each...

Page 74: ...itmaps can follow END part 2 the colour lookup table CLUT with 13 example colour entries 128 max available DATA word mycolours BLACK 0 RED 1 BROWN 2 PINK 3 CYAN 4 CYAN 5 BLUE 6 LIGHTSLATEGRAY 7 ORANGE 8 YELLOW 9 LIME 10 RED 11 WHITE 12 END part 3 the palettes each entry may have 4 colours The colours are selected from the CLUT DATA byte mypalette 0 1 0 9 black red black yellow box 0 9 0 1 black ye...

Page 75: ...litSprite 1 2 xoffs yoffs n display the cherry sprite in all 8 orientations using pallete 2 xoffs 20 if n 3 xoffs 20 yoffs 20 endif next xoffs 20 yoffs 80 for n 0 n 8 n gfx_BlitSprite 2 3 xoffs yoffs n display the ghost sprite in all 8 orientations using pallete 3 xoffs 20 if n 3 xoffs 20 yoffs 20 endif next repeat forever endfunc 2011 4D Systems www 4dsystems com au Page 75 of 87 ...

Page 76: ... of storage therefore the minimum media storage capacity is 2gb The remainder of the disk above the PoGa files is classed as a Common Storage Area CSA and is available for general purpose usage PoGa Disk Architecture Sector offset sectors bytes Usage Notes F 4096 0 1 512 FCB File Control Block F 4096 1 55 28160 PSA Program storage area compiled 4DG program becomes 4XE F 4096 56 16 8192 GCIMAP GCI ...

Page 77: ...GCI_TIME 53 10 GCI file time Padded with Blanks Null terminated STRING FCB_PROG_SIZE 58 2 4DGL Program Size WORD FCB_PROG_CSUM 59 2 4DGL Program Checksum WORD FCB_DESC1 60 32 Reserved padded with Blanks Null terminated STRING FCB_DESC2 76 32 Reserved padded with Blanks Null terminated STRING FCB_DESC3 92 32 Reserved padded with Blanks Null terminated STRING FCB_DESC4 108 32 Reserved padded with Bl...

Page 78: ...size Usage IMAGE_NAME 0 20 Image name Padded with Blanks Null terminated STRING IMAGE_OFFSET_HI 10 2 Relative offset to GCI image HI WORD IMAGE_OFFSET_LO 11 2 Relative offset to GCI image LO WORD IMAGE_XPOS 12 2 Image display position X co ordinate IMAGE_YPOS 13 2 Image display position Y co ordinate RESERVED 14 4 reserved Total 32 32 bytes per entry 2011 4D Systems www 4dsystems com au Page 78 of...

Page 79: ...RDS Image size 6 IMG_WIDTH IMG_HEIGHT Next image Multiple Frame movie Image Format GCI nomenclature Byte offset Usage IMG_WIDTH_HI 0 HI byte of image width IMG_WIDTH_LO 1 LO byte of image width IMG_HEIGHT_HI 2 HI byte of image height IMG_HEIGHT_LO 3 LO byte of image height IMG_MODE 4 Mode set to 16 fixed 16bit colour IMG_DELAY 5 Inter frame delay 1 255 msec FRAMECOUNT_HI 6 HI byte of image frame c...

Page 80: ...Portable Game Console PoGa 4DGL Reference Manual Appendix B PoGa Schematic 2011 4D Systems www 4dsystems com au Page 80 of 87 ...

Page 81: ...complete and free development platform that include Aid tools like Graphics Composer Sprite Editor and PmmC Loader Double click Workshop3 installer exe file to begin installation If you already have an older version installed you will be asked to uninstall the existing version Clicl Next Follow the instruction to complete installation 2011 4D Systems www 4dsystems com au Page 81 of 87 ...

Page 82: ...s folder XP or Users Public Documents 4D Labs folder Vista and Windows 7 PoGa and PoGa Intro folders contain all the PoGa relevant sample source codes uUSB MB5 Driver Visit www 4dsystems com au to download uUSB MB5 driver Double click the installation file and wait for installation to finish Now plug in the uUSB MB5 it should be detected by your system Open 4D Workshop and open any 4DGL program No...

Page 83: ...ectures provides a single unified platform The same application code developed under 4DGL for the GOLDELOX can run on any other 4D custom processor such as the PICASO The combined blocks of EVE the built in graphics and system functions and the low level drivers make up and define the personality of the GOLDELOX PICASO DIABLO analogy to that of a soft silicon This is referred to as the Personality...

Page 84: ...and wait for it to complete On the Load Status you will get a Programming Successful notice as soon as PmmC programming is finished Now close the PmmC Loader You are ready once again to develop and download your 4DGL code on the PoGa 2011 4D Systems www 4dsystems com au Page 84 of 87 Browse and locate the downloaded PmmC file Click Load Choose the com Port ...

Page 85: ... use direct disk access to manipulate the uSD card destined for PoGa If you have UAC turned on the default you will always be prompted to Allow Graphics Composer and PoGa Explorer to run The only way you can prevent this message is to turn UAC off To turn off UAC in Vista go to control panel User Accounts Turn User Account Control On or Off and uncheck the Use User Account Control UAC to help prot...

Page 86: ...ndows 7 go to Control Panel User Accounts System and Security Action Center Change User Account Settings and set the level to Never Notify and click OK In both cases you will need to reboot for the changes to take effect 2011 4D Systems www 4dsystems com au Page 86 of 87 ...

Page 87: ...tness for any particular purpose Information contained in this publication regarding device applications and the like is provided only for your convenience and may be superseded by updates It is your responsibility to ensure that your application meets with your specifications In no event shall 4D Systems be liable to the buyer or to any third party for any indirect incidental special consequentia...

Reviews: