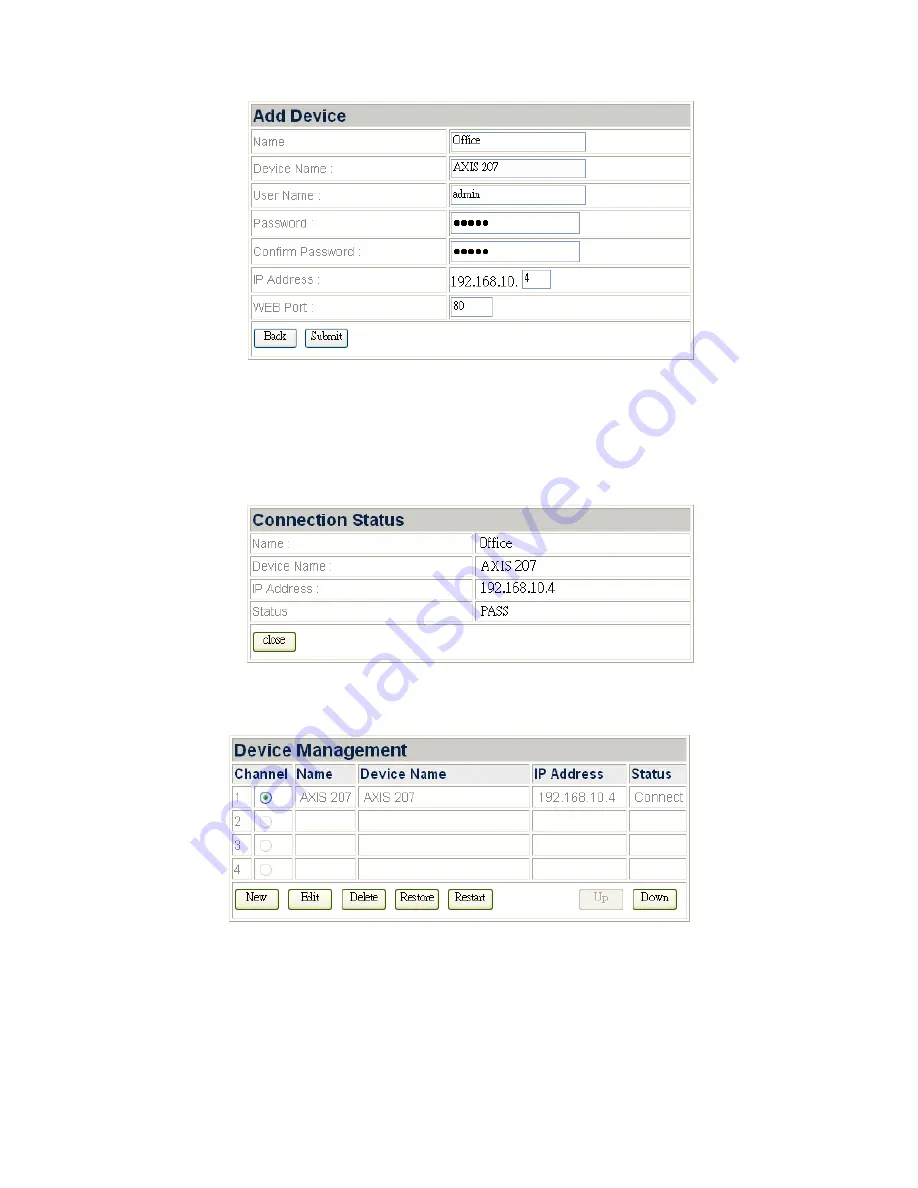
7. Enter the “Name” for the device and the name will show at the live view
screen banner on “Live View” page; enter the “Device Name”, “IP Address”
and “WEB Port” of the IP Camera you’ve seen on the “Device Information”
page; enter the User Name and Password of the IP Camera.
8. Click “Submit” to add the IP Camera information, and the “Connection Status”
window will show the status of the IP Camera you just added.
To change the IP Camera information
1. In the Device Management window, you may select the IP Camera by clicking
the radio button before its name.
2. You may click “Edit” button to edit the Name of the IP Camera.
3. You may click “Delete” button to delete the IP Camera.
4. You may click “Restore” button to restore the IP Camera.
5. You may click “Restart” button to restart the IP Camera.
6. You may click “Up” or “Down” button to move the position of the IP Camera in
this list and the display position of the IP Camera in the “Live View” Page.
19


