E-14
Setting the Time
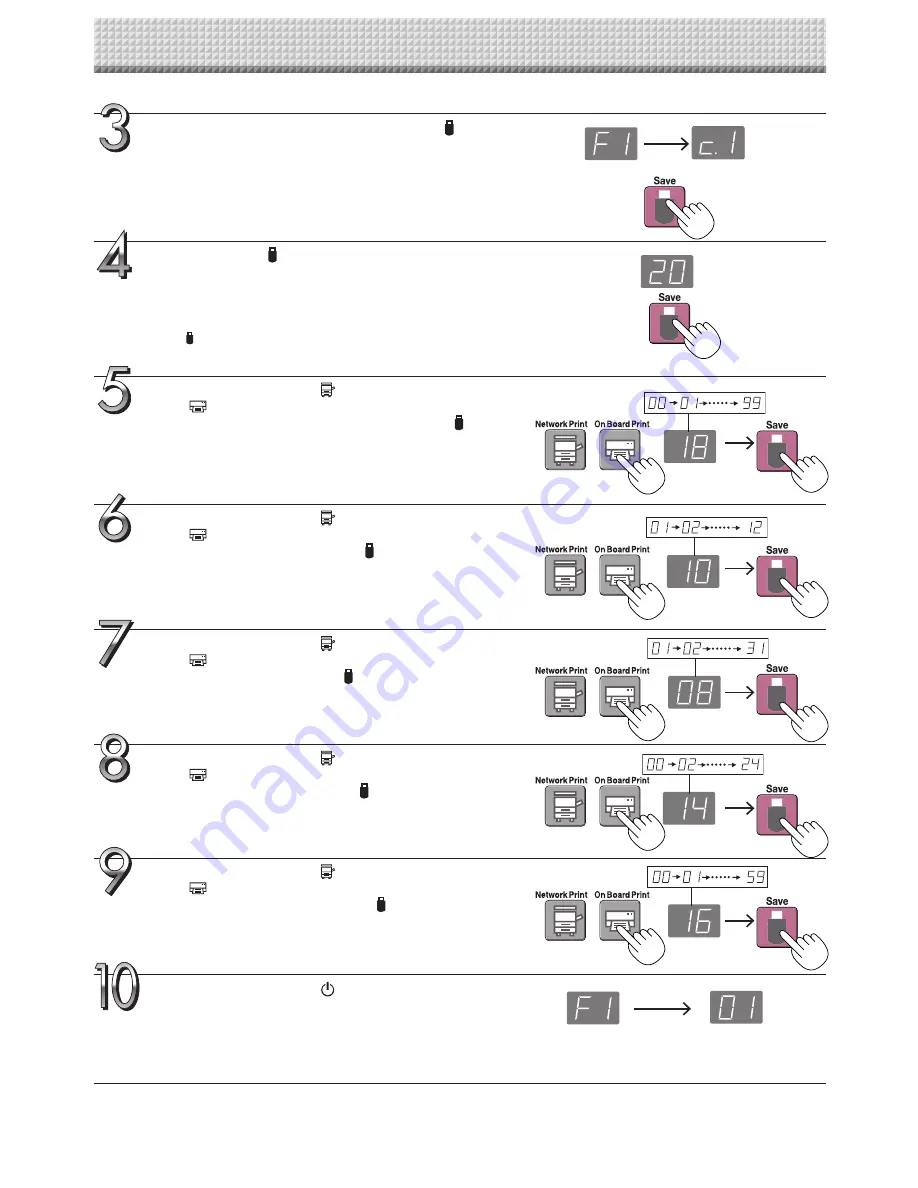
Use the Network Print (Increase) and On Board
Print (Decrease) buttons to select “14” (the
hours), then press the Save button to enter.
The display switches to “c6” (setting of minutes).
Use the Network Print (Increase) and On Board
Print (Decrease) buttons to select “08” (the
day), then press the Save button to enter.
The display switches to “c5” (setting of hours).
Use the Network Print (Increase) and On Board
Print (Decrease) buttons to select “16” (the
minutes), then press the Save button to enter.
The display switches to “F1” (function setting).
Press the ON/Standby
button to return to the
normal mode.
• The network board also returns to the normal mode if you just
wait 10 seconds.
This completes the time setting.
Use the Network Print (Increase) and On Board
Print (Decrease) buttons to select “10” (the
month), then press the Save button to enter.
The display switches to “c4” (setting of day).
Use the Network Print (Increase) and On Board
Print (Decrease) buttons to select “18” (the last
2 digits of the year), then press the Save but-
ton to enter.
The display switches to “c3” (setting of month).
Press the Save button to move to the last dig-
its of the year
The display switches to “c2” (last 2 digits of year).
Notice:
The first two digits of the year (“20”) are fixed. Simply press the
Save
button to switch to the last 2 digits of the year setting
position.
While “F1” is displayed, press the Save button
to enter.
The display switches to “c1” (first 2 digits of year).
If no buttons are operated for 10 seconds while in the time setting
mode, the mode returns to the “CB Setup” mode.
“CB Setup” mode
Normal mode
Summary of Contents for N-324
Page 34: ...26 4721 18A...


