background image


PX-712 Installation and Users Manual  

113


Appendix C: Warranty 

PLEXTOR CORP. (“Plextor”) warrants your PX-712 drive against any 
defect in material and workmanship, under normal use, for a period of 
one year following its date of purchase. In the event this product is 
found to be defective within the warranty period, PLEXTOR will, at its 
option, repair or replace the defective unit. 
 
This warranty is void: a) if the unit is operated or stored under abnormal 
use and/or conditions; b) if the unit is repaired, modified or altered, 
unless such repair, modification or alteration is expressly authorized in 
writing by PLEXTOR;  
c) if the unit is subjected to abuse, neglect, lightning strike, electrical 
fault, improper packaging, or accident; d) if the unit is installed 
improperly; or e) if the serial number of the unit is defaced or missing. 
 
PLEXTOR will not, under any circumstances, be liable for direct, 
special, or consequential damages such as, but not limited to, damage or 
loss of property or equipment, loss of profits or revenues, cost of 
replacement goods, or expense or inconvenience caused by service 
interruptions. Under no circumstances will any person be entitled to any 
sum greater than the purchase price paid for the unit. 
 
To obtain warranty service, you must contact PLEXTOR’s Technical 
Support Department by e-mail ([email protected]) or by calling 
800-886-3935. The Technical Support Department will attempt to 
diagnose and correct your problem. If the unit does not function 
properly, they will give you instructions on obtaining a Return Material 
Authorization (RMA) number. You may be asked to furnish proof of 
purchase to confirm that the unit is still under warranty. 
 
All product returns must be authorized in advance by PLEXTOR. 
Authorization is confirmed by issuance of the RMA number, which 
must be written prominently on the outside of the box in which the 
defective unit is returned to PLEXTOR. 
 

Summary of Contents for PX-712

Page 1: ...DVD R RW CD R RW DRIVE INSTALLATION AND USERS MANUAL APRIL 2004 Model PX 712A Internal ATAPI Drive Model PX 712SA Internal SATA Drive...

Page 2: ...person or organization of such revision or change This manual is copyrighted all rights reserved It may not be copied photocopied translated or reduced to any electronic medium or machine readable fo...

Page 3: ...of the Canadian Department of Communications This class B digital apparatus complies with Canadian ICES 003 Cet appareil num rique de la classe B est conforme a la norme NMB 003 du Canada LASER INFOR...

Page 4: ...Top View of Internal Drive Showing Caution Label Location Detail of PX 712A Laser Caution Labels...

Page 5: ...Detail of PX 712SA Laser Caution Labels...

Page 6: ...This page intentionally left blank...

Page 7: ...the PX 712A Drive 12 PX 712A QuickStart Installation 13 Open the Computer and Prepare for Installation 13 Determine Your Existing IDE Configuration 14 Set the Drive s Mode Jumper 15 Changing the Mode...

Page 8: ...7 Using the LED Indicator 48 Switching to SpeedRead for Video Playback 49 5 Advanced Features and PlexTools Professional 51 Loading PlexTools Professional Software 51 Using Silent Mode 52 Turning On S...

Page 9: ...87 Make Sure the Drive Is Recognized 87 Using the PX 712A Self Test Diagnostics 89 7 Frequently Asked Questions 93 Appendix A PX 712 Specifications 95 Specifications for All PX 712 Drives 95 Specific...

Page 10: ...Table of Contents x PX 712 Installation and Users Manual This page intentionally left blank...

Page 11: ...or installation operation and troubleshooting If your drive needs service see your dealer or call Plextor s Technical Support Department In this manual you should find all the information you need to...

Page 12: ...d Writes DVD RW re writable DVD plus format media at up to 4X speed Writes DVD RW re writable DVD dash format media at up to 4X speed Supports DVD VR and DVD VR real time editing Reads DVD discs at up...

Page 13: ...possible and sets the optimum write speed You can enable and disable PoweRec VariRec Lets you change the write strategy to record at highest quality on different types of discs Also provides user adju...

Page 14: ...all players This allows DVD RW discs to be edited and still play on DVD ROM players Wide DVD R RW and DVD R RW media compatibility Compatible with a wide range of DVD R and DVD RW media Multiple DVD t...

Page 15: ...th Orange Book Parts II and III OPC and ROPC Optimum Power Control and Running Optimum Power Control which adjust the laser power for the optimum write strategy CD TEXT CD G Supports CD TEXT and CD G...

Page 16: ...odel PX 712A requires Windows XP 2000 Me or 98SE Model PX 712SA requires Windows XP or Windows 2000 NOTE You cannot use the PX 712A with early versions of Windows 98 if you are using Windows 98 it mus...

Page 17: ...to burn DVDs and CDs The software lets you burn and share anything on CD or DVD including music photos and videos You can also back up your critical data to a CD or DVD One component of Easy CD Creato...

Page 18: ...free of dirt or other contaminants by storing them in jewel cases Use only industry standard discs Do not insert dirty warped poorly balanced or cracked discs into the drive Do not clean discs using...

Page 19: ...controls and features of your Plextor drive Match the parts of your drive to the illustrations below Front Panel PX 712A Internal Drive Figure 1 Front panel of the PX 712A internal ATAPI drive LED ind...

Page 20: ...e drive always use the eject button to insert the tray This button also enables SpeedRead for DVD Video discs with CSS protection To enable SpeedRead with the disc tray empty press and hold the eject...

Page 21: ...is jumper at its factory setting which is Ultra DMA that is no jumper installed IDE cable connector Connects to your computer s IDE ATAPI interface using 40 pin IDE flat ribbon cable Power connector C...

Page 22: ...thing is missing contact the party from whom you purchased the box for an explanation NOTE This applies to the Plextor retail box Your drive may have been shipped in a different box with other content...

Page 23: ...have Windows 98SE Me 2000 or XP the primary IDE port already has two devices connected and you have a CD ROM installed on the secondary IDE port What to do Change the CD ROM to Slave leave the PX 712...

Page 24: ...uration You can do this by looking at the 40 pin IDE ribbon cable or cables there may be two and seeing what is connected to them One end of the IDE cable is connected to a port on the computer s moth...

Page 25: ...onnected as Master device on primary IDE port nothing connected to secondary IDE port Configuration D System uses special Cable Select cables all devices are jumpered for Cable Select Set the Drive s...

Page 26: ...sers Manual Changing the Mode Jumper on Your PX 712A Drive The drive arrives from the factory with its mode jumper set to Master A function is ON if the jumper is installed and OFF if the jumper is re...

Page 27: ...e jumper to the left set of mode pins Note that if any device is jumpered as Cable Select then both devices connected to that cable must be jumpered as Cable Select In addition the cable you use must...

Page 28: ...most cases this will be the secondary IDE port NOTE For best results set the PX 712A to be the Master if possible Before PX 712A Installation How to Install the PX 712A A Hard disks connected as Maste...

Page 29: ...In this case the buffer may become empty and a buffer underrun error may occur However because it is equipped with Buffer Underrun Proof Technology your PX 712A can still make successful copies if yo...

Page 30: ...e PX 712A B Hard disk connected as Master device and CD ROM or DVD ROM drive connected as Slave on the primary IDE port nothing connected to secondary IDE port Set the mode jumper to Master and connec...

Page 31: ...allation How to Install the PX 712A C Hard disk connected as Master device on primary IDE port nothing connected to secondary IDE port Set the mode jumper to Master and connect the PX 712A as Master t...

Page 32: ...o Install the PX 712A D System uses special Cable Select cables all devices are jumpered for Cable Select Set the PX 712A s mode jumper to CSEL and connect the drive to the end of the cable from the c...

Page 33: ...rposes This signal automatically selects the correct Master Slave setting for the drive Figure 10 Configuring the PX 712A drive for Cable Select To use CSEL you must have A computer that supports CSEL...

Page 34: ...Master and Slave are determined not by jumpers but by the connectors on the Cable Select cable The connectors are identified as Master or Slave Set the DMA Jumper Your PX 712A ships from the factory w...

Page 35: ...Section 2 Installing the PX 712A Internal ATAPI Drive PX 712 Installation and Users Manual 25 Figure 11 Add the DMA jumper if you need to change to Multiword DMA...

Page 36: ...ve and install the PX 712A You must make a minimum of two cable connections to your PX 712A The two cable connections that you must make are IDE cable Power cable There are also two optional cable con...

Page 37: ...not supplied by Plextor CAUTION The length of any IDE cable cannot exceed 18 inches Do You Need a Power Cable In most computers you will find extra power connectors in the computer ready for your use...

Page 38: ...om your computer remove it now following the directions provided by your computer s manufacturer Typically this involves loosening or removing several screws on the back panel of your computer and sli...

Page 39: ...ed directly into your computer Go to step 6 NOTE Plextor does not provide rails If you need rails you can obtain them from the computer manufacturer or from a computer supply retail or mail order stor...

Page 40: ...g your IDE cable upside down into both your drive and the motherboard Be sure you match the red stripe along one side of the IDE cable to Pin 1 on the motherboard and Pin 1 on the drive Pin 1 on the d...

Page 41: ...e receptacle on the drive are keyed Do not force the power connector into the drive or the drive and or the computer may be damaged Figure 17 Cable connections for an internal IDE drive 10 Connect the...

Page 42: ...hese screws CAUTION Do not mount your drive in your computer using screws other than those supplied by Plextor You may damage the drive if you insert screws that are too long or the wrong thread type...

Page 43: ...ar of the Plextor drive Sound Blaster or compatible sound board Sound Blaster compatible analog audio cable Connect to Sound Blaster compatible audio board and to analog audio output connector at the...

Page 44: ...Section 2 Installing the PX 712A Internal ATAPI Drive 34 PX 712 Installation and Users Manual This page intentionally left blank...

Page 45: ...available drive bay inside the computer system 3 Make the cabling connections Serial ATA cable and power cable 4 Turn your computer system ON The following pages give more details for this procedure P...

Page 46: ...re Eject button Push once to eject tray Push again to insert the tray back into the PX 712SA To prevent wear on the drive always use the eject button to insert the tray This button also enables SpeedR...

Page 47: ...tested to ensure your drive can endure rough treatment and still arrive in working order If you have to ship your drive back to Plextor you ll want to send it in the original box For more details abou...

Page 48: ...want to use NOTE The drive can be mounted horizontally or vertically If you don t have an empty bay remove the existing DVD ROM or CD ROM drive and install the PX 712SA You must make two cable connec...

Page 49: ...re 20 Removing a typical computer s cover 3 Remove the cover panel from the bay that will hold the drive To remove the cover panel pop it out by pressing outward lightly In some older computers you ma...

Page 50: ...ctly into your computer Go to step 6 NOTE Plextor does not provide rails If you need rails you can obtain them from the computer manufacturer or from a computer supply retail or mail order store 5 If...

Page 51: ...tach the other end of the SATA ribbon cable to the Serial ATA connector on the computer motherboard or on a PCI board if that is how the Serial ATA interface is provided in your computer When connecti...

Page 52: ...internal SATA drive 9 Mount the PX 712A drive in the computer using the four screws that were supplied with your drive Use only these screws CAUTION Do not mount your drive in your computer using scre...

Page 53: ...dia Digital Video Discs You can immediately play pre recorded DVD discs including movies and other DVDs DVD R DVD R Recordable DVD You can record on these discs but only once You can also read them DV...

Page 54: ...iscs HS RW media you can rewrite at 10X Using Ultra Speed CD RW discs US RW media in this drive you can rewrite at up to 24X You can write to Ultra Speed CD RW discs only on drives that support this m...

Page 55: ...using your hand is not recommended and risks damage or premature wearing of the mechanism Handling DVD and CD Media Take care when handling blank CD and DVD media Dust scratches and fingerprints on ei...

Page 56: ...your discs must be clean Trying to record on a dirty disc may result in a failed session and ruin the disc To clean the disc wipe the disc using a clean soft cotton cloth to remove surface dirt such a...

Page 57: ...he change then that DVD will not play If you do accept the change then the region code setting is changed But remember you can change the drive s region code only 5 times After that you can t change i...

Page 58: ...s Operation LED color On Off Blink Blinking interval No disc Off Eject Yellow On Loading Off Initialize Yellow On Standby Green On Read Yellow On DVD write 8X and higher Amber Blink 40ms DVD write 4 7...

Page 59: ...icator blinks green three times to indicate SpeedRead will be active for DVD Video discs with CSS copy protection 3 Release the eject button The disc tray opens 4 Insert a DVD Video disc that is equip...

Page 60: ...Section 4 Using Your PX 712 50 PX 712 Installation and Users Manual This page intentionally left blank...

Page 61: ...the Plextor disc into the Plextor PX 712 drive or another drive that can read the Plextor software disc 2 On the screen choose the PlexTools Professional installation If the installation doesn t start...

Page 62: ...pplications that have been written to make use of this technology One of these applications is the PlexTools Professional software To use PlexTools Professional to control Silent Mode 1 In the PlexToo...

Page 63: ...dium access time 80 milliseconds and Slow for a low access time 120 milliseconds The quietest setting is Slow 7 Use the Tray Speed Loading and Eject sliders to adjust the loading and eject speed Set a...

Page 64: ...f you power down the computer or the drive To clear Silent Mode settings select the Reset Values button If SpeedRead is enabled with Silent Mode on default read speed is 40X speed maximum If you are p...

Page 65: ...software SecuViewer software is easily available to any user simply by downloading it from the Plextor web site at http www plextor com english support downloads reader html Password Protecting a Dis...

Page 66: ...d in the Verify Password field 6 Click the Activate Protection button The Protection Status field shows that protection is Active 7 Use a disc at once DAO recording application such as CD DVD ROM Make...

Page 67: ...he password in the Password field 5 Click the Activate Protection button The Protection Status field shows that protection is Active You can now read the contents of the disc using Windows Explorer Im...

Page 68: ...ecording process VariRec operates both for DVD and CD recording NOTE In order for you to actually perform the adjustment VariRec must be supported by the recording software you re using PlexTools Prof...

Page 69: ...Rec Setting VariRec lets you increase or decrease the laser power setting by up to 4 degrees in either the positive or negative direction You can make these changes for DVD R 4X and 2 4X DVD R 2 4X an...

Page 70: ...example 8X or 4X for a CD R 7 Click the Recording drop down menu to choose the recording strategy for example Default Azo Cyanine Phthalocyanine A B C or D Figure 29 Changing the VariRec parameters 8...

Page 71: ...s advantage of GigaRec is that it extends the capacity of a standard CD R disc For instance a Type 80 CD normally allows 700 megabytes of data and 80 minutes of recording But with GigaRec you can get...

Page 72: ...aRec disc 1 Insert a blank CD R disc in the Plextor PX 712 drive You can t use DVD R RW or CD RW discs with GigaRec 2 In the PlexTools menu bar select Drive Settings You see the tabs for drive setting...

Page 73: ...GigaRec and return to normal writing clear the Enable GigaRec check box How GigaRec Works CD R and CD RW discs are manufactured with special information about manufacturer model name disc features and...

Page 74: ...r PX 712 achieves high quality recording on virtually any media To confirm operation you can use the PlexTools Professional software to measure and display characteristics of the drive and media you r...

Page 75: ...can use a recorded DVD R RW disc DVD R RW disc or CD R RW disc 2 From the PlexTools menu bar select Read Transfer Rate Test You see the Read Transfer Rate Test window with a graph for read speeds Figu...

Page 76: ...the test window click the Start button You see the amount of recorded data represented in minutes the start speed and current speed 7 To end measurement click the Stop button or wait for the measureme...

Page 77: ...fer Rate The Write Transfer Rate selection lets you test the transfer rate of data written to a disc The function reports the writing response of the Plextor PX 712 drive This test is conducted on bla...

Page 78: ...ions Uncheck the Simulate box to write to the recordable CD or DVD disc or leave it checked to simulate writing If you simulate the blank disc is preserved Set the CD or DVD length to the capacity of...

Page 79: ...up to the limit of the disc capacity If the curve is not linear or smooth repeat the test with another piece of media or media from a different vendor Most write transfer failures are caused by poor...

Page 80: ...stallation and Users Manual Figure 34 Q Check C1 C2 Test window 3 Click the Preferences button to view or change the preferences You can change the scale limit and the time length indication and you c...

Page 81: ...surement in the C1 C2 Test window click the Start button You see the error counts representing the result of C1 error measurement BLER and C2 error measurement E22 If the disc is defective you may als...

Page 82: ...ction as part of the data stream This error correction is derived from the actual content of the original computer data and is used to reconstruct the original data if needed when the disc is read Eve...

Page 83: ...h number of C1 C2 errors you should try another brand of media If the graph reports CU errors the disc is defective and should be discarded Because the Plextor PX 712 can report the number of C2 error...

Page 84: ...o measure tracking and focus error 1 Place a blank DVD R RW a DVD R RW or a CD R or CD RW disc in the PX 712 Don t use a pre recorded commercially stamped disc 2 From the PlexTools menu bar select Q C...

Page 85: ...can change the scale the start position and the end position Figure 37 Changing preferences for graphing focus error and tracking error 4 Click OK to exit the Preferences window and return to the Q C...

Page 86: ...ording but the reduction in speed may be perceived as a problem with the drive when compared against a drive without PoweRec The FE TE graphing capability of the Plextor PX 712 drive displays the mech...

Page 87: ...curate only for a blank recordable or rewritable DVD or CD If you attempt to measure a recorded or pre recorded commercially pressed DVD or CD the measurements have no meaning Making Q Check Jitter Be...

Page 88: ...ation and Users Manual Figure 38 Q Check Beta Jitter Test window 3 Click the Preferences button to view or change the preferences You can change the sample length the length of one sample the time len...

Page 89: ...return to the Q Check Beta Jitter Test window 5 To begin measurement in the Beta Jitter Test window click the Start button You see the error counts representing the result of beta error measurement ji...

Page 90: ...alue at no more than 35 nanoseconds Using PlexTools Professional and the Plextor drive you can use the Q Check Beta Jitter Test to determine the quality of writing on a disc The test graph displays an...

Page 91: ...test is for use on a DVD that contains content that is a commercial pressed DVD or a disc recorded on a DVD burner To measure PI PO error 1 Place a pressed DVD disc or a recorded DVD R DVD RW DVD R o...

Page 92: ...the DVD equivalent of C1 C2 error measurement for a CD PI indicates the number of bytes that are corrected during PI stage while POF indicates the number of uncorrectable blocks Each sector on a DVD...

Page 93: ...fer a memory chip that acts as a kind of holding area Typically the buffer size is 2 to 8 megabytes However this buffer can be emptied quickly when you write at high speeds or if you use other applica...

Page 94: ...Section 5 Advanced Features and PlexTools Professional 84 PX 712 Installation and Users Manual This page intentionally left blank...

Page 95: ...In this case If your drive is still in warranty and you are experiencing problems send the drive to Plextor See Returns on page 111 If your drive is out of warranty before returning the drive for repa...

Page 96: ...drive please visit our web site at www plextor com to check if you have the latest firmware To obtain new firmware for your drive 1 Go to the Plextor web site at www plextor com 2 Look for firmware up...

Page 97: ...sc tray open 5 Remove the CD from the disc tray 6 Carefully push the disc tray shut Troubleshooting If you have problems during or right after installation of your drive first make sure the drive is r...

Page 98: ...auto or something similar depending on your setup program 4 Save and exit your CMOS setup to restart your computer with the new settings 5 In Windows 98SE or Me once the system comes up click the Sta...

Page 99: ...l need Tools to remove the computer s cover An extra jumper supplied A blank piece of Plextor recommended DVD R DVD R or CD R media See page 96 or visit our web site The self test will write to this m...

Page 100: ...s test If the jumper is on the SLAVE or CABLE SELECT jumper leave it in place The position of the DMA jumper on or off doesn t matter Don t change it 5 Install an extra jumper so that both the CABLE S...

Page 101: ...tor If the LED indicator blinks amber three times the loaded disc is not a blank DVD R or CD R disc Remove the disc and insert a blank Plextor recommended DVD R or CD R disc 10 The drive begins the di...

Page 102: ...al setting as noted in Step 4 above Also remove the extra jumper you installed 14 Reconnect the IDE cable to the PX 712A drive If you removed the drive to gain access to the cable or jumpers replace t...

Page 103: ...rdable or rewritable CD and DVD media that have been tested by Plextor and found to operate well consistently from one manufacturing lot to another For each drive Plextor engineers test media from man...

Page 104: ...Section 7 Frequently Asked Questions 94 PX 712 Installation and Users Manual This page intentionally left blank...

Page 105: ...Eject Eject button manual emergency eject software eject LED Indicator Yellow when initializing reading or ejecting disc Green during standby and when Buffer Underrun Proof Technology or Lossless Lin...

Page 106: ...12 cm Usable Formats Logical DVD Read Write DVD ROM DVD Video multi border multi session DVD VR DVD VR Logical CD Read Write CD DA CD Extra CD ROM Mode 1 CD ROM Mode 2 CD ROM XA Photo CD Video CD mult...

Page 107: ...RW media are rewritable up to 1 000 times DVD R 8X 6X 4X 2X Mitsubishi Chemical Verbatim Taiyo Yuden Maxell TDK DVD RW 4X Victor Mitsubishi Chemical Verbatim DVD RW 1X 2X Victor Mitsubishi Chemical V...

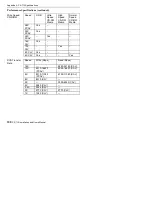
Page 108: ...6 16X CAV Yes Single layer disc 5 12X CAV Yes Single or dual layer disc Yes Yes 3 8X CAV Yes Single or dual layer disc Yes Yes 2 5X CAV Yes Single or dual layer disc Yes Yes 2X CLV Yes Single or dual...

Page 109: ...tamp R RW Stamp R 14 32X CAV Stamp R RW Stamp R RW Stamp R RW 10X 24X CAV Stamp R RW Stamp R RW Stamp R RW 8X CLV Stamp R RW Stamp R RW Stamp R RW 4X CLV Stamp R RW Stamp R RW Stamp R RW NOTE Stamp in...

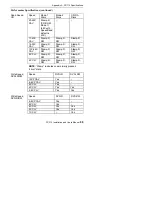
Page 110: ...dia High Speed CD RW Media Normal Speed CD RW Media 48X PCAV Yes 32X PCAV Yes 24X PCAV Yes 16X CLV Yes 10X CLV Yes 8X CLV Yes 4X CLV Yes Yes DVD Transfer Rate Speed Write Kbps Read Kbps 16X 9280 22160...

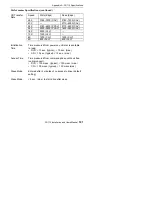
Page 111: ...AV 16X 2400 CLV 10X 1500 CLV 8X 1200 CLV 1200 CLV 4X 600 CLV 600 CLV Initialization Time Time measured from power on until disc is available to read DVD 13 sec typical 15 sec max CD 13 sec typical 15...

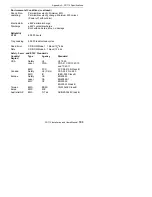
Page 112: ...to 95 non condensing Acoustic Noise Playing balanced disc Maximum 45dB Playing unbalanced disc Maximum 45dB Tray ejecting Maximum 50dB Vibration Operating Sine sweep 5 minutes CD DVD read 0 15G0 Pk 5...

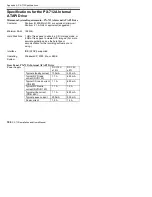
Page 113: ...eliability MTBF 60 000 hours Tray Loading 50 000 load unload cycles Read Error Rate CD ROM Mode 1 1 block 10 12 bits CD ROM Mode 2 1 block 10 9 bits Safety Laser and EMC Standards Country Region Type...

Page 114: ...GB of free space to create DVD images For more accurate guidelines see the help files or documentation for the recording software you re using Interface IDE ATAPI supported Operating System Windows XP...

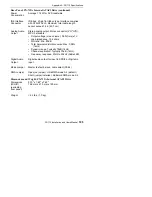
Page 115: ...max volume 0 55V rms 1V Load impedance 10 k ohms S N ratio Min 80dB Total harmonic distortion noise Max 0 08 1kHz Dynamic range Typically 75dB 1kHz Channel separation Typically 70dB 1kHz Frequency re...

Page 116: ...X 712A Internal ATAPI Drive Type ATA ATAPI 5 compliant PIO Transfers Modes 0 4 Multiword DMA Transfers Modes 0 2 Ultra DMA Transfers Modes 0 2 Ultra DMA33 ATAPI Command Set Refer to the Plextor ATAPI...

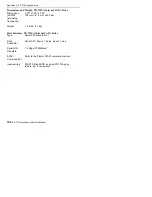
Page 117: ...ate DVD images For more accurate guidelines see the help files or documentation for the recording software you re using Interface Serial ATA supported Operating System Windows XP 2000 only Rear Panel...

Page 118: ...5 x 1 63 x 7 87 146 mm x 41 3 mm x 200 mm Weight 2 4 lbs 1 1 kg Host Interface PX 712SA Internal SATA Drive Type Serial ATA Generation 1 Data Connector Serial ATA Power 15 pins signal 7 pins Serial AT...

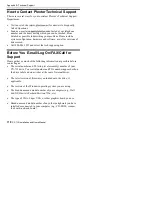
Page 119: ...ur web site to assist you in troubleshooting the problem on your own NOTE We encourage you to go the Plextor web site www plextor com before attempting to contact Technical Support The answers to the...

Page 120: ...ech support option Before You E mail Log On FAX Call for Support Please gather as much of the following information as possible before contacting us The serial number and TLA top level assembly number...

Page 121: ...ish support rma_request_form htm Complete the form providing the Technical Support Ticket number and details of the drive failure After completing the form click the Submit button IMPORTANT NOTE The R...

Page 122: ...led in a computer we recommend you pay a packaging store such as Mail Boxes Etc to ship your drive If you don t have a packaging store in your area ask for packaging pointers when you contact us to ge...

Page 123: ...y circumstances be liable for direct special or consequential damages such as but not limited to damage or loss of property or equipment loss of profits or revenues cost of replacement goods or expens...

Page 124: ...States For a drive originating outside of the United States the customer is responsible for shipping costs in both directions NOTE Warranty validity is limited to that applicable in the location where...

Page 125: ...Under Run Error Proof GigaRec and 63 Buffer Underrun Proof Technology 5 83 LED indicator and 9 36 95 C C1 C2 CU error measurement 64 69 72 cable analog audio 26 audio 32 cable select 23 27 digital au...

Page 126: ...m 107 types of IDE 15 connection digital audio 105 sound board and 32 connector analog audio output 11 31 105 digital audio 10 32 IDE interface 11 30 36 105 power 11 31 36 41 SATA interface 41 connect...

Page 127: ...ground format 2 compatibility 93 editing 4 media 43 97 software 7 writing 47 writing speed 99 DVD VR 2 DVD R 93 drive capabilities 43 media 97 writing speed 2 99 DVD RW 93 drive capabilities 43 DRT DM...

Page 128: ...n 102 storage 102 I IDE configuration determining for PX 712A 14 examples 18 selecting for PX 712A 18 types of 15 IDE interface connector 11 30 36 105 IDE ports 14 IDE ribbon cable 26 cable select 27...

Page 129: ...program 88 Mount Rainier CD 5 96 mounting position 26 38 46 102 mounting PX 712A 26 28 mounting PX 712SA 38 mounting rails 29 40 MPC compliant audio cable 33 MSF 63 MTBF 103 multiword DMA PX 712A set...

Page 130: ...ing 106 installation 9 12 20 21 installation examples 18 installation cable select 22 interface 3 6 104 minimum computer 104 minimum configuration 104 mode jumper 15 mounting 26 operating system 6 opt...

Page 131: ...running optimum power control running optimum power control 5 S safety standards 103 SATA interface connector 41 screws mounting 32 42 secondary IDE port 14 SecuRec 5 55 lost password 58 security stic...

Page 132: ...rage 102 testing laser operation 4 64 73 media 4 64 ticket number tech support 111 TLA code 26 38 tracking error measurement 64 73 76 transfer rate CD 101 DVD 100 tray closing 45 front door 9 36 loadi...

Page 133: ...eed achieving 44 CD R 2 100 CD RW 2 100 DVD R 2 99 DVD RW 99 DVD R 2 99 DVD RW 99 GigaRec and 63 monitoring 48 silent mode and 52 VariRec and 3 61 writing to CD R 47 writing to CD RW 47 writing to DVD...

Page 134: ...Index 124 PX 712 Installation and Users Manual This page intentionally left blank...

Page 135: ...PX 712 Installation and Users Manual 125 Notes...

Page 136: ...Plextor CORP 48383 Fremont Blvd Suite 120 Fremont CA 94538 6509 Phone Fax E mail 510 440 2000 800 886 3935 510 651 9755 info plextor com www plextor com...

Reviews: