Section 6. Maintenance and Troubleshooting
PX-712 Installation and Users Manual
87
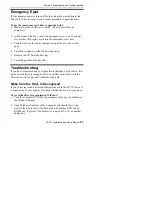
Emergency Eject
If the computer power is turned off or the automatic eject button at the
front of the drive does not work, use this procedure to open the drive.
To use the emergency eject hole to open the drive:
1. Make sure power to the drive is OFF. (That is, turn off your
computer.)
2. At the front of the drive, insert the emergency eject tool, or a paper
clip or other thin, rigid object, into the emergency eject hole.
3. Push the tool or other object straight in, until the disc tray clicks
open.
4. Carefully continue to slide the disc tray open.
5. Remove the CD from the disc tray.
6. Carefully push the disc tray shut.
Troubleshooting
If you have problems during or right after installation of your drive, first
make sure the drive is recognized. If you still have problems, visit the
Plextor web site for tips and troubleshooting help.
Make Sure the Drive Is Recognized
If you’re having trouble after installation, make sure the PX-712 drive is
recognized by your computer. To check whether the drive is recognized:
To see if the drive is recognized in Windows:
1. Turn the computer ON. After the computer boots up, you should see
the Windows display.
2. Open Windows Explorer or My Computer and ensure there is an
icon for the Plextor drive, the hard disk, and another DVD or CD-
ROM drive, if present. The Plextor icon may be D: or E: or another
designator.
Summary of Contents for PX-712
Page 5: ...Detail of PX 712SA Laser Caution Labels...
Page 6: ...This page intentionally left blank...
Page 10: ...Table of Contents x PX 712 Installation and Users Manual This page intentionally left blank...
Page 134: ...Index 124 PX 712 Installation and Users Manual This page intentionally left blank...
Page 135: ...PX 712 Installation and Users Manual 125 Notes...


