15
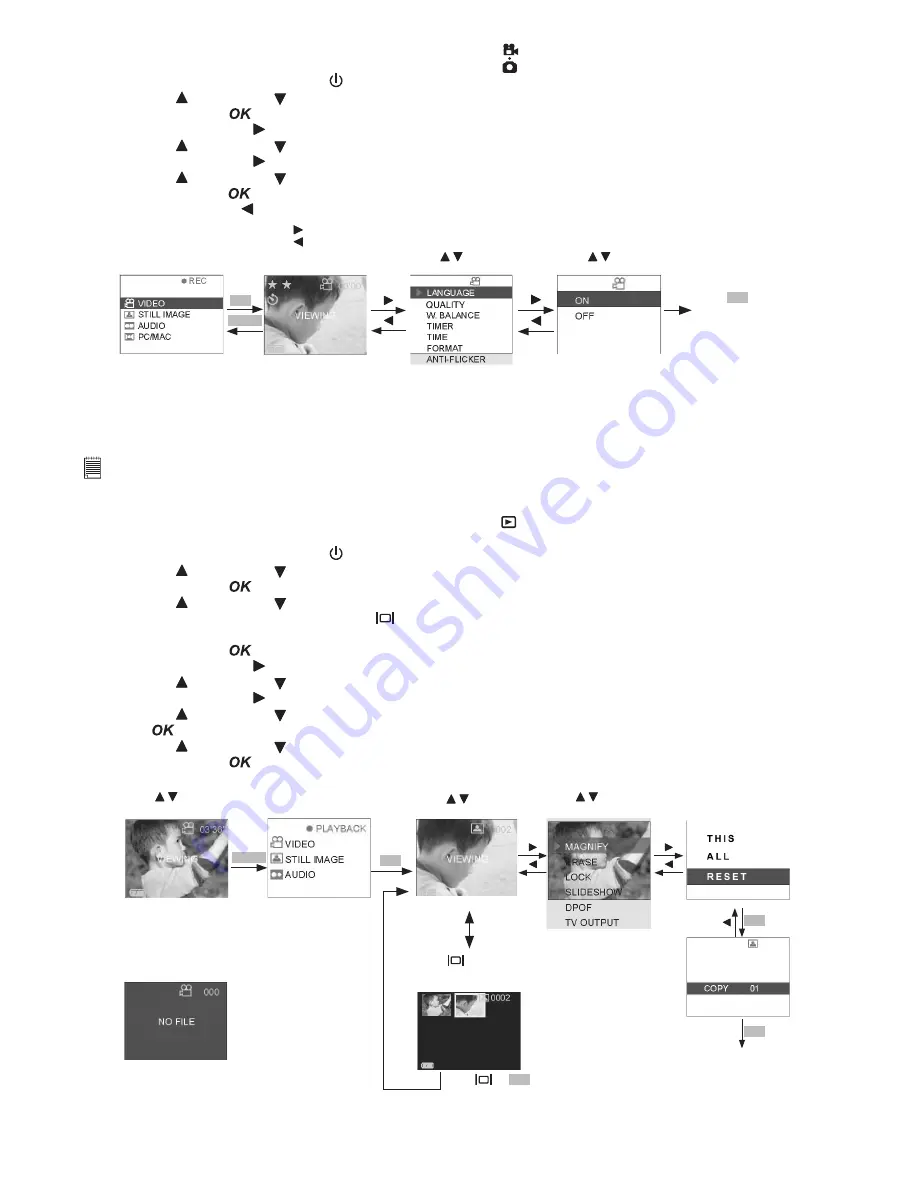
• Set Time Stamp (Still Image only)
1. Select the Capture/playback selector to Capture Mode
2. Pull left to open the LCD panel
3. Press the Power On/Off button until the LCD on
4. Press UP and DOWN button to select “STILL IMAGE” on the LCD Display
5. Press OK Button
to confirm
6. Press RIGHT button
7. Press UP and DOWN button and select “TIME STAMP”
8. Press RIGHT button
9. Press UP and DOWN button and select “ON” to activate Time Stamp
10. Press OK button
to confirm time stamp activated and return to main menu
11. Press LEFT button to resume Capture Mode
Start A
Press Shutter down fully
to record; press shutter
down fully to stop.
Press to pop out the menu.
Press to return to the
previous screen.
Default----video
Press to select
item.
MENU
OK
Main Menu
Press
OK
to select
the item and return
to main menu.
Press to select
item.
• Set DPOF
NOTE:
• DPOF only available when SD Card or MMC Card is inserted.
• All DPOF files are protected. Users cannot delete them using the erase function.
1. Select the Capture/playback selector to playback Mode
2. Pull left to open the LCD panel
3. Press the Power On/Off button until the LCD on
4. Press UP and DOWN button to select “STILL IMAGE” on the LCD Display
5. Press OK Button
to confirm
6. Press UP and DOWN button to select files you want to set DPOF.
OR you can press the DISPLAY button
to show Thumbnails and use the four direction button to select
requested file.
7. Press OK Button
to confirm
8. Press RIGHT button
9. Press UP and DOWN button to select “DPOF”
10. Press RIGHT button
11. Press UP and DOWN button to select “THIS” or “ALL”
12. Press
13. Press UP and DOWN button to select the number of copy you want
14. Press OK Button
to confirm DPOF format and reutn to main menu
Return to view files.
DPOF
OK
MENU
OK
STILL
IMAGE
Start B
ERROR MESSAGE
Start A
Press to view the files.
Default----video
Press to view
the files.
Start C
Press
to show
thumbnail or Full
screen.
Press
or
OK
to
Start C
Press to select
item.
OK


