background image


Viewing JPEG discs

09


53


En


2

Use the cursor buttons (


///


) to 

navigate.


When a file is highlighted, a thumbnail image 
is displayed.

• When a folder is highlighted you can 

press 


ENTER


 to open the Photo Browser 

screen for that folder. See below for more 
on using the Photo Browser.


3

To resume the slideshow from the 

highlighted file, press ENTER.


Using the Photo Browser


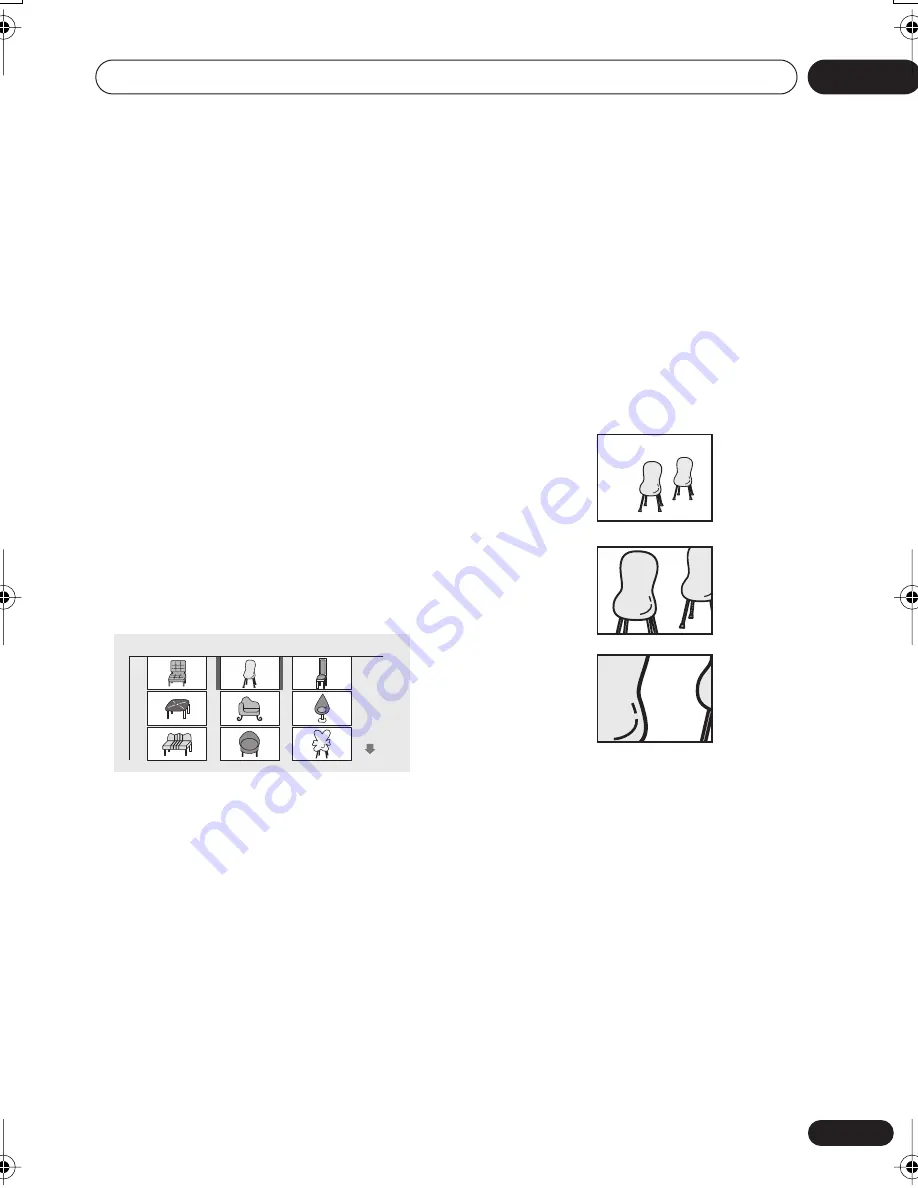
The Photo Browser displays nine thumbnail 
images at a time from the current folder.


1

From the Disc Navigator screen, 

highlight a folder to display then press 
ENTER.


The Photo Browser screen opens with the first 
nine pictures displayed as thumbnails.


2

Use the cursor buttons (


///


) to 

highlight a thumbnail picture.


• Use the track skip buttons (


 and 


to see the previous / next page of 
thumbnails. Keep the button pressed if 
you want to skip several pages; release 
when you reach the page you want.

• To return to the Disc Navigator screen, 

press 


RETURN


.


3

Press ENTER to display the selected 

thumbnail full size on screen.


The slideshow resumes from the selected 
picture.


Zooming the screen


Using the zoom feature you can magnify a 
part of the screen by a factor of 2 or 4, while 
viewing pictures from a JPEG disc.


1

During slideshow playback, use the 

ZOOM button to select the zoom factor.

• Normal

• 2x

• 4x


• The slideshow is paused when the screen 

is zoomed.

• Since JPEG pictures have a fixed 

resolution, picture quality may 
deteriorate, especially at 4x zoom. This is 
not a malfunction.


2

Use the cursor buttons (


///


) to 

change the zoomed area.


You can change the zoom factor and the 
zoomed area freely.


3

To resume the slideshow, press 


(play).

Photo Browser

2 / 40

Live at Soft

Normal

Zoom 2x

Zoom 4x

XV-EV51.book 53 ページ 2003年5月6日 火曜日 午後2時31分

Summary of Contents for S-EV31V

Page 1: ...Stereo DVD Cassette Deck Receiver XV EV61 XV EV31 Speaker System S EV61V S EV31V Operating Instructions ...

Page 2: ...ture accompanying the appliance H002_En CAUTION RISK OF ELECTRIC SHOCK DO NOT OPEN WARNING THE APPARATUS IS NOT WATERPROOFS TO PREVENT FIRE OR SHOCK HAZARD DO NOT EXPOSE THIS APPARUTUS TO RAIN OR MOISTURE AND DO NOT PUT ANY WATER SOURCE NEAR THIS APPARATUS SUCH AS VASE FLOWER POT COSMETICS CONTAINER AND MEDICINE BOTTLE ETC H001A_En WARNING BEFORE PLUGGING IN THE UNIT FOR THE FIRST TIME READ THE FO...

Page 3: ...ere is no guarantee that interference will not occur in a particular installation If this equipment does cause harmful interference to radio or television reception which can be determined by turning the equipment off and on the user is encouraged to try to correct the interference by one or more of the following measures Reorient or relocate the receiving antenna Increase the separation between t...

Page 4: ...s 27 Video CD Super VCD PBC menus 28 Listening to auxiliary components 28 Automatic power on buttons 28 05 Setting up for surround sound EV61DVD model only Choosing your surround sound settings 29 System Setup menu options 29 Subwoofer setting 30 Setting the relative volume level of each channel 31 06 Playing discs Introduction 32 Using the Disc Navigator to browse the contents of a disc 32 Scanni...

Page 5: ...ones 58 Using the Advanced Surround effects 58 Adjusting the Advanced Surround effect level 59 Enhancing dialogue 59 Listening with a virtual surround back speaker 60 Recording mode 60 12 Adjusting the sound Adjusting the bass and treble 61 Boosting the bass level 61 Muting the sound 61 Adjusting the balance 61 Creating wider stereo sound 61 Saving your sound preferences 62 Using the Sound Field C...

Page 6: ...to avoid 81 Using cassette tapes 81 Tapes you should avoid 81 Protecting your recordings 82 Proper installation and maintenance of this unit 82 Hints on installation 82 Cleaning the pickup lens 82 Problems with condensation 82 Moving the unit 83 Power cord caution 83 Troubleshooting 84 General 84 DVD CD Video CD player 85 WMA MP3 JPEG discs 86 Tuner 87 Tape deck 87 Error Messages 88 Screen sizes a...

Page 7: ...use of batteries can result in hazards such as leakage and bursting Please observe the following Don t mix new and old batteries together Don t use different kinds of battery together although they may look similar different batteries may have different voltages Make sure that the plus and minus ends of each battery match the indications in the battery compartment Remove batteries from equipment t...

Page 8: ...CD also supports the widescreen size Other formats including but not limited to the following are not playable in this system DVD Audio SACD DVD RAM DVD ROM CD ROM Except those that contain MP3 WMA or JPEG See also Compressed audio compatibility on page 78 and JPEG file compatibility on page 79 DVD R RW and CD R RW discs Audio CDs and Video CD Super VCDs recorded using a DVD recorder CD recorder o...

Page 9: ...ect the speaker cords attached to each speaker to the correct speaker terminals on the unit The terminals and cords are color coded to help you match them up EV61DVD model only Connect each speaker using the color coded speaker cable Match them to the colored labels above the speaker terminals see illustration below SPEAKERS SURROUND CENTER FRONT SUB WOOFER R L R L Front right Surround right EV61D...

Page 10: ... speaker placement The following guidelines will help you to get the best performance from your speaker system Place the front left and right speakers at equal distances from the TV EV61 DVD model only Place the center speaker above or below the TV so that the sound of the center channel is localized at the TV screen If you choose to install the center speaker on top of the TV be sure to secure it...

Page 11: ...effects on page 58 for more details on this setting Attaching the surround speakers to the speaker stands EV61DVD only If you have set up your system using the basic surround setup see above you can use the supplied speaker stands to stabilize your surround speakers Attach each speaker as shown in the steps below 1 Line up the spurs on the speaker stand with the holes on the back of the surround s...

Page 12: ...cially available S Video cable to connect the S VIDEO OUT jack to an S Video input on your TV 2 Optionally Use a stereo audio cable to connect the audio outs of your TV or VCR to the LINE IN jacks on the rear of this unit This will enable you to hear the TV or VCR sound through this system Connecting the radio antennas Connecting the supplied antennas will allow you to listen to both AM and FM rad...

Page 13: ...ct with metal objects and avoid placing near computers television sets or other electrical appliances 6 Connect the FM wire antenna in the same way as the AM loop antenna For best results extend the FM antenna fully and fix to a wall or door frame Don t drape loosely or leave coiled up The supplied FM antenna is a simple means of receiving FM stations using a dedicated outdoor FM antenna will usua...

Page 14: ...jacks Connecting the optional surround speakers EV31DVD model only You can connect surround speakers to the left and right SURROUND speaker jacks on the rear panel to hear additional surround sound from this unit Use speakers with a nominal impedance of at least 16Ω Make sure you connect both surround speakers or you won t be able to hear anything from the surround jacks Connect the surround speak...

Page 15: ...Control page 62 6 Function select buttons Selects the source you want to listen to 7 KARAOKE Selects audio channels for karaoke page 54 8 DOLBY NR DEMO Switches Dolby Noise Reduction on or off page 47 9 ASES Press for CD to tape synchro recording page 50 10 TIMER CLOCK ADJ Use for setting the clock page 22 as well as for setting and checking the timers page 63 SOUND MODE ADVANCED SURROUND SURROUND...

Page 16: ...e cassette door will open the tape deck 20 MIC VOL Controls the volume of the karaoke mics 21 MIC input jacks 22 PHONES jack Headphone jack Remote control The remote control for the EV61DVD model is shown in the illustration below 1 STANDBY ON Switches the player on or into standby 2 Function select buttons Selects the source you want to listen to 3 DVD control buttons AUDIO Selects the audio chan...

Page 17: ...us system and surround sound settings 8 ENTER TUNE cursor control buttons Navigates on screen displays and menus ENTER selects an option or executes a command 9 SOUND MODE Adjusts the tone Also use to adjust the balance EV31DVD model only and DSP controls EV61DVD model only page 61 10 Playback controls Starts resumes playback and Use for reverse slow motion playback frame reverse and reverse scann...

Page 18: ...ge 43 14 MONO Press to listen to a stereo FM broadcast in mono sound quality is usually improved page 45 15 MUTE Mutes the volume page 61 16 TIMER CLOCK ADJ Use for setting the clock page 22 as well as for setting and checking the timers page 63 17 DVD MENU Displays the DVD menu for CDs Video CD Super VCDs and WMA MP3 discs the Disc Navigator screen appears TOP MENU SHIFT DVD MENU Displays the top...

Page 19: ...ly in the player LFE lights when the disc has an LFE channel 9 MONO Lights when FM mono reception is selected 10 Lights during multi angle scenes on a DVD disc 11 EV31DVD model only Lights when Virtual Surround is switched on 12 96 kHz Lights when a 96kHz source is detected may not light correctly if the source is copy protected 13 TUNED Lights when a broadcast is being received 14 STEREO Lights w...

Page 20: ...er starts recording 28 Lights when either timer is set and flashes when they activate 29 WAKE UP Lights when the wake up timer is set and flashes when the wake up timer activates 30 KARAOKE L R Lights when one of the Karaoke modes is selected KARAOKE Vocal cancel Vocals in the backing track are partially eliminated using EQ L Left channel only Use for tracks that have a vocal recorded in the right...

Page 21: ...en sizes and disc formats on page 89 if you re not sure which one to choose 4 Press ENTER again to finish setting up Use the cursor right button to select BACK then press ENTER if you want to go back and change the setting you just made SYSTEMSETUP HOME MENU TOP MENU DVDMENU SUBTITLE VOLUME ANGLE ZOOM ADVANCED MONO SYSTEMDISP DVD DISP ECHO DSP AUDIO DVD CD TAPE FM AM LINE SURROUND KARAOKE I KEYCON...

Page 22: ...2 24 HR On the front panel use and 4 Press ENTER The current clock format is shown in the display 5 Use the cursor up down buttons to select either 12 or 24 hour clock format On the front panel use and 6 Press ENTER to confirm Setting up the remote to control your TV You can set up the supplied remote to control your TV using the TV CONTROL buttons 1 Switch on your TV 2 Find the name of the manufa...

Page 23: ...onds to switch the demo mode off If the demo mode has previously been switched off you can switch it on by switching the system into standby then following step 2 Using the on screen displays For ease of use this player makes extensive use of graphical on screen displays OSDs You should get used to the way these work as you ll need to use them when setting up the player using some of the playback ...

Page 24: ...ading a double sided DVD disc load it with the side you want to play face down 4 Press play to start playback If you re playing a DVD or Video CD Super VCD a menu may appear See DVD Video disc menus on page 27 and Video CD Super VCD PBC menus on page 28 for how to navigate these If you re playing an WMA MP3 disc it may take a few seconds before playback starts depending on the complexity of the fi...

Page 25: ... 7 8 9 0 CLEAR ENTER 4 1 8 7 3 Button What it does Starts playback DVD and Video CD If the display shows RESUME or LAST MEM playback starts from the resume or last memory point see also Resume and Last Memory below Pauses a disc that s playing or restarts a paused disc Stops playback DVD and Video CD The display shows RESUME Press again if you want to cancel the resume function See also Resume and...

Page 26: ...e playback this works for up to five discs If you want to clear the resume last memory point press stop while RESUME or LAST MEM is displayed When a Video CD is loaded the Resume point is lost if the system is switched off or switched to a function other than DVD CD For the Last Memory function to work you must press stop to stop playback before opening the disc tray The Last Memory function doesn...

Page 27: ... so even if you have 4 3 Pan Scan selected those discs will still be shown in letterbox format This is not a malfunction DVD Video disc menus Many DVD Video discs contain menus from which you can select what you want to watch They may give access to additional features such as subtitle and audio language selection or special features such as slideshows See the disc packaging for details Sometimes ...

Page 28: ...em on DVD CD TAPE FM AM TUNER and LINE switch the unit on directly into that function In the case of DVD CD and TAPE if there is a disc or tape loaded it will start playing The OPEN CLOSE button switches the power on and opens the disc tray and the front panel and remote buttons switch the unit on into the last function selected and start playback Button What it does RETURN Displays the PBC menu N...

Page 29: ...at steps 2 and 3 to make other settings 5 When you re done press ENTER to leave the System Setup menu The setting display is automatically exited after 20 seconds of inactivity System Setup menu options Below are all the available settings in the setup menu The first setting in each section is the default See also the notes in each section for additional information about the settings Front speake...

Page 30: ...his setting to switch the audio channel on DVD RW discs recorded with two separate soundtracks LCH1RCH2 Both channels are played through the front speakers CH1 MONO Only channel 1 is played CH2 MONO Only channel 2 is played On the CH1 MONO and CH2 MONO settings the sound comes only from the center speaker or from the front speakers if listening in STEREO mode This setting works only with dual mono...

Page 31: ...from each speaker when seated in your main listening position The channel level range is 10 dB 5 When you re done press ENTER to turn off the test tone The speaker volume can be adjusted while listening to any sound source you want by pressing CH LEVEL SHIFT 5 and then using the cursor up down buttons to adjust the channel levels After you re finished with one channel use the cursor left right but...

Page 32: ...t to play You can use the Disc Navigator when a disc is playing or stopped You can t use the Disc Navigator with Video CD Super VCDs in PBC mode or unfinalized CD R RW discs 1 Press HOME MENU and select Disc Navigator from the on screen display Alternatively if a VR format DVD RW CD Video CD Super VCD or WMA MP3 JPEG disc is loaded you can press DVD MENU which takes you straight to the Disc Naviga...

Page 33: ...ess repeatedly to increase the scan ning speed WMA MP3 tracks can only be scanned at one speed The scanning speed is shown on screen 3 To resume normal playback press play Sound can be heard while scanning audio CDs and MP3 discs When scanning a Video CD Super VCD or WMA MP3 track playback automatically resumes at the end or beginning of the track There is no sound while scanning DVDs Video CD Sup...

Page 34: ...dvance or back up a DVD disc frame by frame With Video CD Super VCDs and VR format DVD RWs you can only use frame advance 1 During playback press pause 2 Press or to reverse or advance a frame at a time 3 To resume normal playback press play The picture quality when using frame reverse is not as good as frame advance Depending on the disc normal playback may automatically resume when a new chapter...

Page 35: ...r unfinalized CD R RW discs 1 During playback press HOME MENU and select Play Mode 2 Select Repeat from the list of func tions on the left 3 Select a repeat play option If program play is active select Program Repeat to repeat the program list or Repeat Off to cancel For DVD discs select Title Repeat or Chapter Repeat or Repeat Off For CDs and Video CD Super VCDs select Disc Repeat or Track Repeat...

Page 36: ...acks CD Video CD Super VCD and WMA MP3 discs in a random order You can set the random play option when a disc is playing or stopped You can t use random play with VR format DVD RW discs Video CD Super VCDs playing in PBC mode or while a DVD disc menu is being displayed 1 Press HOME MENU and select Play Mode 2 Select Random from the list of func tions on the left 3 Select a random play option For D...

Page 37: ... This feature lets you program the play order of titles chapters folders tracks on a disc You can t use Program play with VR format DVD RW discs Video CD Super VCDs playing in PBC mode or while a DVD disc menu is being displayed 1 Press HOME MENU and select Play Mode 2 Select Program from the list of func tions on the left 3 Select Create Edit from the list of program options The Program edit scre...

Page 38: ...ogram list and exit the program edit screen without starting play back press HOME MENU Don t press RETURN your program list won t be saved Program Step 01 01 02 03 04 05 06 07 08 Title 1 38 Title 01 Title 02 Title 03 Title 04 Title 05 Title 06 Title 07 Title 08 Chapter 1 4 Chapter 001 Chapter 002 Chapter 003 Chapter 004 Program Program Step 01 01 003 02 03 04 05 06 07 08 Title 1 38 Title 01 Title ...

Page 39: ... press HOME MENU If you want to exit the program edit screen without saving the changes you made press RETURN Other functions available from the program menu As well as creating and editing a program list you can start program play cancel program play erase the program list and memorize a program list from the Play Mode menu 1 Press HOME MENU and select Play Mode 2 Select Program from the list of ...

Page 40: ...list You must clear the program list to program a new one Press CLEAR while the disc is stopped Program lists are saved for the DVD disc loaded When you load a disc with a saved program list program play is automati cally turned on You can save program lists for up to 24 discs After that the oldest one is replaced with the new one saved Searching a disc You can search DVD discs by title or chapter...

Page 41: ...hange subtitle language from the disc menu Press TOP MENU to access To set subtitle preferences see Subtitle Language on page 72 Switching the DVD audio language When playing a DVD disc recorded with dialogue in two or more languages you can switch audio language during playback Press AUDIO repeatedly to select an audio language option Some discs only allow you to change audio language from the di...

Page 42: ...an audio channel option Zooming the screen Using the zoom feature you can magnify a part of the screen by a factor of 2 or 4 while watching a DVD or Video CD Super VCD 1 During playback or when paused use the ZOOM button to select the zoom factor Normal 2x 4x Since DVD and Video CD Super VCD have a fixed resolution picture quality will dete riorate especially at 4x zoom This is not a malfunction 2...

Page 43: ...e information displayed press DVD DISP SHIFT SYSTEM DISP When a disc is playing the information appears at the top of the screen Keep pressing DVD DISP SHIFT SYSTEM DISP to change the displayed information DVD displays VR format DVD RW displays CD and Video CD displays Super VCD displays WMA MP3 disc displays Audio 1 French Dolby Digital 3 2 1CH Angle Subtitle 1 English 1 Title Play DVD 2 05 11 38...

Page 44: ...DVD DISP to change the displayed information DVD DVD RW displays Chapter no Elapsed title time Remaining title time Chapter no Remaining chapter time CD and Video CD displays Track no Elapsed track time Play JPEG File File Name FL000001 1 40 Current Total Play JPEG Folder Folder Name Holiday 1 40 Current Total 2 8 4 9 TTL 1 0 7 0 0 2 0 4 2 4 1 1 6 Track no Remaining track time Remaining disc time ...

Page 45: ... The receiver will start searching for the next station stopping when it has found one Repeat this step to search for other stations Manual tuning To change the frequency one step at a time press the TUNE buttons High speed tuning Press and hold the TUNE buttons for high speed tuning releasing the button once the desired frequency is reached Improving poor FM reception If you re listening to an FM...

Page 46: ...g signal is received 2 When auto tuning stops at a station press ENTER to save the station as a preset or press or to continue without saving Auto tuning resumes After the FM band is finished auto tuning continues in the AM band Press stop anytime to exit Auto tuning stops automatically after the AM band is finished or after the limit of 30 presets has been reached When this happens the tuner auto...

Page 47: ...y B NR on or off as required 4 Press REVERSE MODE front panel only to select the reverse mode Press repeatedly to choose between Single side playback Auto reverse playback stops after finishing playback in the reverse direction Continuous playback up to 16 complete plays KARAOKE STEREO DVD TUNER DECK EV61DVD FULL LOGIC AUTO REVERSE STEREO CASSETTE DECK DVD CD TUNER TAPE LINE OPEN CLOSE DOLBY NR DE...

Page 48: ... track then resumes playback By pressing or more than once the tape will skip several tracks at once up to a maximum of 15 For example press twice to skip forward two tracks Track search is unlikely to work reliably in the following cases If the space between tracks is less than about 4 seconds If the recording is particularly noisy so the spaces are not recognized If the recording contains freque...

Page 49: ...facing up then use the front panel controls 2 Check the recording direction If you start recording in the direction both sides of the tape can be recorded unless the erase protect tab for side B is missing If you switch sides and start recording in the direction then recording will start from side B and stop when the end of the tape is reached If you need to change the direction press twice then s...

Page 50: ...yback is stopped before going to the next step 4 Press ASES to start recording The ASES indicator lights followed by a 4 second pause while the tape winds past the leader then recording starts Recording finishes automatically when the end of the disc is reached or the tape ends whichever comes first 5 If you want to stop recording before the end of the CD press stop ASES may not work correctly if ...

Page 51: ...line source by switching on the attenuator 1 Switch the system into standby 2 Press ENTER 3 Use the cursor left right buttons to select the attenuation LINE ATT display On the front panel use and 4 Press ENTER The current setting is shown in the display 5 Use the cursor up down buttons to select a setting On the front panel use and ATT 6DB Lowers source signal by 6dB ATT 10DB Lowers source signal ...

Page 52: ...re files you should first set the Photoviewer option to Off See PhotoViewer on page 76 Using the JPEG Disc Navigator and Photo Browser Use the JPEG Disc Navigator to find a particular folder or picture by filename on the disc in the play position use the Photo Browser to find a picture within a folder by thumbnail image 1 Press DVD MENU to display the Disc Navigator screen The left column shows th...

Page 53: ... previous next page of thumbnails Keep the button pressed if you want to skip several pages release when you reach the page you want To return to the Disc Navigator screen press RETURN 3 Press ENTER to display the selected thumbnail full size on screen The slideshow resumes from the selected picture Zooming the screen Using the zoom feature you can magnify a part of the screen by a factor of 2 or ...

Page 54: ...a component connected to the auxiliary inputs as source material for a backing track If you want to play from a track other than the first select the track now 4 To change the mix press KARAOKE Pressing repeatedly switches between these options KARAOKE Vocal cancel Vocals in the backing track are partially eliminated using EQ L CH Left channel only Use for tracks that have a vocal recorded in the ...

Page 55: ... using the karaoke feature Changing the vocal mix Adding some effects to the microphone mix can sometimes improve the overall sound You can choose between three echo levels To add effects to the microphone mix press ECHO Pressing repeatedly switches between echo levels 1 to 3 and off Changing the backing track Sometimes you may want to lower or raise the pitch of the backing track to match your vo...

Page 56: ...stereo sources using one of the Dolby Pro Logic decoding modes Press SURROUND repeatedly to select a listening mode or press SURROUND then use the cursor up down buttons The listening mode choices that appear in the display will vary according to the type of source that s playing AUTO Auto listening mode see above DOLBY DIGITAL DTS Dolby Digital or DTS decoding depending on the source For a multic...

Page 57: ...Dimension and Panorama Default Settings C WIDTH 3 DIMEN 0 PNRM OFF 1 With the Dolby Pro Logic II MUSIC mode active press SOUND MODE repeatedly to select C WIDTH DIMEN or PNRM You can also use the cursor left right buttons on the remote to select a menu item after you ve pressed SOUND MODE C WIDTH Center Width Makes the center channel wider higher settings or narrower lower settings DIMEN Dimension...

Page 58: ...dditional energy and depth to a stereo source by using the surround speakers in addition to the front speakers see the diagram on page 11 for the Extra Power mode sound setup MUSIC Gives a concert hall type sound MOVIE Gives a movie theater type sound EXPANDED Creates an extra wide stereo field GAME Creates surround sound from video game sources TV SURR TV Surround Designed for mono or stereo TV b...

Page 59: ...ect level can be adjusted from 10 min to 90 max 3 Press ENTER to confirm Enhancing dialogue Default setting DIA OFF The Dialogue Enhancement feature is designed to make the dialogue stand out from other background sounds in a TV or movie soundtrack 1 Press SOUND MODE repeatedly to select DIALOGUE then press ENTER You can also use the cursor left right buttons on the remote to select a menu item af...

Page 60: ... when listening in the AUTO non multichannel source or STEREO listening modes If there is no surround channel Virtual Surround Back has no effect You can t use the Virtual Surround Back effect with high sampling rate 96 kHz sources or with headphones Recording mode Default setting MODE OFF The Recording mode allows you to make analog recordings from the LINE OUT jacks When Recording mode is on mos...

Page 61: ...nu item after you ve pressed SOUND MODE 2 Use cursor up down to select either BOOST 1 or BOOST 2 You can also use and on the front panel EV61DVD only Select BOOST 0 to switch off the bass boost 3 Press ENTER Muting the sound Use the mute button if you need to momentarily turn off any sound coming out of the speakers Press MUTE to switch off the volume To switch the sound back on adjust the volume ...

Page 62: ...r USER 2 will blink in the display 2 Use cursor up down to select USER 1 or USER 2 You can also use and on the front panel 3 Press ENTER Using the Sound Field Control EV31DVD model only Depending on the source you re listening to you may want to use the Sound Field Control to match the source you re listening to Press SFC repeatedly to select a sound mode The options are as follows SFC OFF SFC ind...

Page 63: ...e front panel use and 8 Press ENTER 9 Set the switch on time Use the cursor up down buttons and on the front panel to set the hour then press ENTER Set the minute in the same way pressing ENTER when you re done 10 Set the switch off time Use the cursor up down buttons and on the front panel to set the hour then press ENTER Set the minute in the same way pressing ENTER when you re done After pressi...

Page 64: ...at it s set The wake up timer will automatically be canceled if the clock is reset Setting the sleep timer The sleep timer switches off the system after a specified time so you can fall asleep without worrying about it If you set the sleep timer while either the wake up or record timer is active the earlier switch off time takes priority 1 Press SLEEP SHIFT 6 to select a switch off time Press repe...

Page 65: ...detailed instructions on tuning 3 Press TIMER CLOCK ADJ 4 Use the cursor left right buttons to select REC On the front panel use and 5 Press ENTER 6 Use the cursor left right buttons to select EDIT On the front panel use and 7 Press ENTER 8 Set the switch on time Use the cursor left right buttons and on the front panel to set the hour then press ENTER Set the minute in the same way pressing ENTER ...

Page 66: ...d the timer indicator show in the display when you select ON Child Lock This system has a child lock feature that makes the front panel buttons and controls inoperative This is useful when you have set the timer and don t want the recorder accidently turned on before the timer recording has started 1 Switch the system into standby then press ENTER 2 Use the cursor left right buttons to select the ...

Page 67: ...ss HOME MENU and select Audio Settings from the on screen display 2 Highlight Audio DRC then use the cursor left right buttons to change to Off Medium or High as required 3 Press ENTER to make the setting and exit the Audio Settings screen Audio DRC is only effective with Dolby Digital audio sources Virtual Surround Default setting Off Switch on Virtual Surround to enjoy surround sound effects fro...

Page 68: ... panel to switch Virtual Surround on Virtual Surround Off Virtual Surround doesn t work with DTS or 96kHz linear PCM audio through either the analog or digital outputs If the player is outputting Dolby Digital or MPEG bitstream audio in other words no conversion to PCM How good the surround effect is varies with the disc TruSurround SRS and symbol are trade marks of SRS Labs Inc TruSurround tech n...

Page 69: ...itor you may not see the effect clearly Creating your own presets You can create up to two presets of your own 1 Select one of the Memory presets see above 2 Press cursor down to select Detailed Settings then press ENTER 3 Adjust the picture quality settings Use the cursor up down buttons to select a setting Use the cursor left right buttons to adjust the current setting Press DVD DISP SHIFT SYSTE...

Page 70: ... of the following picture quality settings Contrast Adjusts the contrast between light and dark Brightness Adjusts the overall bright ness Chroma Level Adjusts how saturated colors appear 4 Press ENTER to save the preset and exit the Video Adjust screen ...

Page 71: ...Default setting 4 3 Letter Box If you have a widescreen TV select the 16 9 Wide setting widescreen DVD software is then shown using the full screen area When playing software recorded in conventional 4 3 format the settings on your TV will deter mine how the material is presented see the manual that came with your TV for details on what options are available If you have a conventional TV select ei...

Page 72: ...e disc menu Press DVD MENU to access the disc menu Subtitle Language Default setting English This setting is your preferred subtitle language for DVD discs If the language you specify here is recorded on a disc the player automatically plays the disc with those subti tles The DVD format recognizes 136 different languages Select Other Language if you want to specify a language other than those list...

Page 73: ...uage setting Set to Off to switch subtitles off altogether Display settings OSD Language Default setting English This sets the language of this player s on screen displays On Screen Display Default setting On This sets whether operation displays are shown on screen Play Resume Scan and so on Angle Indicator Default setting On Video Output Language Display Options Audio Language Subtitle Language D...

Page 74: ...ll always play without requiring the pass word first If you forget your password you ll need to reset the player to its factory settings see Resetting the unit on page 77 then register a new password Registering a new password You must register a password before you can change the Parental Lock level or enter a Country code 1 Select Password 2 Use the number buttons to enter a 4 digit password The...

Page 75: ...menu screen Setting changing the Country code You may also want to refer to the Country code list on page 90 1 Select Country Code Video Output Language Display Options Initial Settings Password New Password Parental Lock Password Change Video Output Language Display Options Initial Settings Password New Password Parental Lock Password Change Video Output Language Display Options Parental Lock Pho...

Page 76: ...important if you load a disc that contains both WMA MP3 audio files and JPEG picture files The default On setting allows you to view only the JPEG files on this kind of disc Set to Off to be able to play the WMA MP3 audio files Changing the PhotoViewer setting does not take effect until the next disc is loaded or the current disc is reloaded Video Output Language Display Options Initial Settings C...

Page 77: ...irm Setting the TV format The default setting of this unit is AUTO and unless you notice that the picture is distorted when playing some discs you should leave it set to AUTO If you experience picture distortion with some discs set the TV system to match your country or region 1 Switch the system into standby then press ENTER 2 Use the cursor left right buttons to select TV SYS On the front panel ...

Page 78: ...alized DVD R RW discs cannot be played in this player PC created disc compatibility If you record a disc using a personal computer even if it is recorded in a compatible format as listed above there will be cases in which the disc may not be playable in this machine due to the setting of the application software used to create the disc In these particular instances check with the software publishe...

Page 79: ...with the file extension mp3 MP3 wma or WMA When naming MP3 and WMA files add the corresponding file name extension mp3 or wma Files are played according to the file extension To prevent noise and malfunctions do not use these extensions for other kinds of files This player can recognize up to 999 files WMA MP3 JPEG and up to 499 folders If a disc exceeds these limits only files and folders up to t...

Page 80: ...s with this unit Handling discs When holding discs of any type take care not to leave fingerprints dirt or scratches on the disc surface Hold the disc by its edge or by the center hole and edge Damaged or dirty discs can affect playback performance Take care also not to scratch the label side of the disc Although not as fragile as the recorded side scratches can still result in a disc becoming unu...

Page 81: ...s to avoid Discs spin at high speed inside the player If you can see that a disc is cracked chipped warped or otherwise damaged don t risk using it in your player you could end up damaging the unit This unit is designed for use with conventional fully circular discs only Never use shaped discs with this unit Pioneer disclaims all liability arising in connection with the use of shaped discs Using c...

Page 82: ...omes hot in use Use near a television or monitor as you may experience interference especially if the television uses an indoor antenna Use in a kitchen or other room where the player may be exposed to smoke or steam Use on a thick rug or carpet or cover with cloth this may prevent proper cooling of the unit Place on an unstable surface or one that is not large enough to support all four of the un...

Page 83: ...ion Handle the power cord by the plug part Do not pull out the plug by tugging the cord and never touch the power cord when your hands are wet as this could cause a short circuit or electric shock Do not place the unit a piece of furniture or other object on the power cord or pinch the cord in any other way Never make a knot in the cord or tie it with other cords The power cords should be routed s...

Page 84: ...or so Also the timer indicator is blinking If the speaker cables aren t connected properly the system has a safety feature that shuts the power off automatically Check the speaker wires to make sure they re connected properly If there appears to be nothing wrong try switching the power back on after the timer indicator has been blinking for a minute or so Make sure the VOLTAGE SELECTOR on the rear...

Page 85: ...e 96kHz display will not light Can t operate the remote control Replace the batteries see Putting the batteries in the remote control on page 7 Operate within 23 feet 7 m 30 of the remote sensor on the front panel see Using the remote control on page 7 Remove the obstacle or operate from another position Avoid exposing the remote sensor on the front panel to direct light The microphone can t be he...

Page 86: ... play some copy protected CDs See also PhotoViewer on page 76 Picture disturbance during playback or dark This player is compatible with Macro Vision System copy guard Some discs include a copy prevention signal and when this type of disc is played back stripes etc may appear on some sections of the picture depending on the TV This is not a malfunction Discs respond differently to particular playe...

Page 87: ...farther away from any other equipment that may be causing the noise The tuning interval is incorrect for your country or region Try switching the tuning interval see Changing the frequency step on page 77 Auto tuning does not pick up some stations The radio signal is weak Auto tuning will only detect radio stations with a good signal For more sensitive tuning connect an outdoor antenna Sound is mo...

Page 88: ...51 Problem Remedy Message Description KEY LOCK This message appears when the front panel buttons are pressed when the child lock feature is active See Child Lock on page 66 for more on switching on off the child lock REC MODE Blinks rapidly for 2 seconds when an operation is prohibited because the line recording mode is on see Recording mode on page 60 or when recording to the tape deck PHONES IN ...

Page 89: ...reen setting page 71 of this player should be set to 4 3 Letter Box or 4 3 Pan Scan depending on which you prefer Set to 4 3 Letter Box widescreen discs are shown with black bars top and bottom Set to 4 3 Pan Scan widescreen discs are shown with the left and right sides cropped Although the picture looks larger you don t actually see the whole picture Please note that many widescreen discs overrid...

Page 90: ...lam ml 1312 Mongolian mn 1314 Moldavian mo 1315 Marathi mr 1318 Malay ms 1319 Maltese mt 1320 Burmese my 1325 Nauru na 1401 Nepali ne 1405 Norwegian no 1415 Occitan oc 1503 Oromo om 1513 Oriya or 1518 Panjabi pa 1601 Polish pl 1612 Pashto Pushto ps 1619 Portuguese pt 1620 Quechua qu 1721 Rhaeto Romance rm 1813 Kirundi rn 1814 Romanian ro 1815 Kinyarwanda rw 1823 Sanskrit sa 1901 Sindhi sd 1904 San...

Page 91: ...4 655 Manufacturer Code s FIRSTLINE 640 644 FISHER 632 635 638 645 FORMENTI 632 607 642 FRONTECH 631 642 646 FRONTECH 632 PROTECH FUJITSU 648 629 FUNAI 640 646 658 GBC 632 642 GE 601 608 607 610 617 602 628 618 GEC 607 634 648 GELOSO 632 644 GENEXXA 631 641 GOLDSTAR 610 623 621 602 607 650 GOODMANS 607 639 647 648 656 GORENJE 638 GPM 641 GRAETZ 631 642 GRANADA 607 635 642 643 648 GRADIENTE 630 657...

Page 92: ... 646 ROADSTAR 641 644 646 SABA 631 636 642 651 SAISHO 639 644 646 SALORA 631 632 642 643 SAMBERS 649 SAMSUNG 607 638 644 646 SANYO 635 645 648 621 614 SBR 607 634 SCHAUB LORENZ 642 Manufacturer Code s SCHNEIDER 607 641 647 SEG 642 646 SEI 632 640 649 SELECO 631 642 SHARP 602 619 627 SIAREM 632 649 SIEMENS 631 SINUDYNE 632 639 640 649 SKANTIC 643 SOLAVOX 631 SONOKO 607 644 SONOLOR 631 635 SONTEC 60...

Page 93: ...hows which channels are active for example showing 3 2 1 The 3 being the two front channels and the center channel the 2 being the surround channels and the 1 being the LFE channel Dolby Pro Logic Pro Logic II A matrix decoding system that extracts 4 1 Dolby Pro Logic or 5 1 Dolby Pro Logic II channel surround sound from a two channel source DRM DRM digital rights management is a type of server so...

Page 94: ...er VCD only A system of navigating a Video CD Super VCD through on screen menus recorded onto the disc Especially good for discs that you would normally not watch from beginning to end all at once karaoke discs for example PCM Pulse Code Modulation The most common system of encoding digital audio found on CDs and DAT Excellent quality but requires a lot of data compared to formats such as Dolby Di...

Page 95: ...ed by using Windows Media Player version 8 or Windows Media Player for Windows XP Files are recognized by their file extension wma or WMA Microsoft Windows Media and the Windows logo are trademarks or registered trademarks of Microsoft Corporation in the United States and or other countries Manufactured under license from Dolby Laboratories Dolby Pro Logic and the double D symbol are trademarks of...

Page 96: ...l stereo Heads Recording playback head x 1 Erasing head x 1 Motor DC servo motor x 1 Tape types Type I Normal FM tuner section Frequency range 87 5 108MHz Antenna 75 Ω unbalanced AM tuner section Frequency range With 9 kHz step 531 kHz to 1 602 kHz With 10 kHz step 530 kHz to 1 700 kHz Antenna Loop antenna Miscellaneous Power requirements AC 110 127 220 230 240 V switchable 50 60 Hz Power consumpt...

Page 97: ...ound speakers S EV61V only Enclosure Closed box bookshelf type magnetically shielded System 8 7 cm 1 way system Speaker 8 7 cm cone type Nominal impedance 6 Ω Frequency range 90 Hz to 20 kHz Maximum input power 75 W Dimensions 188 W x 100 H x 84 D mm Weight 0 9 kg Subwoofer S EV61V S EV31V Enclosure Bass reflex bookshelf type magnetically shielded System 14 cm 1 way system Speaker 13 cm cone type ...

Page 98: ... product includes FontAvenue fonts licensed by NEC corporation FontAvenue is a registered trademark of NEC corporation Please read through these operating instructions so you will know how to operate your model properly After you have finished reading the instructions put them away in a safe place for future reference This product incorporates copyright protection technology that is protected by m...

Page 99: ...Additional information 17 99 En ...

Page 100: ...OF CANADA INC 300 Allstate Parkway Markham Ontario L3R OP2 Canada TEL 905 479 4411 PIONEER EUROPE NV Haven 1087 Keetberglaan 1 B 9120 Melsele Belgium TEL 03 570 05 11 PIONEER ELECTRONICS ASIACENTRE PTE LTD 253 Alexandra Road 04 01 Singapore 159936 TEL 656 472 1111 PIONEER ELECTRONICS AUSTRALIA PTY LTD 178 184 Boundary Road Braeside Victoria 3195 Australia TEL 03 9586 6300 PIONEER ELECTRONICS DE ME...

Reviews: